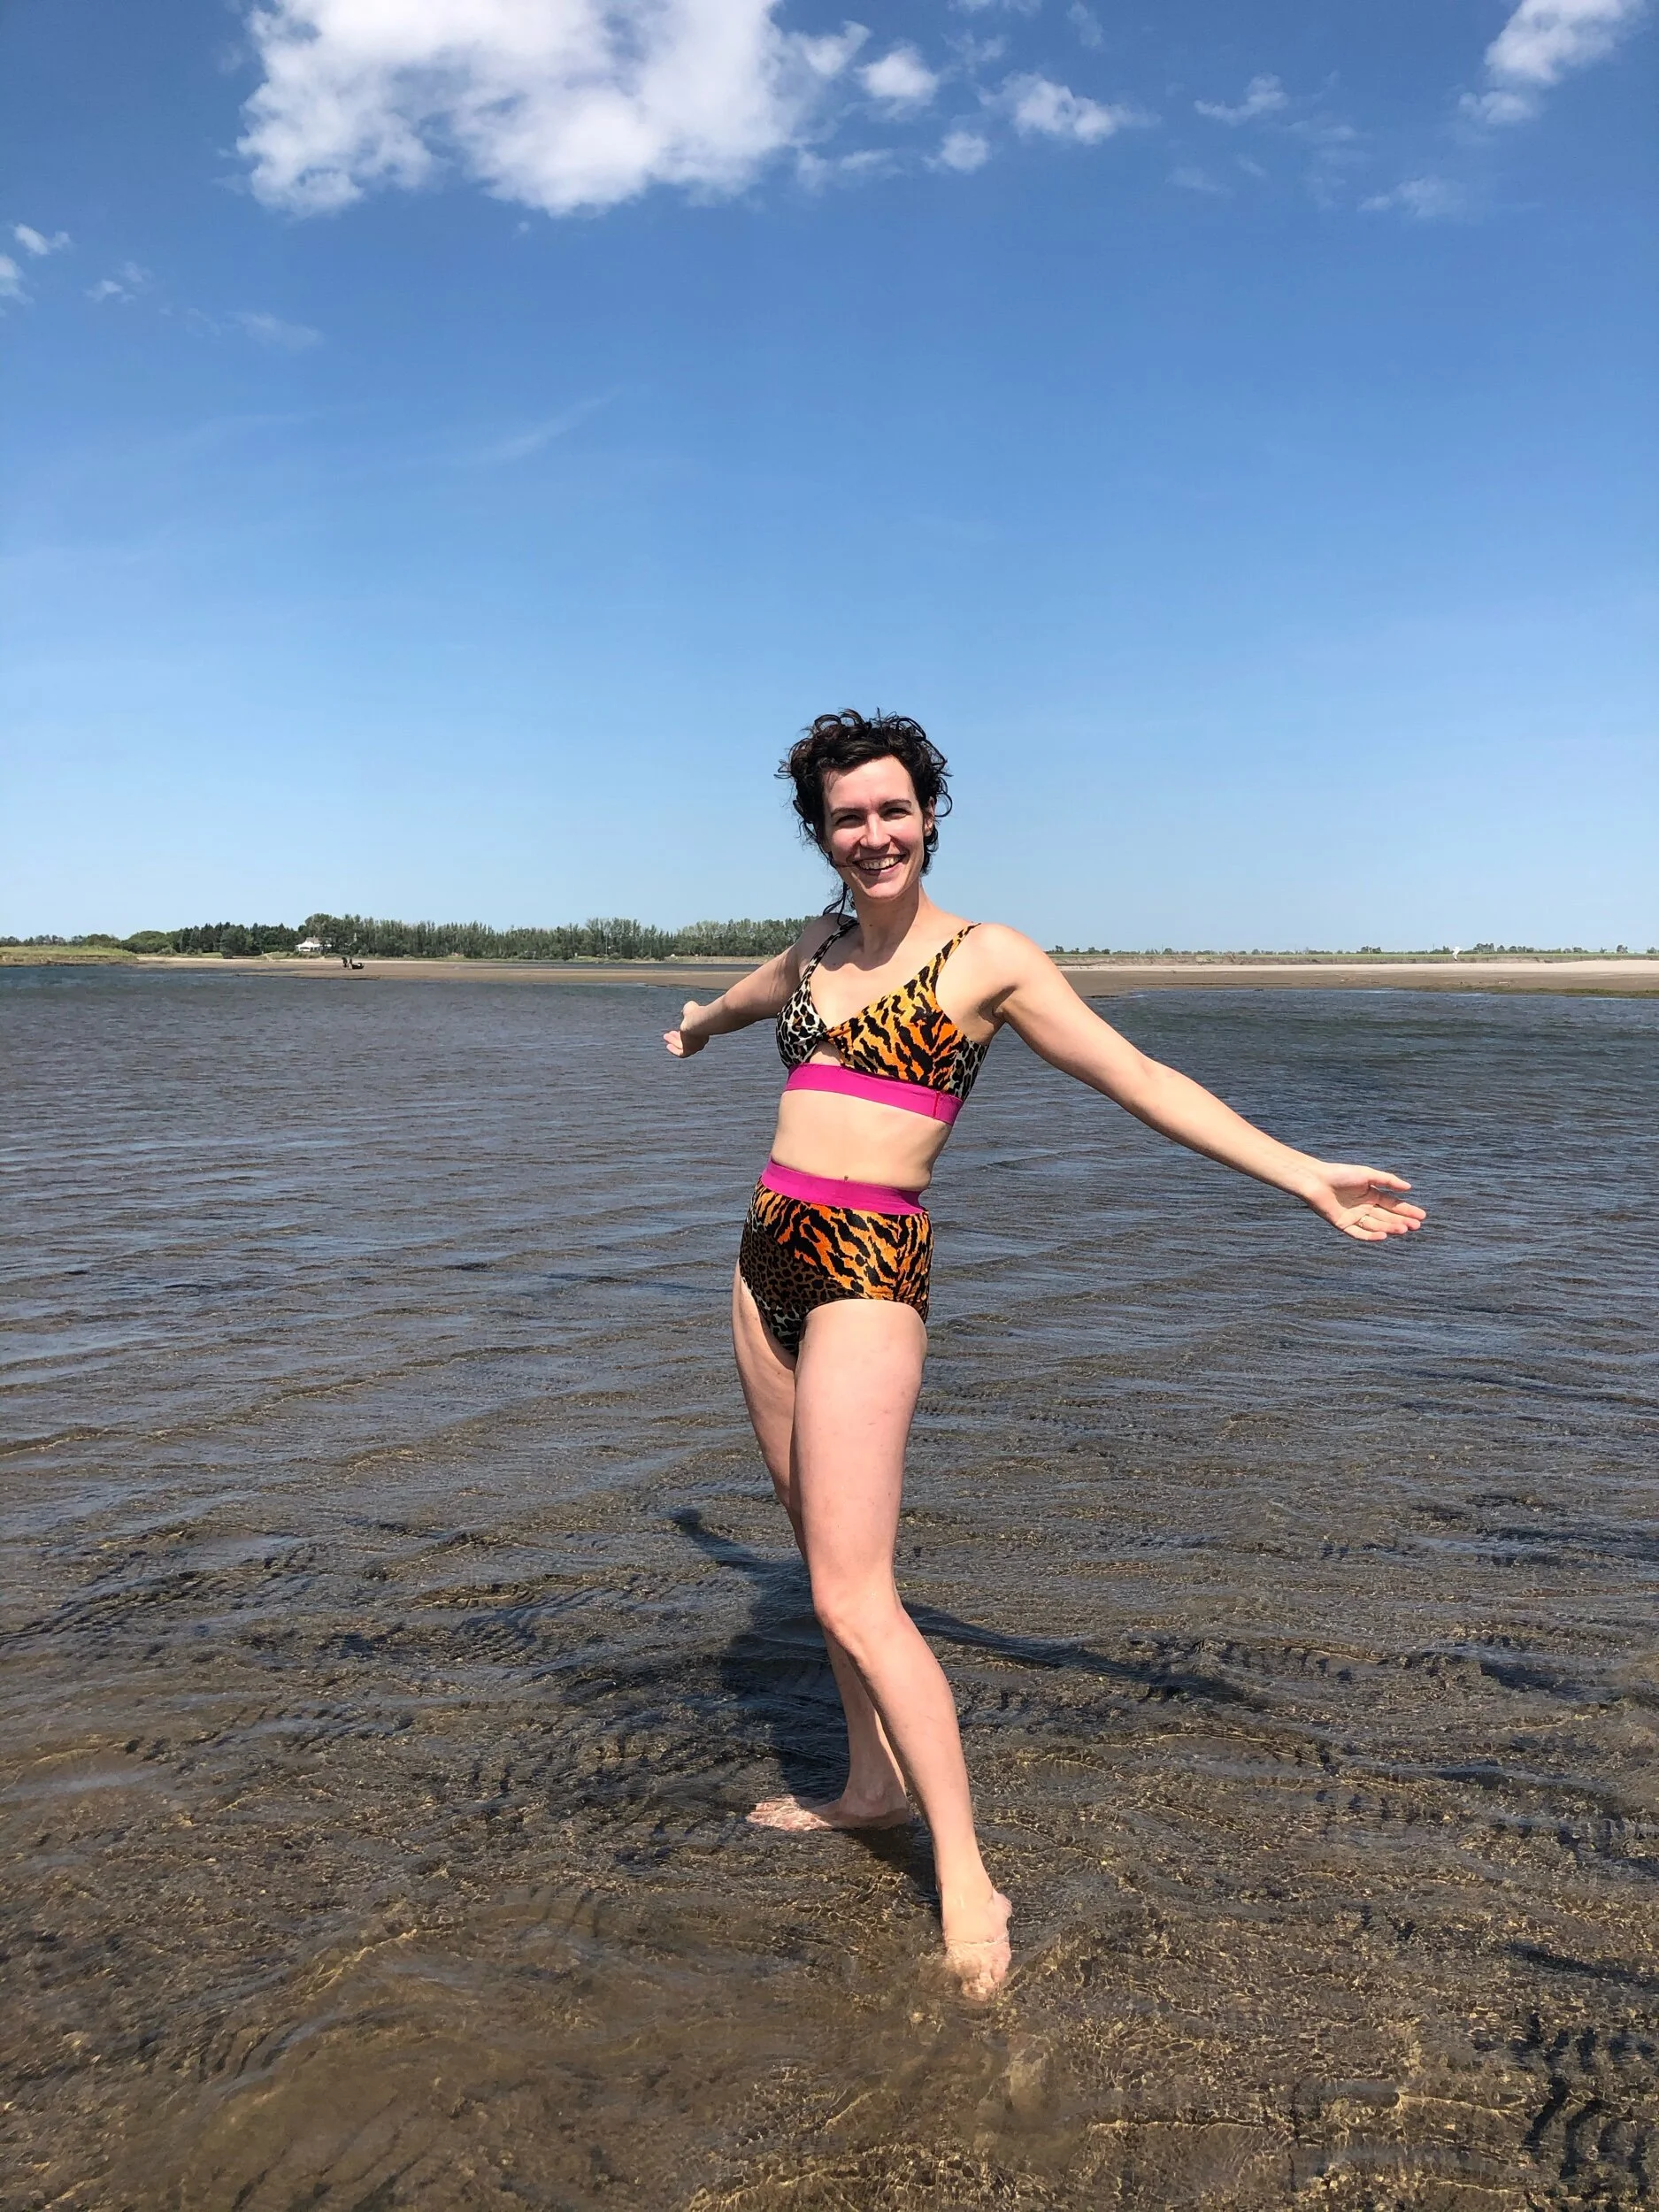
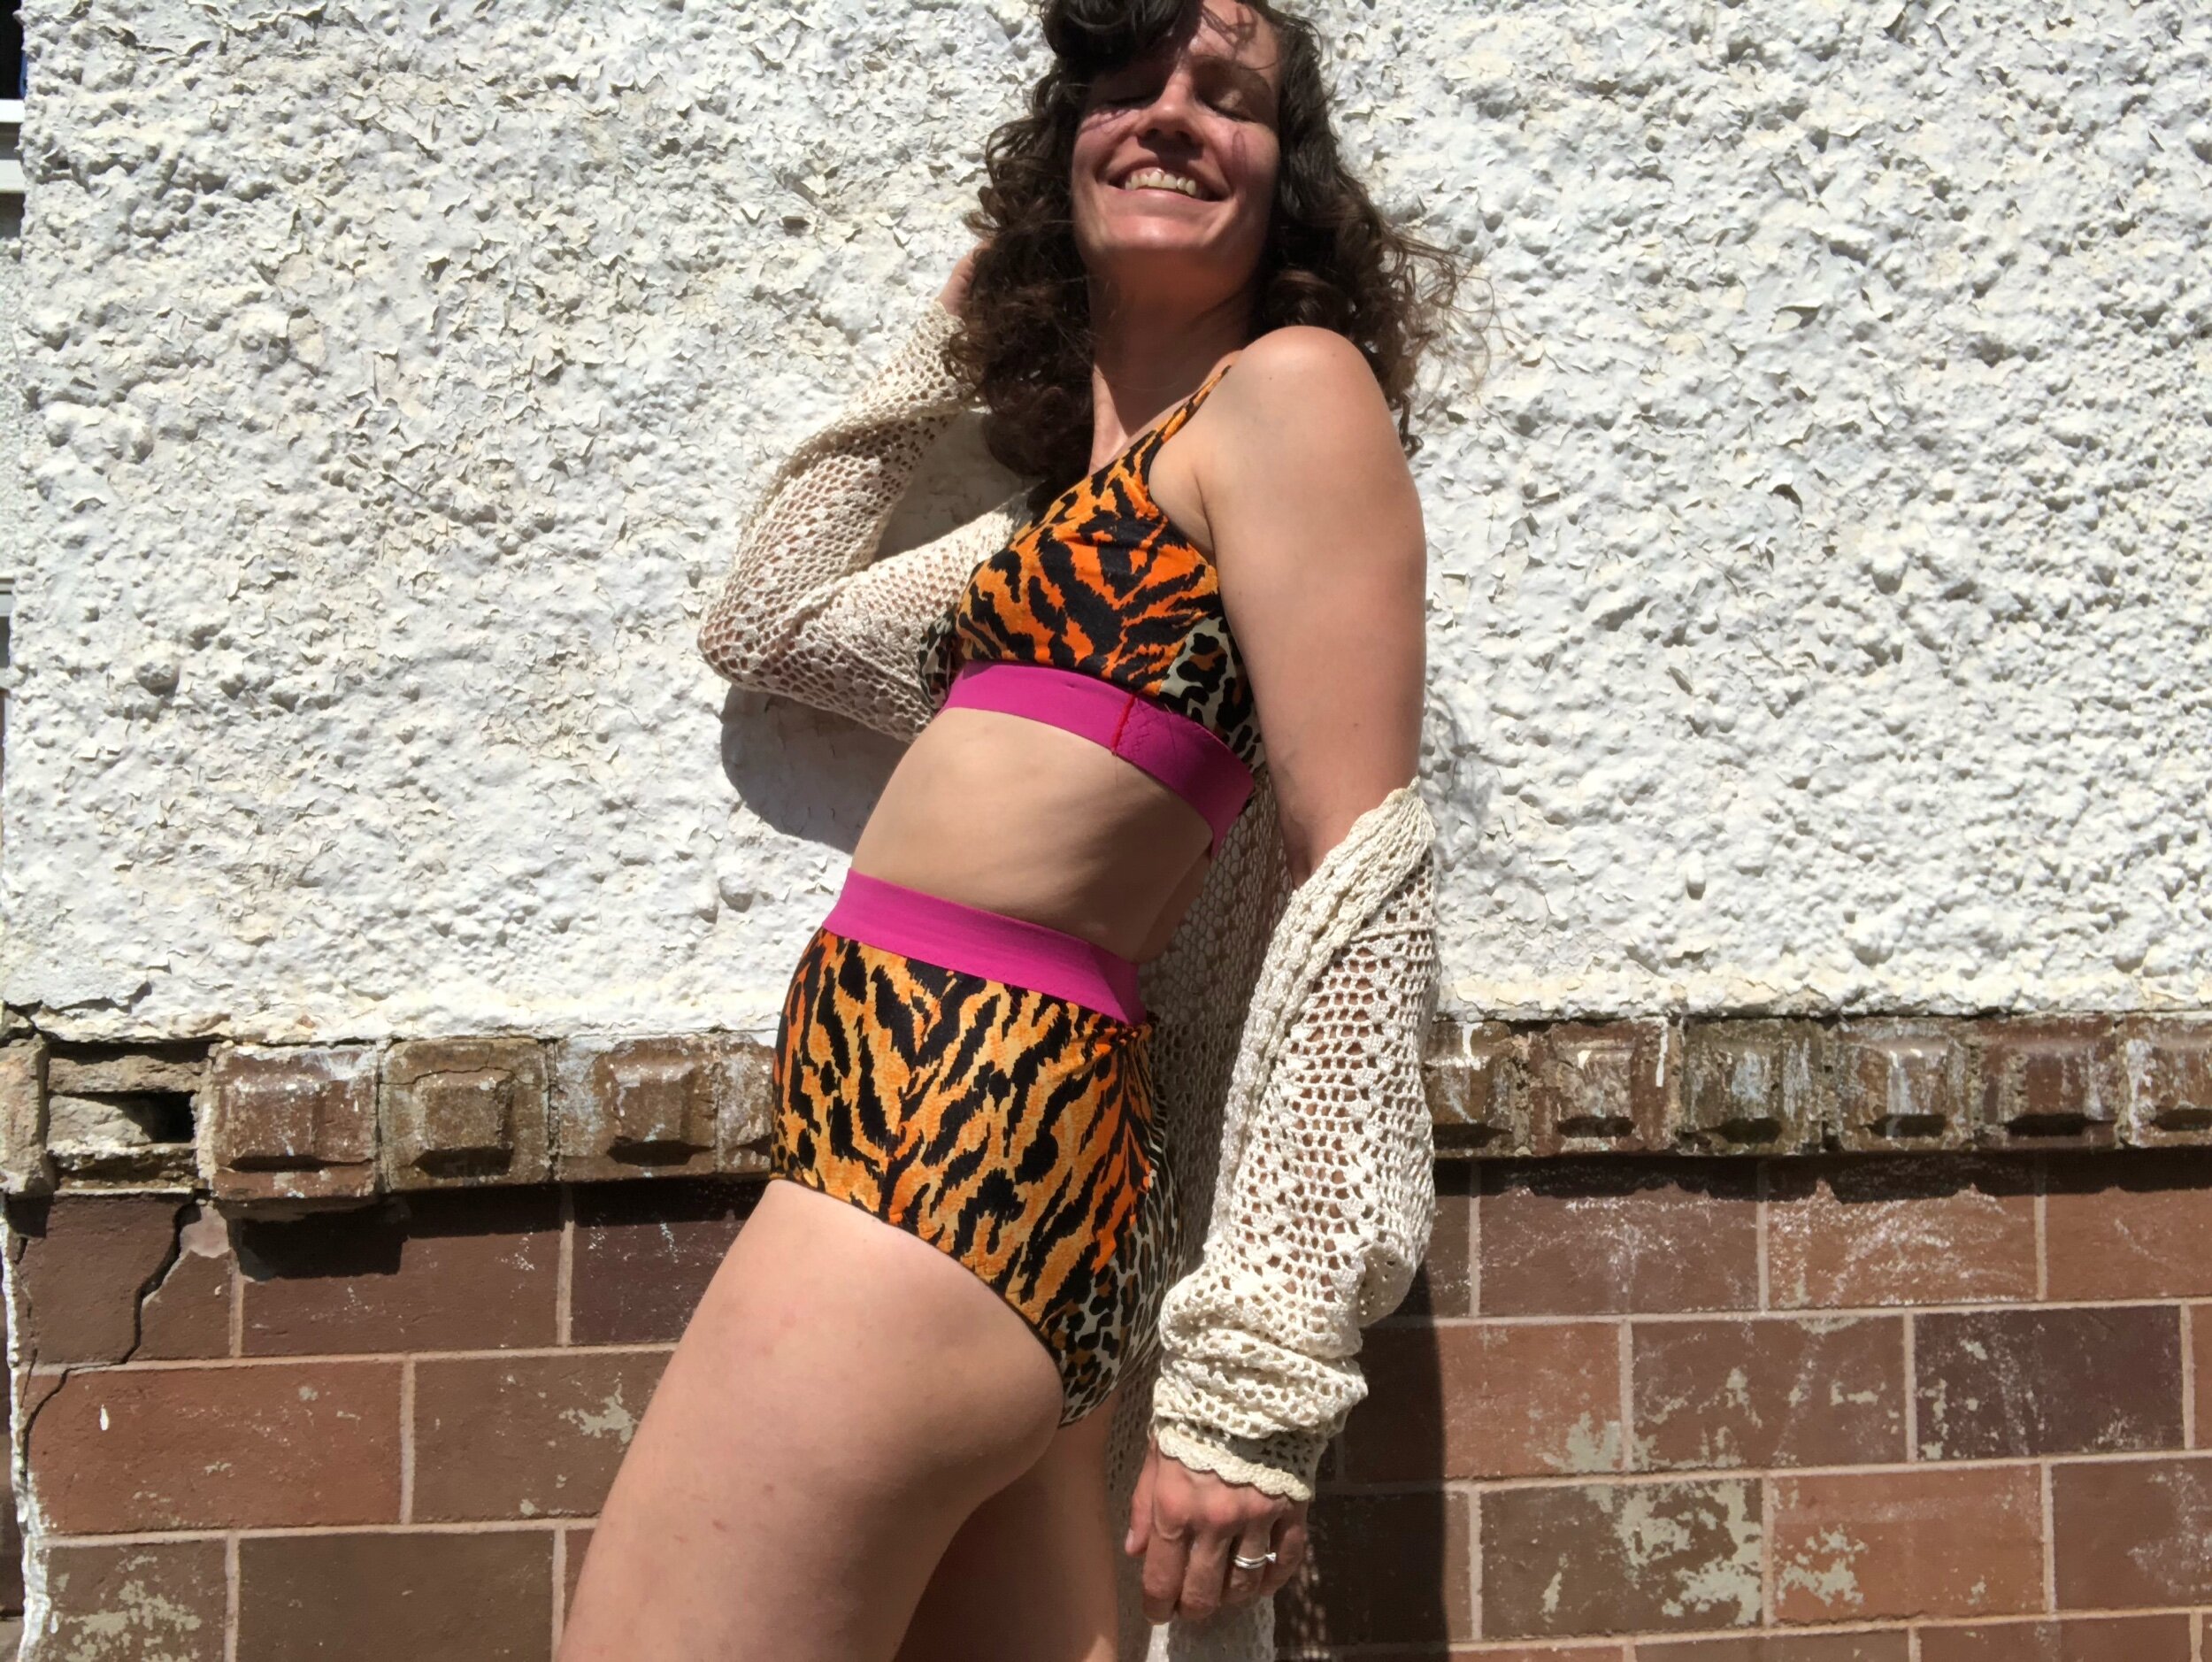
Pink and leopard and tiger oh my!
HELLO i love this bikini! And boy was it spur-of-the-moment, reminding me of when Rosie Martin did her analysis of her 2017 sewing, wherein she realized that the spur-of-the-moment makes were most frequently hits.
This is a hit! I decided in heatwave inability to focus times Thursday that I should absolutely make a cute bralette type top as my friend Tannara did when Toronto had a heatwave, then realized i should actually absolutely make a bikini top since what I’m really dreaming of is the beach, and lane swimming is still a distant daydream what with the pandemic life. And that that bathing suit top should fulfill my dream of a leopard tiger swim confection, which had been hatched when i found said fabrics at the crazy fabric garage sale last year. Admittedly, I originally envisioned this as a one-piece training suit, but don’t rule that out entirely yet.
In vague I want to sew swimwear dreams I had secured cut and sew foam from Blackbird a couple months earlier (truly doing that get up to shipping requirements thing but in the more sensible way) and swimwear elastic and recycled nylon (!) black power mesh from Matchpoint (wish I’d gotten more because ethical ish elastic and synthetics, man). So I was hot to go!
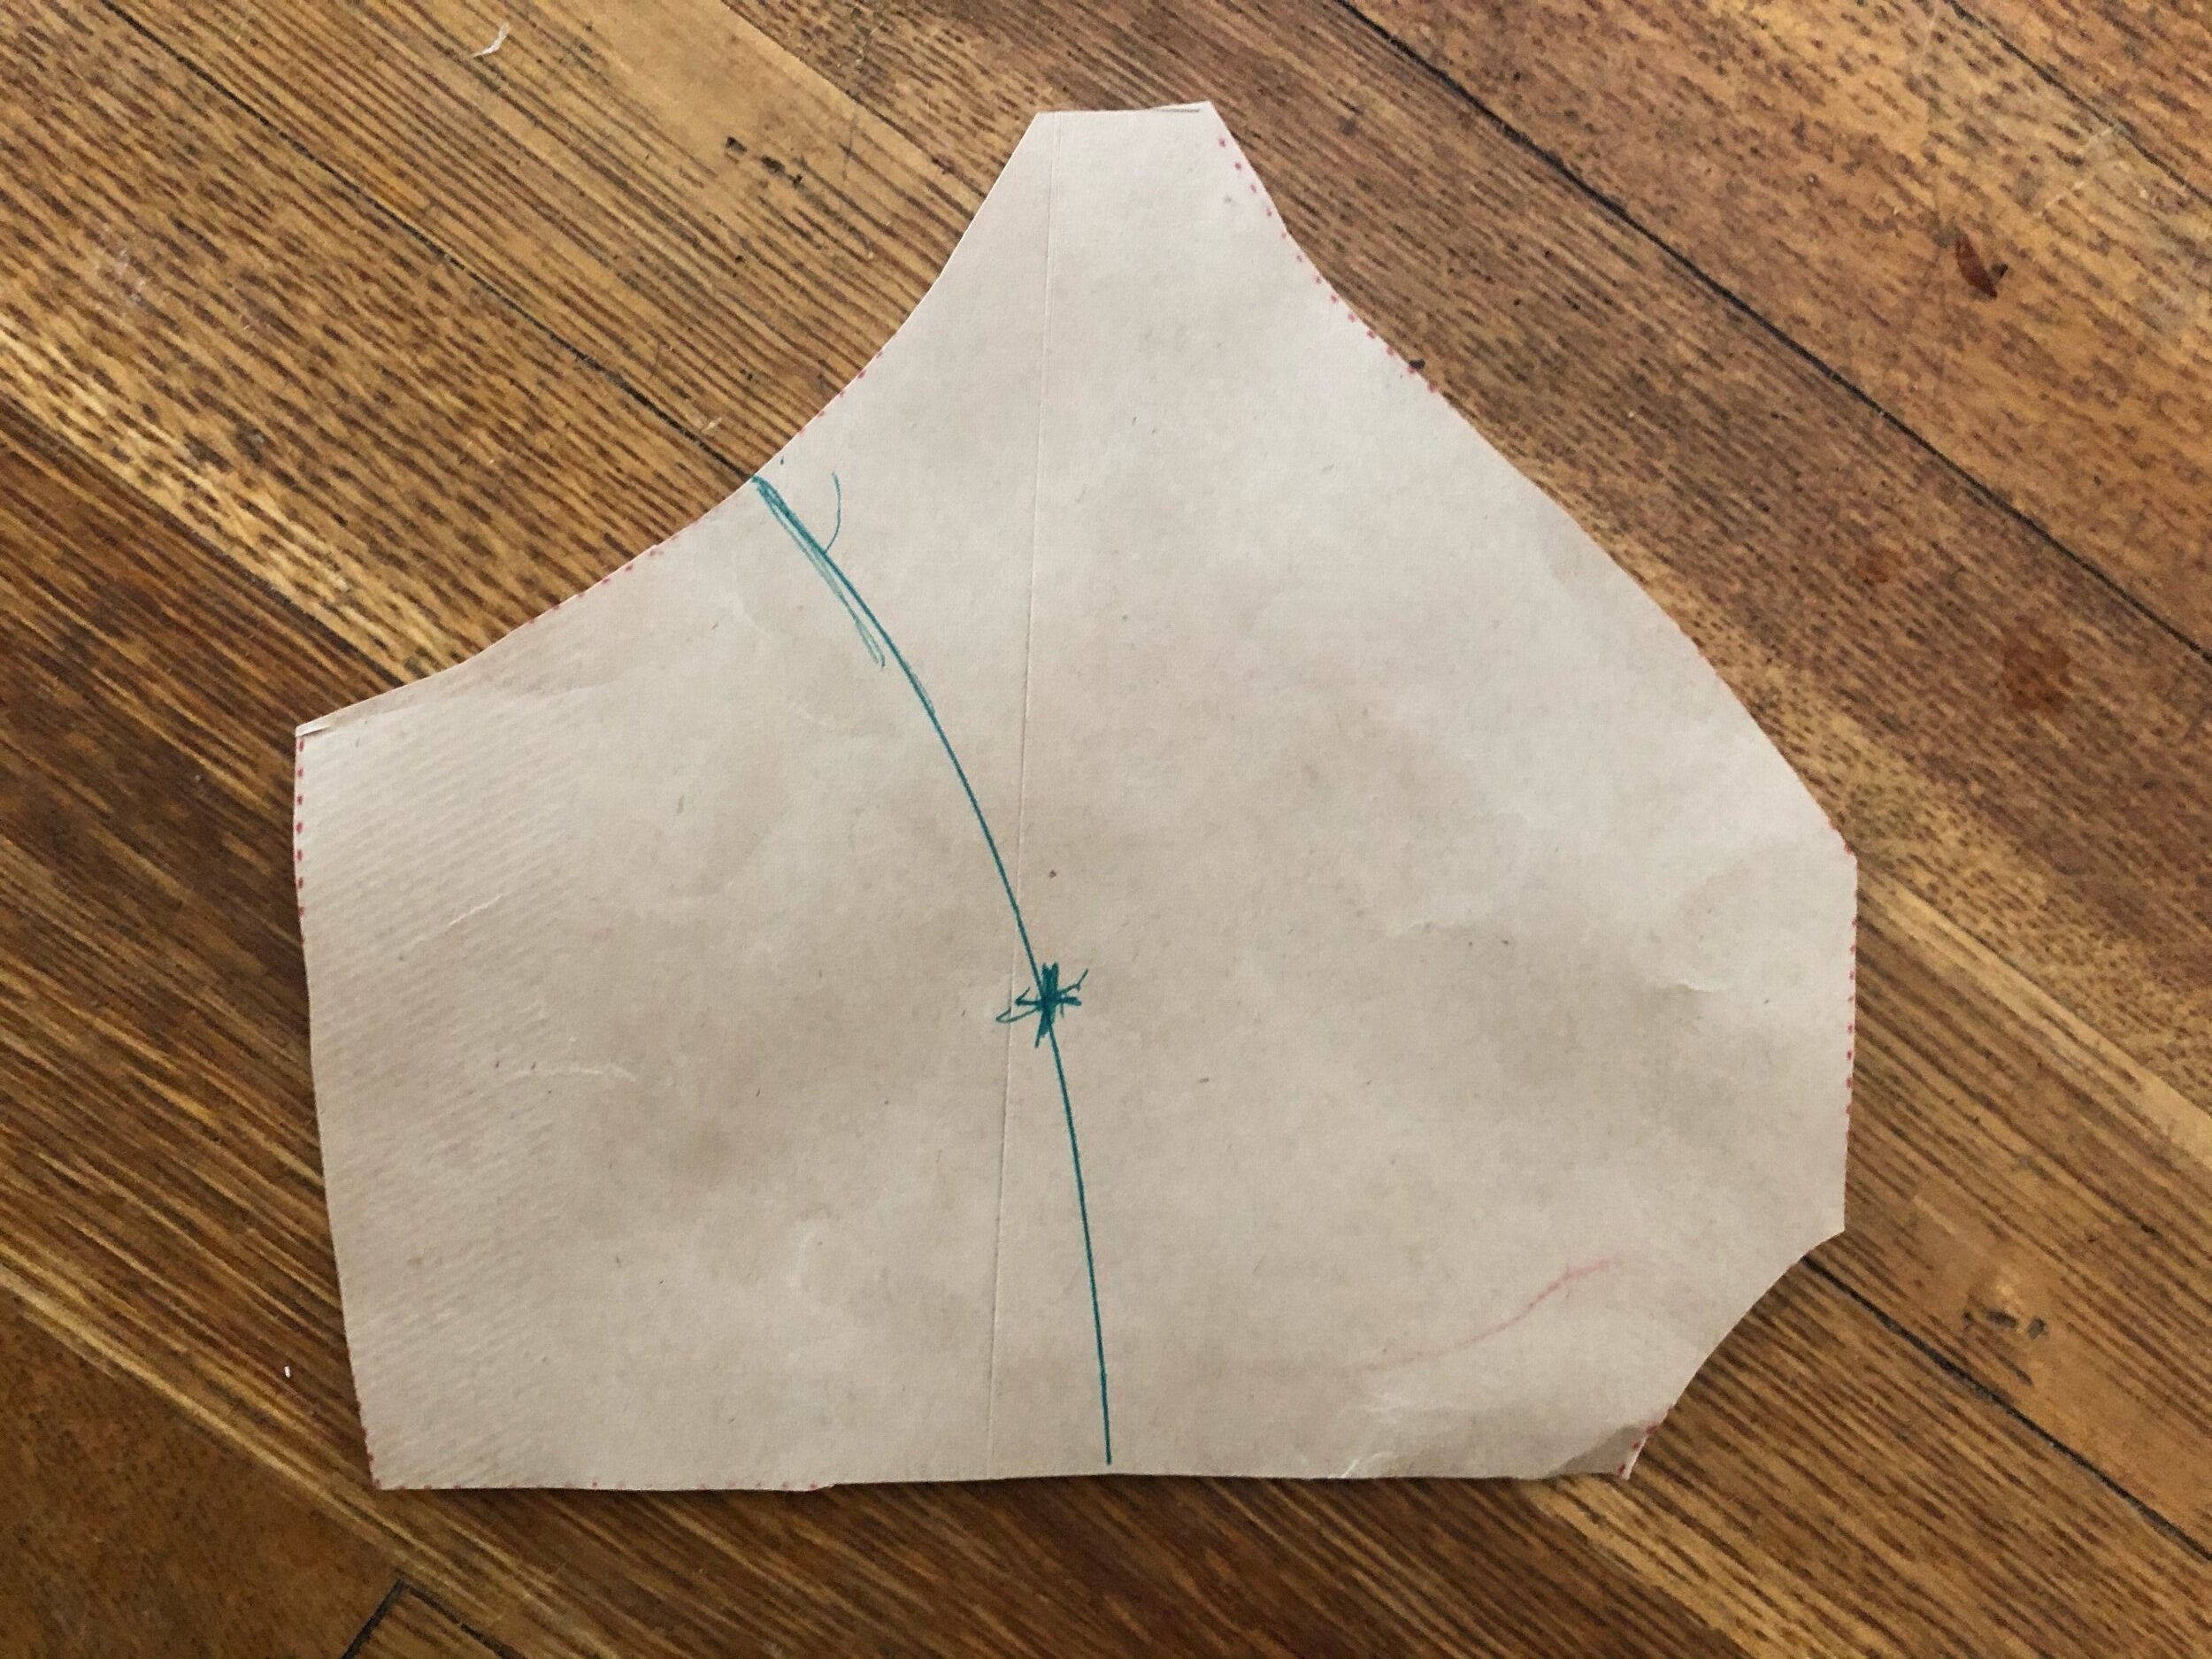
I started Thursday evening, cut out fronts and decided to give the cut and sew foam a go. This is sort of non-negotiable because breastfeeding can make one’s nipples extra-insistent, and that wasn’t the look I was going for for this. Let the leopard and tiger print speak for themselves, ya know? So I googled how you use it. OK cool you need a pattern with shaped cups, that makes sense. I only have the Lucky Lingerie from Rad Patterns available. I’ll check if their Facebook group has any advice on this. Ok what I can find says to use another sports bra with princess seams. That’s not gonna work. OK new plan:

Draft foam cups for sports bra/swimsuit
Trace off front pattern, no seam allowances
put on existing lucky lingerie and line up the new pattern piece to mark my bust apex (aka nipples)
slice into pattern piece up to apex
hold pattern piece up again, overlapping slit edges to determine dart width
rotate newly marked “dart” to top, mark the tops of new princess seams based on dart legs
draw in princess seams from darts through apex and down, using curve rule on hand
add seam allowances back on around edges, not on princess seam
in this case, i had to chop some off around the twist at centre front to let it twist properly.
images below have a bit of description in them!
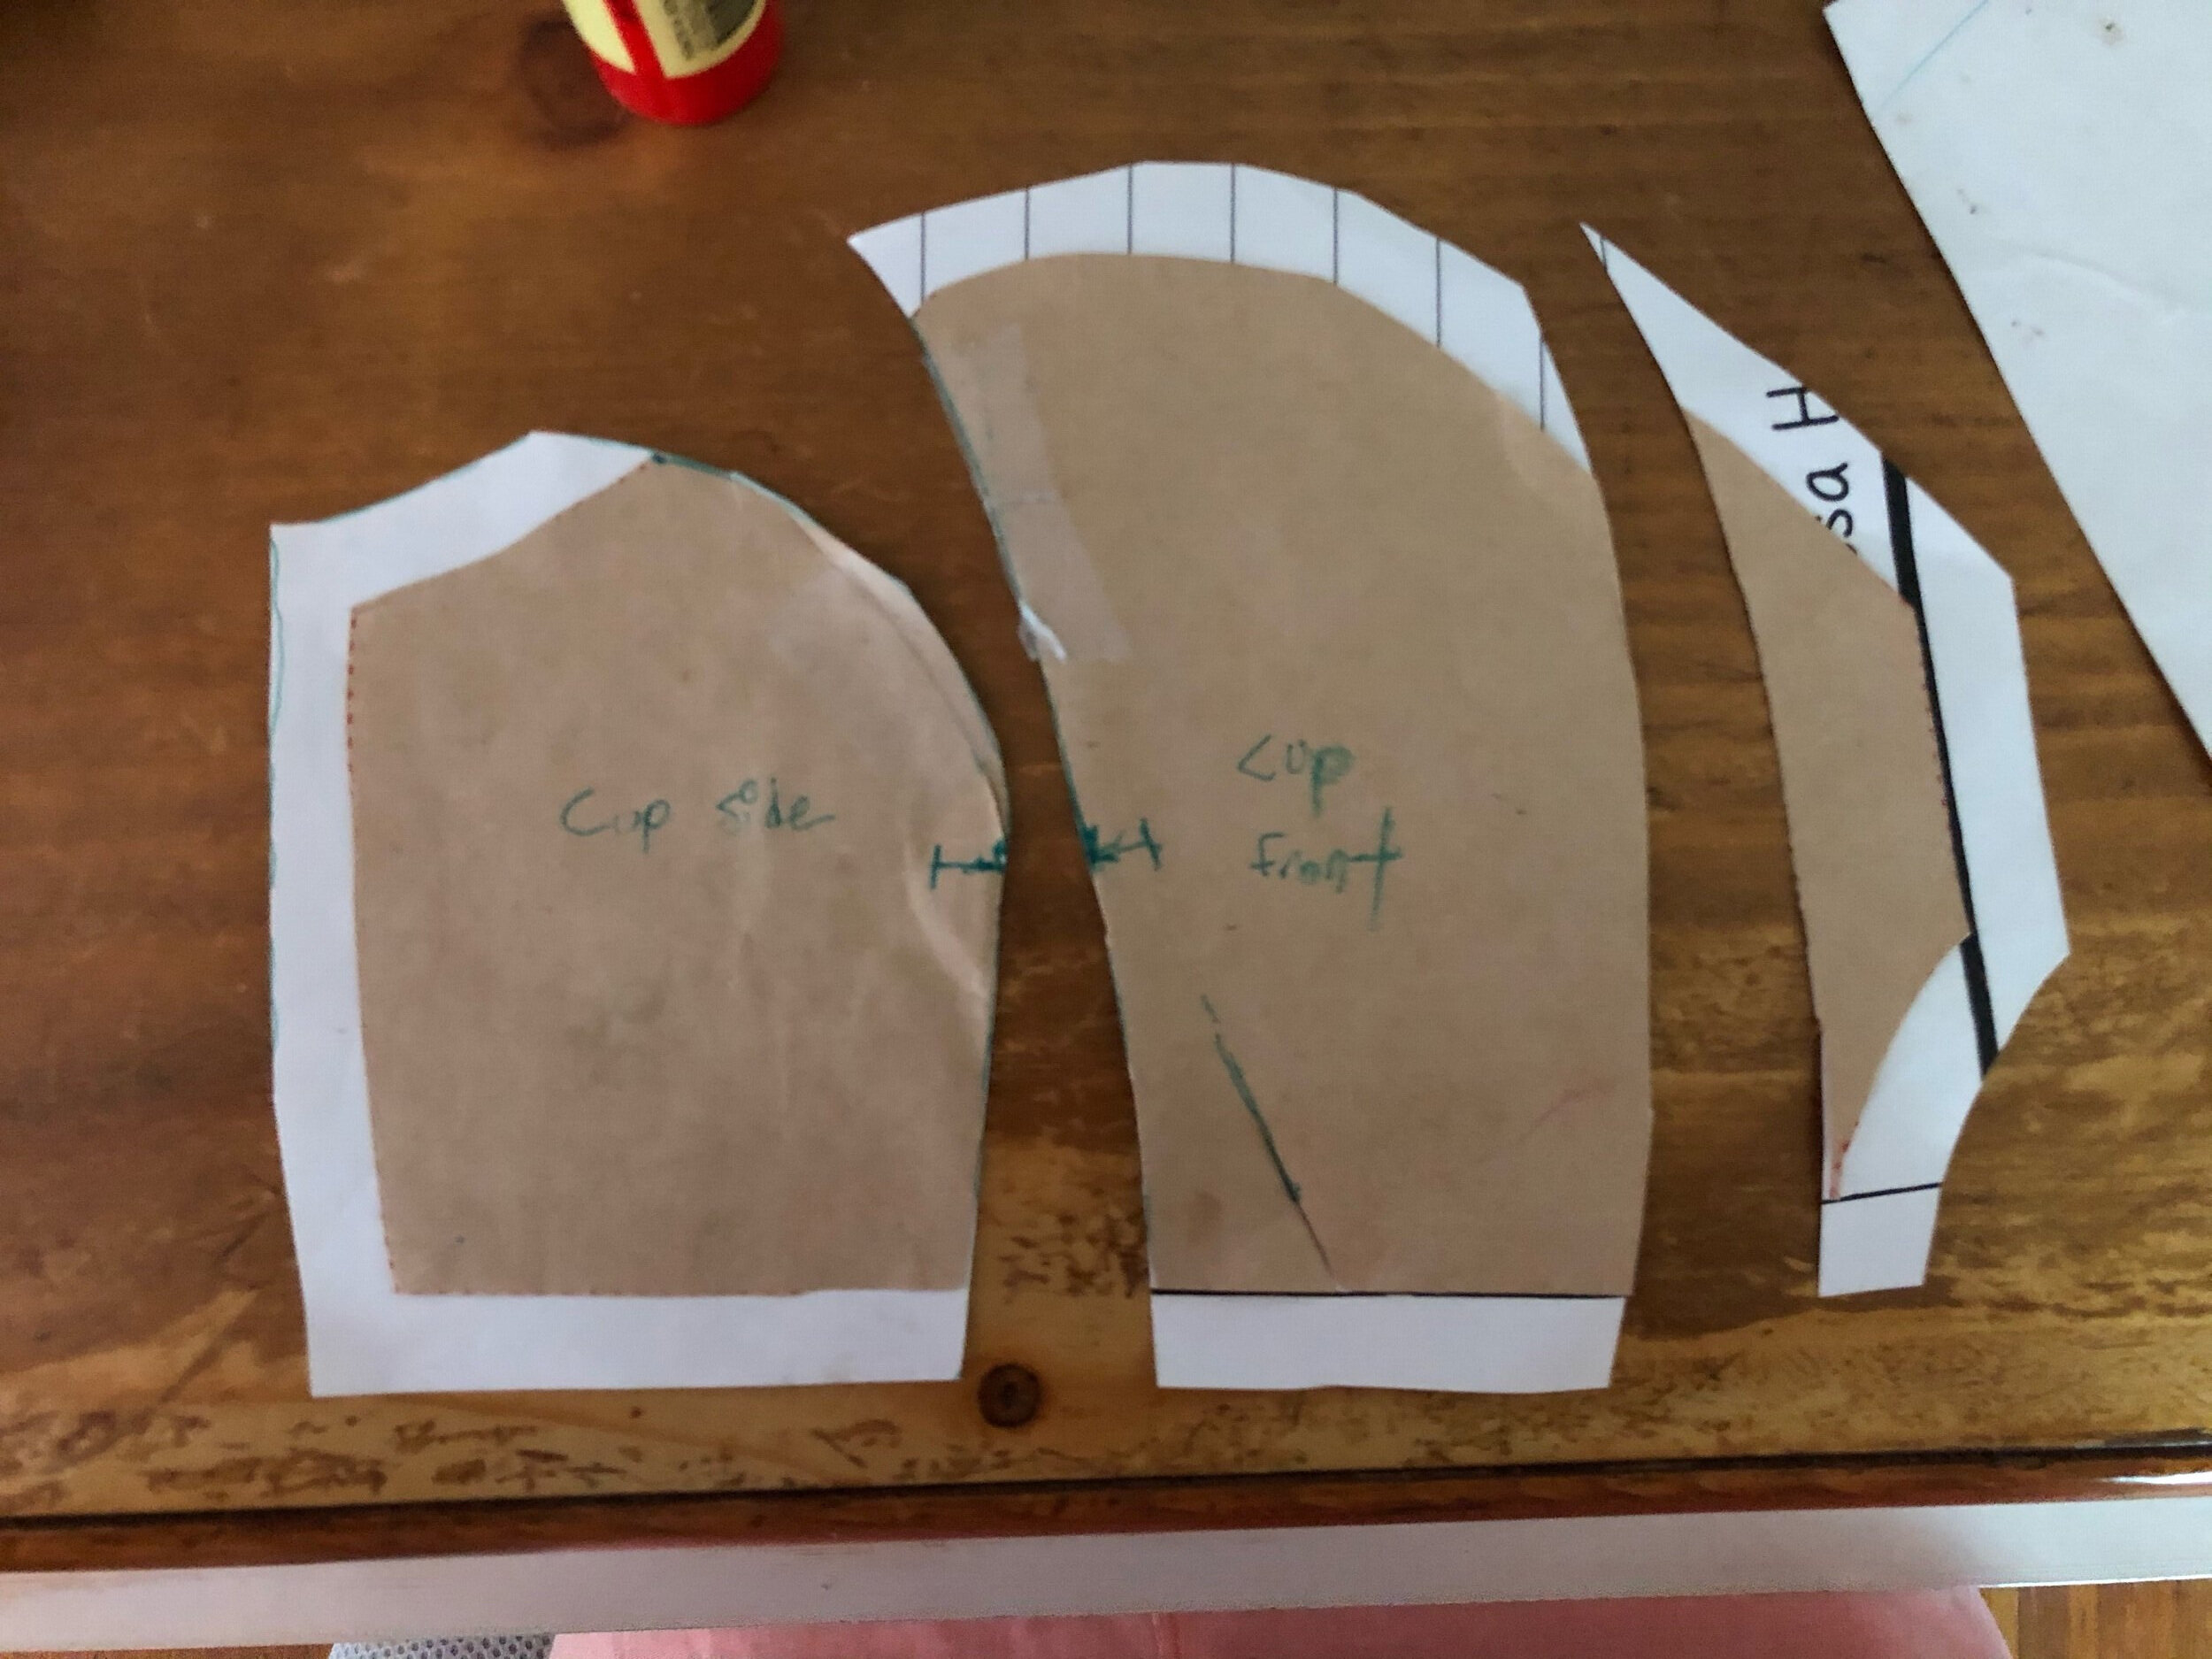
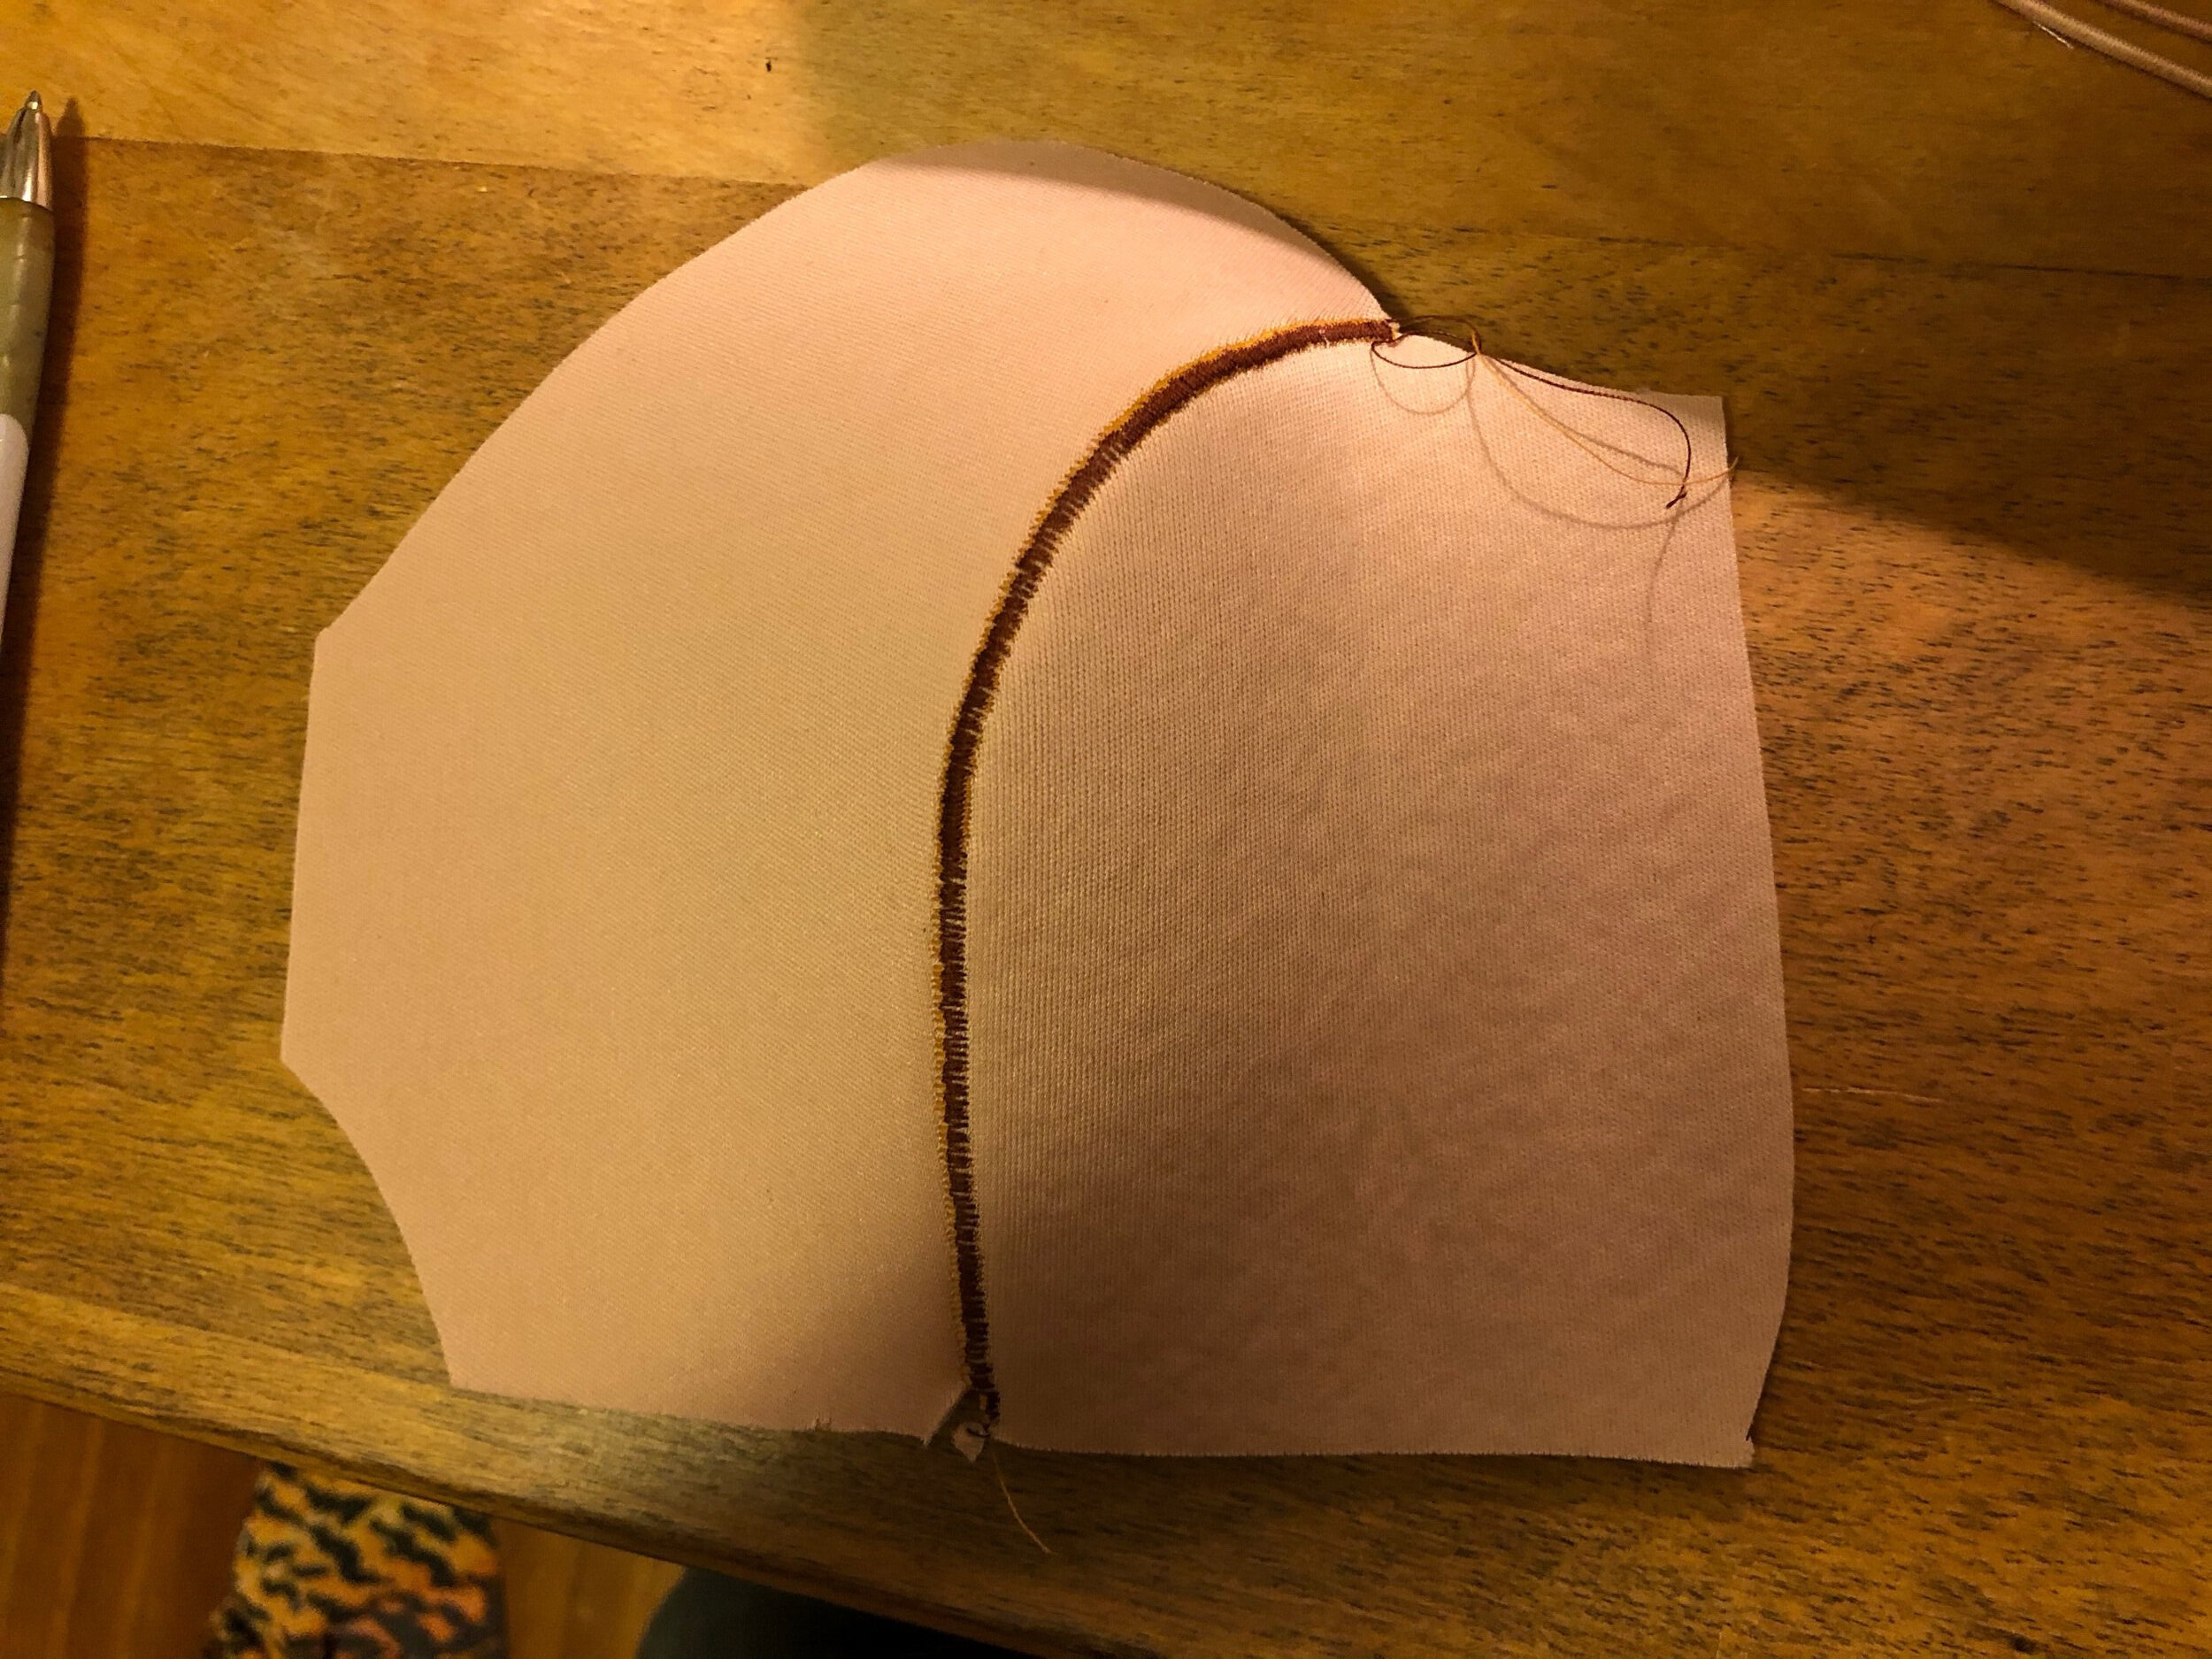
So I then cut the pieces out of foam and started connecting them! A nice wide satin stitch (.9 length, 5 width) all along the length of the seam, and this was something that the second cup looks way smoother than the first.
I then stretched my fronts over the cups and remembered, looking down at myself, that I’ve felt for some time that the basic pattern could be improved by the addition of a dart, so I did that right where my leopard print switched from white to brown background (and remembered to copy to the pattern piece!). I then pinned the pieces together (rather than basting, which was not about laziness in this case so much as wanting to be able to adjust on the go) to treat as one.
From here I could basically follow the Lucky Lingerie instructions, which are helpful because twists and clean linings can bend your brain a bit.
I also added chlorine resistant braided elastic inside the straps for strength and longevity, which I did a 3 step zig zag over to secure and keep nice and bumped up against the cups for smoothness.
I got totally baffled by the instructions for adding visible elastic and I just feel like they were missing a couple details, in any case, my first effort I did from the reverse side and it looked awful so instead I tried a more methodical method:
Adding exposed elastic band to bra/swimsuit
BASTE along desired seam allowance (3/8”)
Line up elastic along marked SA
Attach with wide (5 mm width) 3 step zig zag from top of elastic, ensuring stitching remains aligned with top of elastic
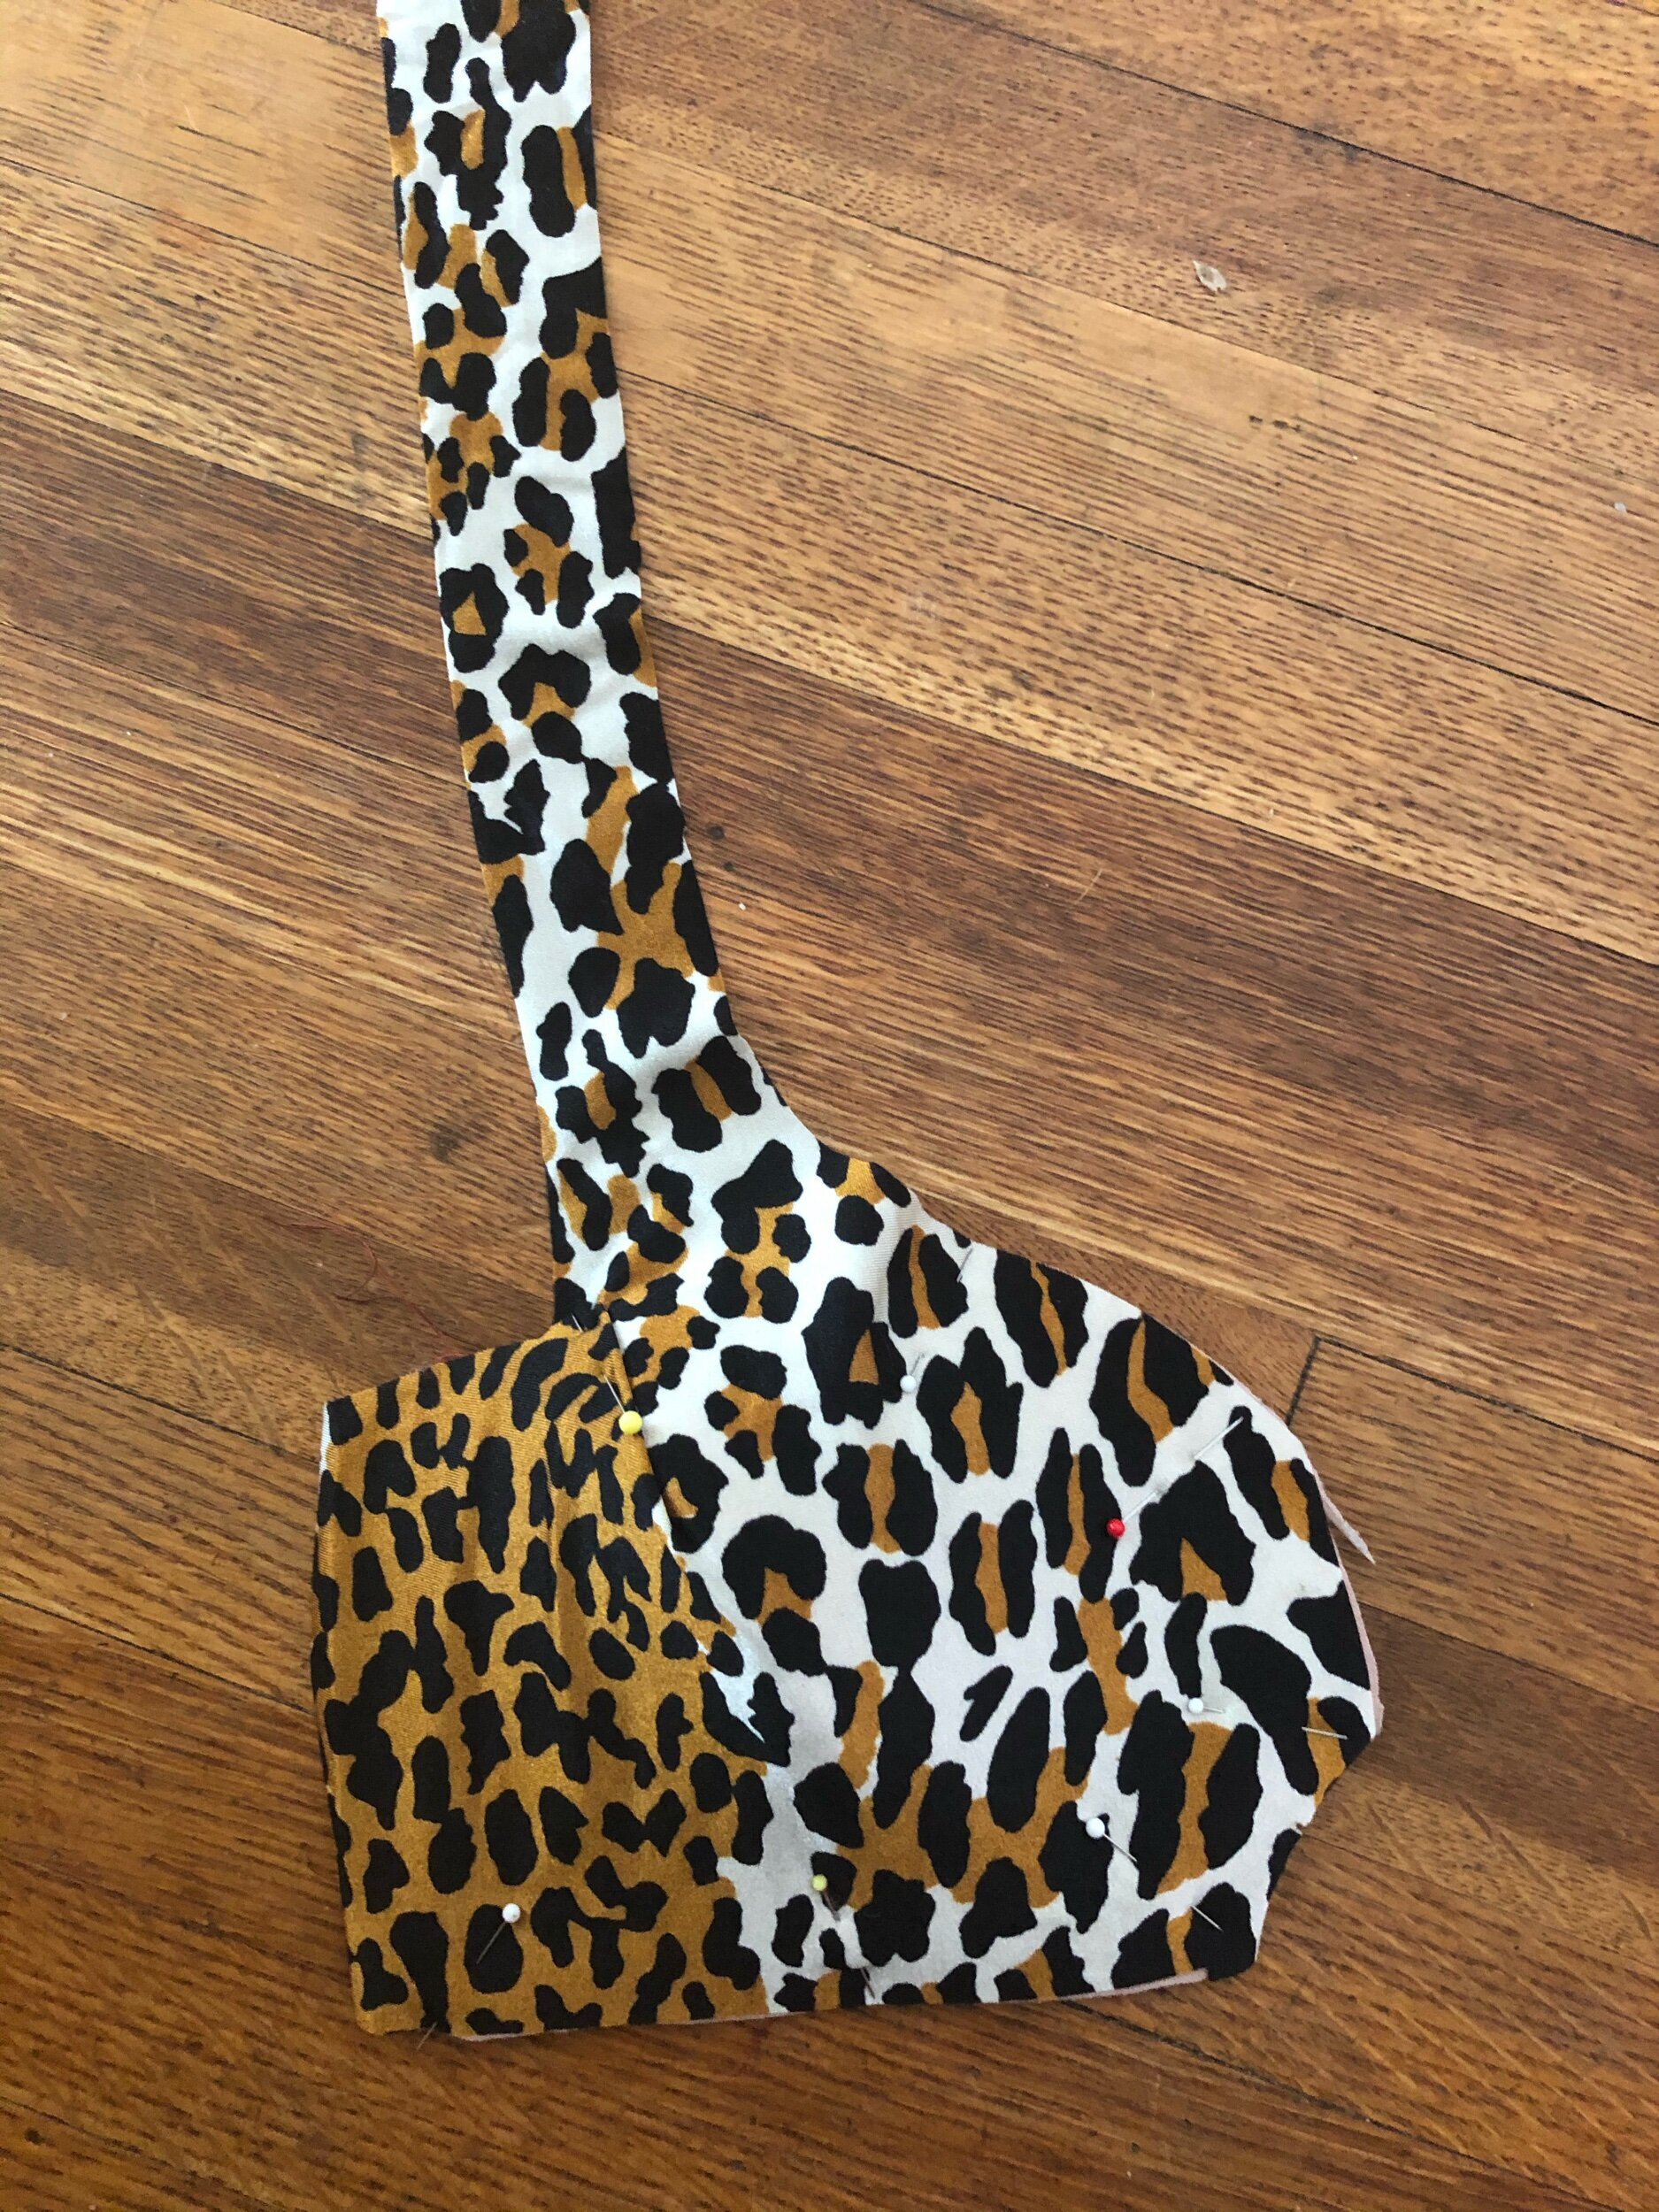
Also, extremely minor note, but I cut the back piece in two on the exterior, without a twist, to keep up my mixed prints theme. The interior is all leopard b/c I have more of it.

On to the swim bottoms
Now I did not have a pattern for bottoms to go to, as the only underwear pattern I use is boyshort style and I want some high-waist practically-a-one-piece action in my bikinis. I really like one pieces. This may be a holdover from growing up swimming.
I drafted the bottoms following Kat Klebenow’s instructions for panties in the shortlived but incredibly approachable Monthly Draft series she did.

Mine were obviously much, much higher than her draft, but the instructions remain the same. I followed her advice to go to ~30% negative ease for swimwear and for sure, these babies are staying secure. I could train in them, though the waistband elastic isn’t actually chlorine resistant so I’m sure it would give out at that level of wear. So next time, I might go a little less secure.
I’m quite happy overall with the leg shape, rise, and overall feel on this. My only regret is there should be more tiger print. This was an error (if you can even call it that) of the sketching phase, as I decided on going asymmetrical with the slices of each print and different ratios from front to back, after debating more difficult things like curves. Live and learn. Get more of that bright orange in there next time.
I cut the lining, the recycled black power mesh, without the colour blocking, and the exteriors with, considering how to align the different colour stripes of leopard.
My biggest mistake in construction on the bottoms was in fact attaching the lining to the fashion fabric, as in my haste and laziness, I just lined up all four layers of fabric along the crotch and attached, then realized that this exposed the seam allowance somewhat unattractively on the inside. But no way I was unpicking that, and recutting was not in the spirit of the moment, so I plugged on and the insides of this swimsuit have that * GASP * mistake all the way through - exposed seam allowances.
Legs were sewn like the legs on the Spring Racer, with that Matchpoint swimsuit elastic cut to (I think) 90% of the length at seam line (3/8 in from edge). 3 point zig zag in place, turn over to enclose elastic, 3 point zig zag.
Beautiful.
I love this goofy suit.
And of course now I neeeeed to draft more complicated things!
Patterns: Rad Patterns Lucky Lingerie, self drafted bottoms
Size Made: (top only) Medium, darts added, foam cups added
Measurements: 36 full bust
Fabric: Cut & Sew foam from Blackbird fabrics, wild animal swim prints from the wild garage sale house last year, exposed elastic from Fabricland, swimsuit elastic and black power mesh from Matchpoint.
Next time: might go looser on the bottoms - 20% negative ease? 15%?
Worn irl


