Sewing a waistband curtain
My very necessary disclaimer here is I am writing this “tutorial” the first time I do this thing. I’ve got zero expertise, but a waistband curtain for a split waistband was a detail i really, really wanted on the trousers I’m working on and I found no resource online that outlined this construction. So I befriended my seam ripper, took copious photos and notes, and copied a pair of RTW pants.
I’ve noted where my results/methods differ from the industrial sample (other than that my bias cut pieces are all way more of a mess - note to self, cut slightly larger than desired then cut to size if you want things really clean bc you never quite get a perfect match on bias tape seams).
My trousers were made for a 30” waist with roughly a 1” CB seam and lengths are described for such a pair of pants. They also accommodate a fairly wide fly shield, but that only should affect the non-curtain pieces of the right hand side.
Also, the photos are Not Great, as evening working time is what it is.
Drafting and Cutting

All pieces for the trousers, but you know, matching pieces stacked on top of one another.
Piece lengths are listed assuming you are making a split waistband (with a seam at CB). They also assume you’ve got the same generous fly shield and a 30” waistband pant. So lengths are an example, but I will describe how that corresponds to your pants as I go. Hence drafting; you will have to determine appropriate lengths for your work.
Curtain unit - left side
To determine your length, measure from CF (no seam allowance included) to your seam extension beyond CB (my pants have a bit over a 1” seam allowance at CB)
My pieces were cut to 17.5” length. I would recommend cutting and assembling the curtain as one long piece then cutting down to size for ease, and given that curtains can be purchased on a roll, I gather that this would be closer to industrial practice.
On the bias:
Inner curtain - lining material - width 2”
Outer curtain - lining material - width 2 ¾”
Inner waistband canvas/interfacing (i used a fusible lightish weight woven) - width 1 ⅜”
Waistband facing - pocketing material - width 2 ¼”
Non-bias:
Super light weight non-woven interfacing - ½”
Curtain unit - right side
All pieces cut as curtain unit left side but + 1” in length
In my case, that meant 18.5” for inner curtain, outer curtain, inner waistband interfacing, waistband facing, non-woven interfacing
Rest of waistband
1 “ Ban rol - Cut 2: Ban rol should go from ½” less than CF to 1” less than CB. Mine is 15”.
Waistband - cut 2 from fashion fabric. 2 3/4” wide, length from CB with seam extension to end of fly shield. Mine is 20.5”.
I’ve cut the waistband double like this so the front right edge gets folded back. It’s a bit shorter on the RTW pants, with only a 1” turn back, but i thought it would be simpler to just accommodate a wider turnback and/or trim down later.
Assembling the waistband unit
Assembling the curtains
My final curtain unit has a visible line of topstitching joining the curtains and the facing. The sample does not. Instead, the curtains and inner canvas are chainstitched to the ¼” turn of the facing, then this seam is pressed open such that there is no visible stitching a that join. It’s beautiful but I found for a non-industrial setup/my precision abilities that aligning all four pieces at once (with the interfacing actually overhanging and inside the large curtain, as described below) was just not workable. Instead, I’ve opted for a method with a visible line of edgestitching, but that line is cleaner than i typically wind up with sewing a standard waistband, and it was much easier for me to achieve. Structurally, my method results in all pieces aligned as they were in the sample pair.
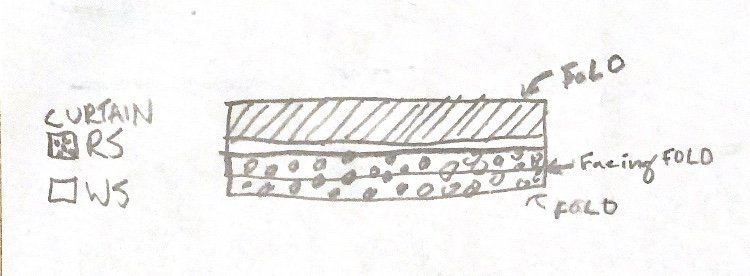
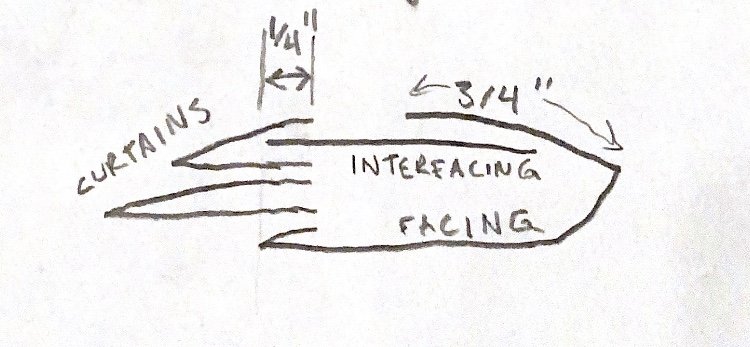
Facing pieces - fold in one long side ¾” and other long side ¼” - results in a 1 ⅛” waistband facing
The ¾” segment will be the top of the facing.
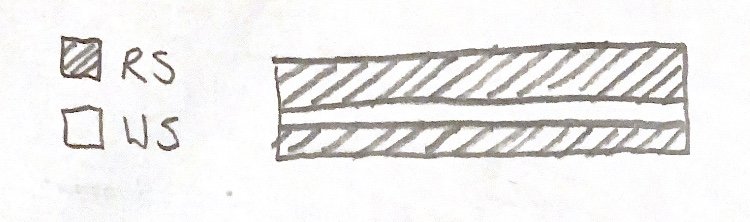
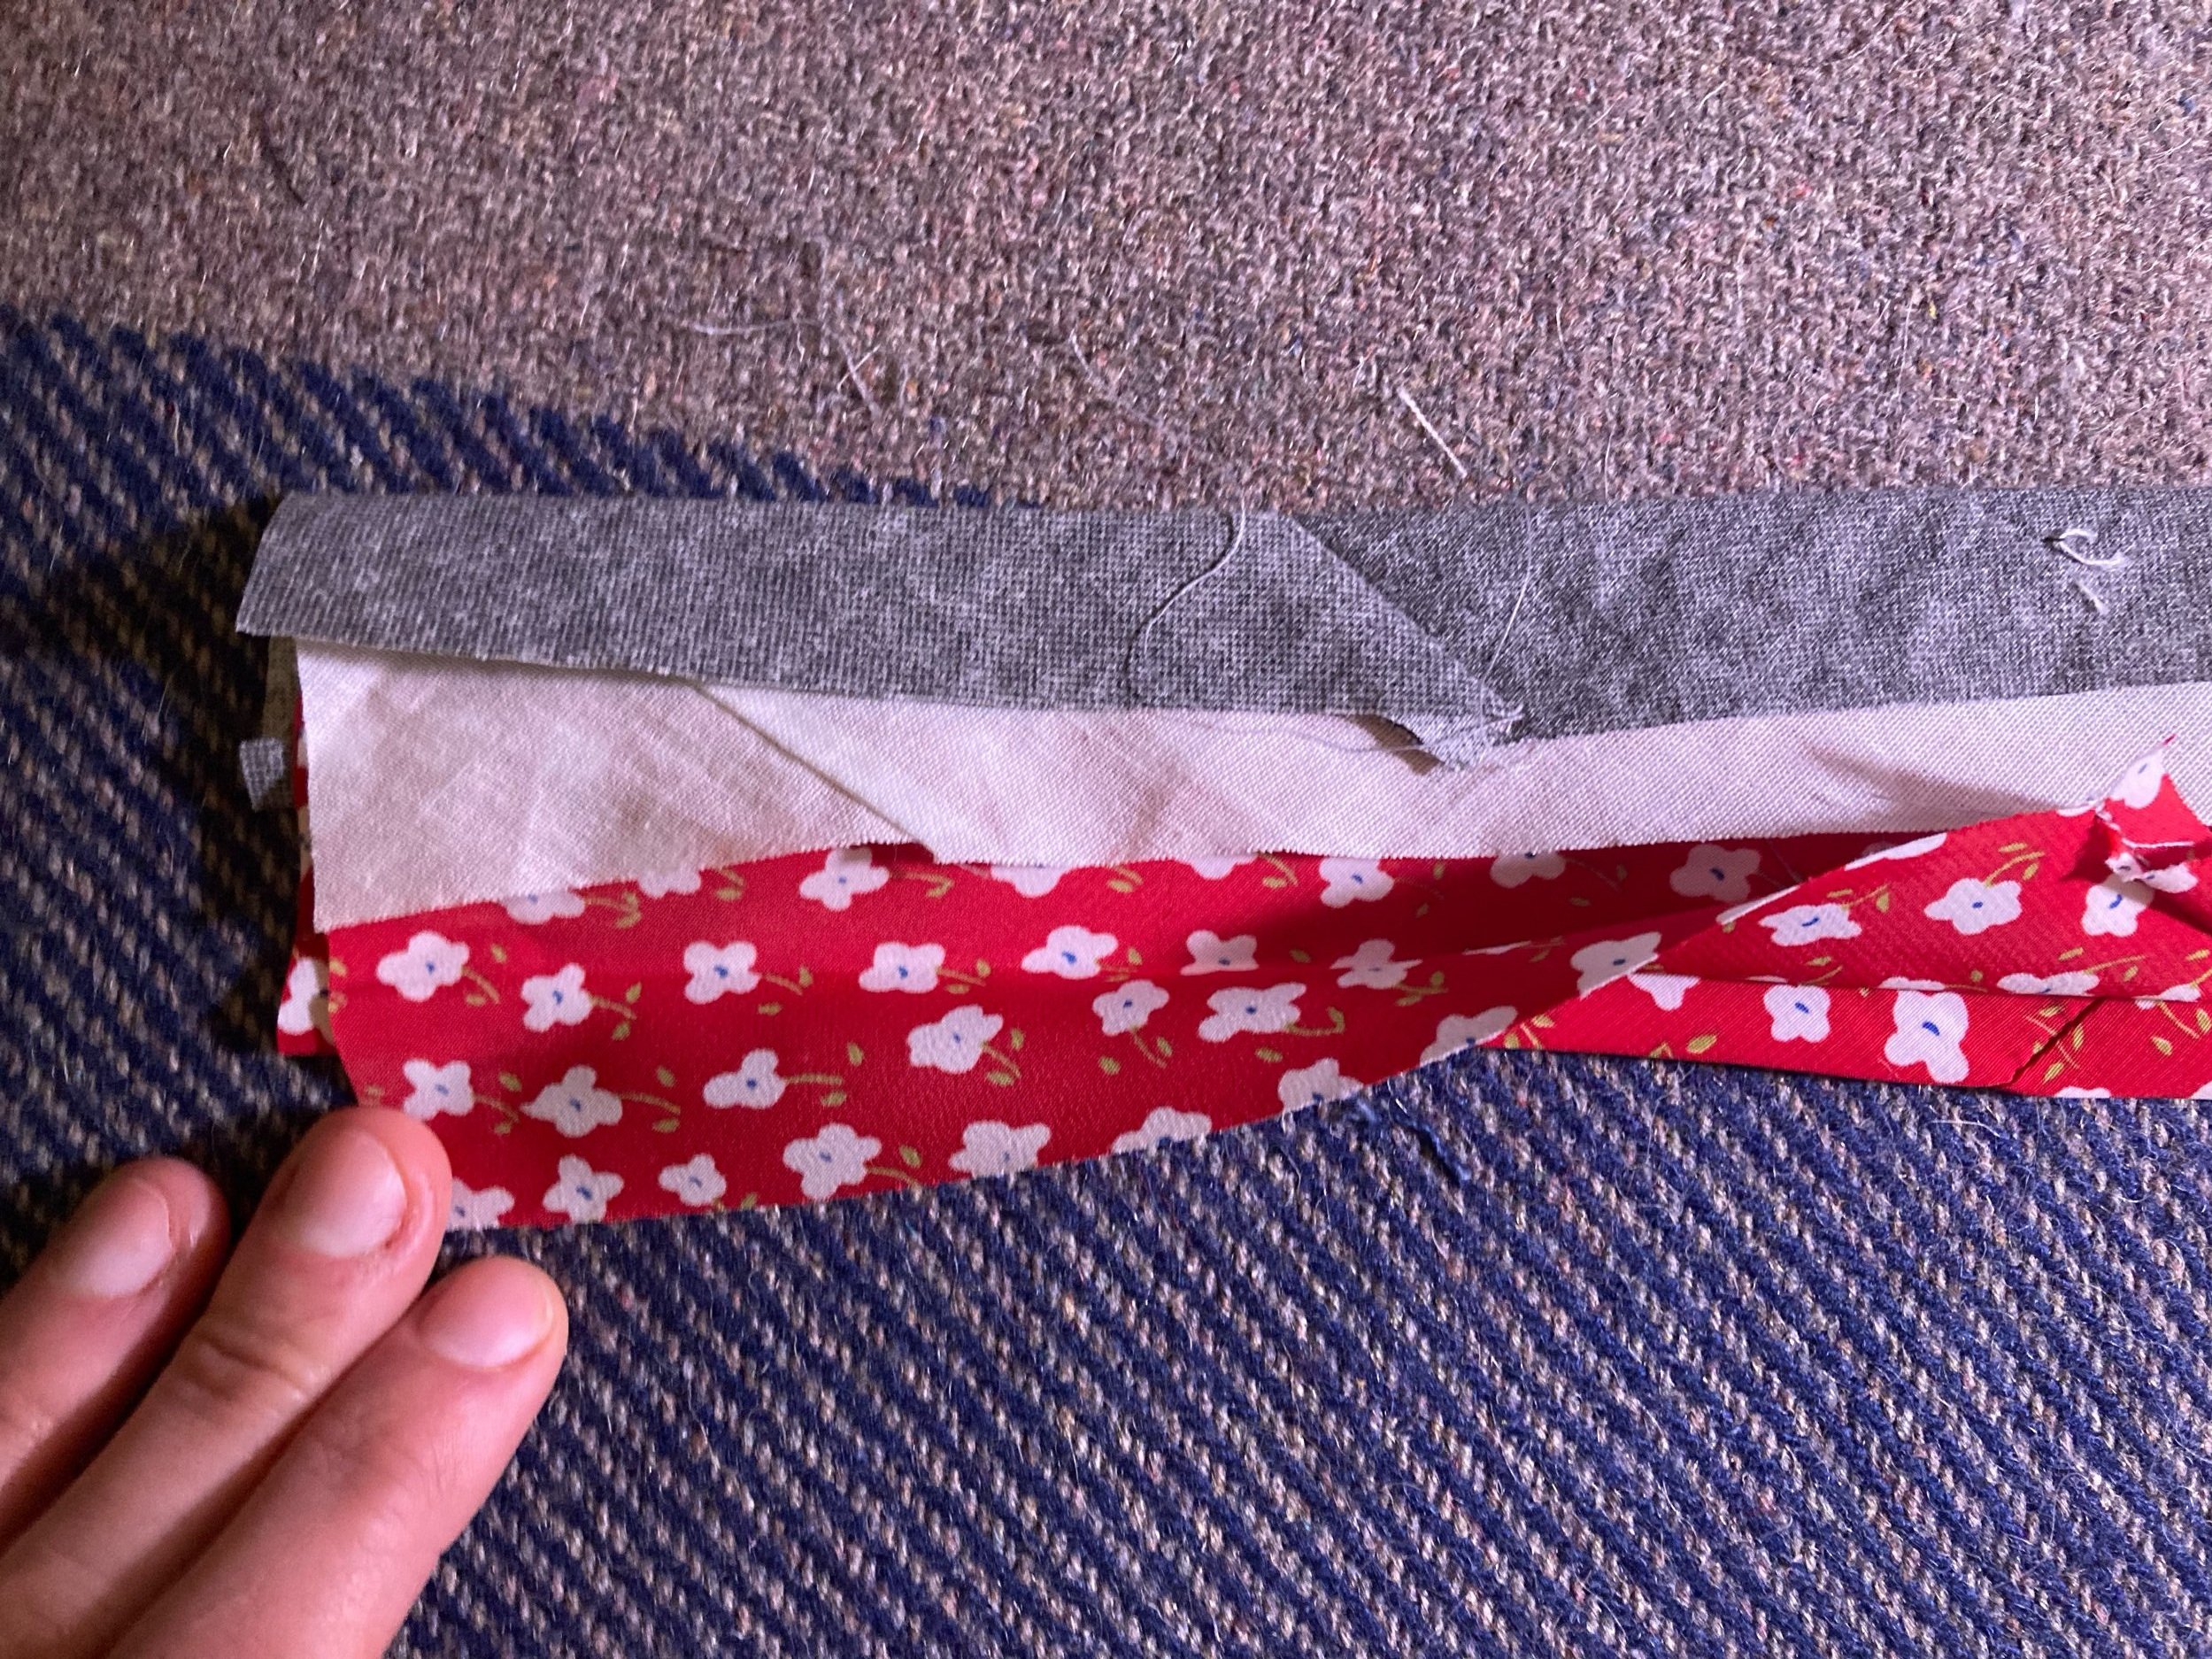
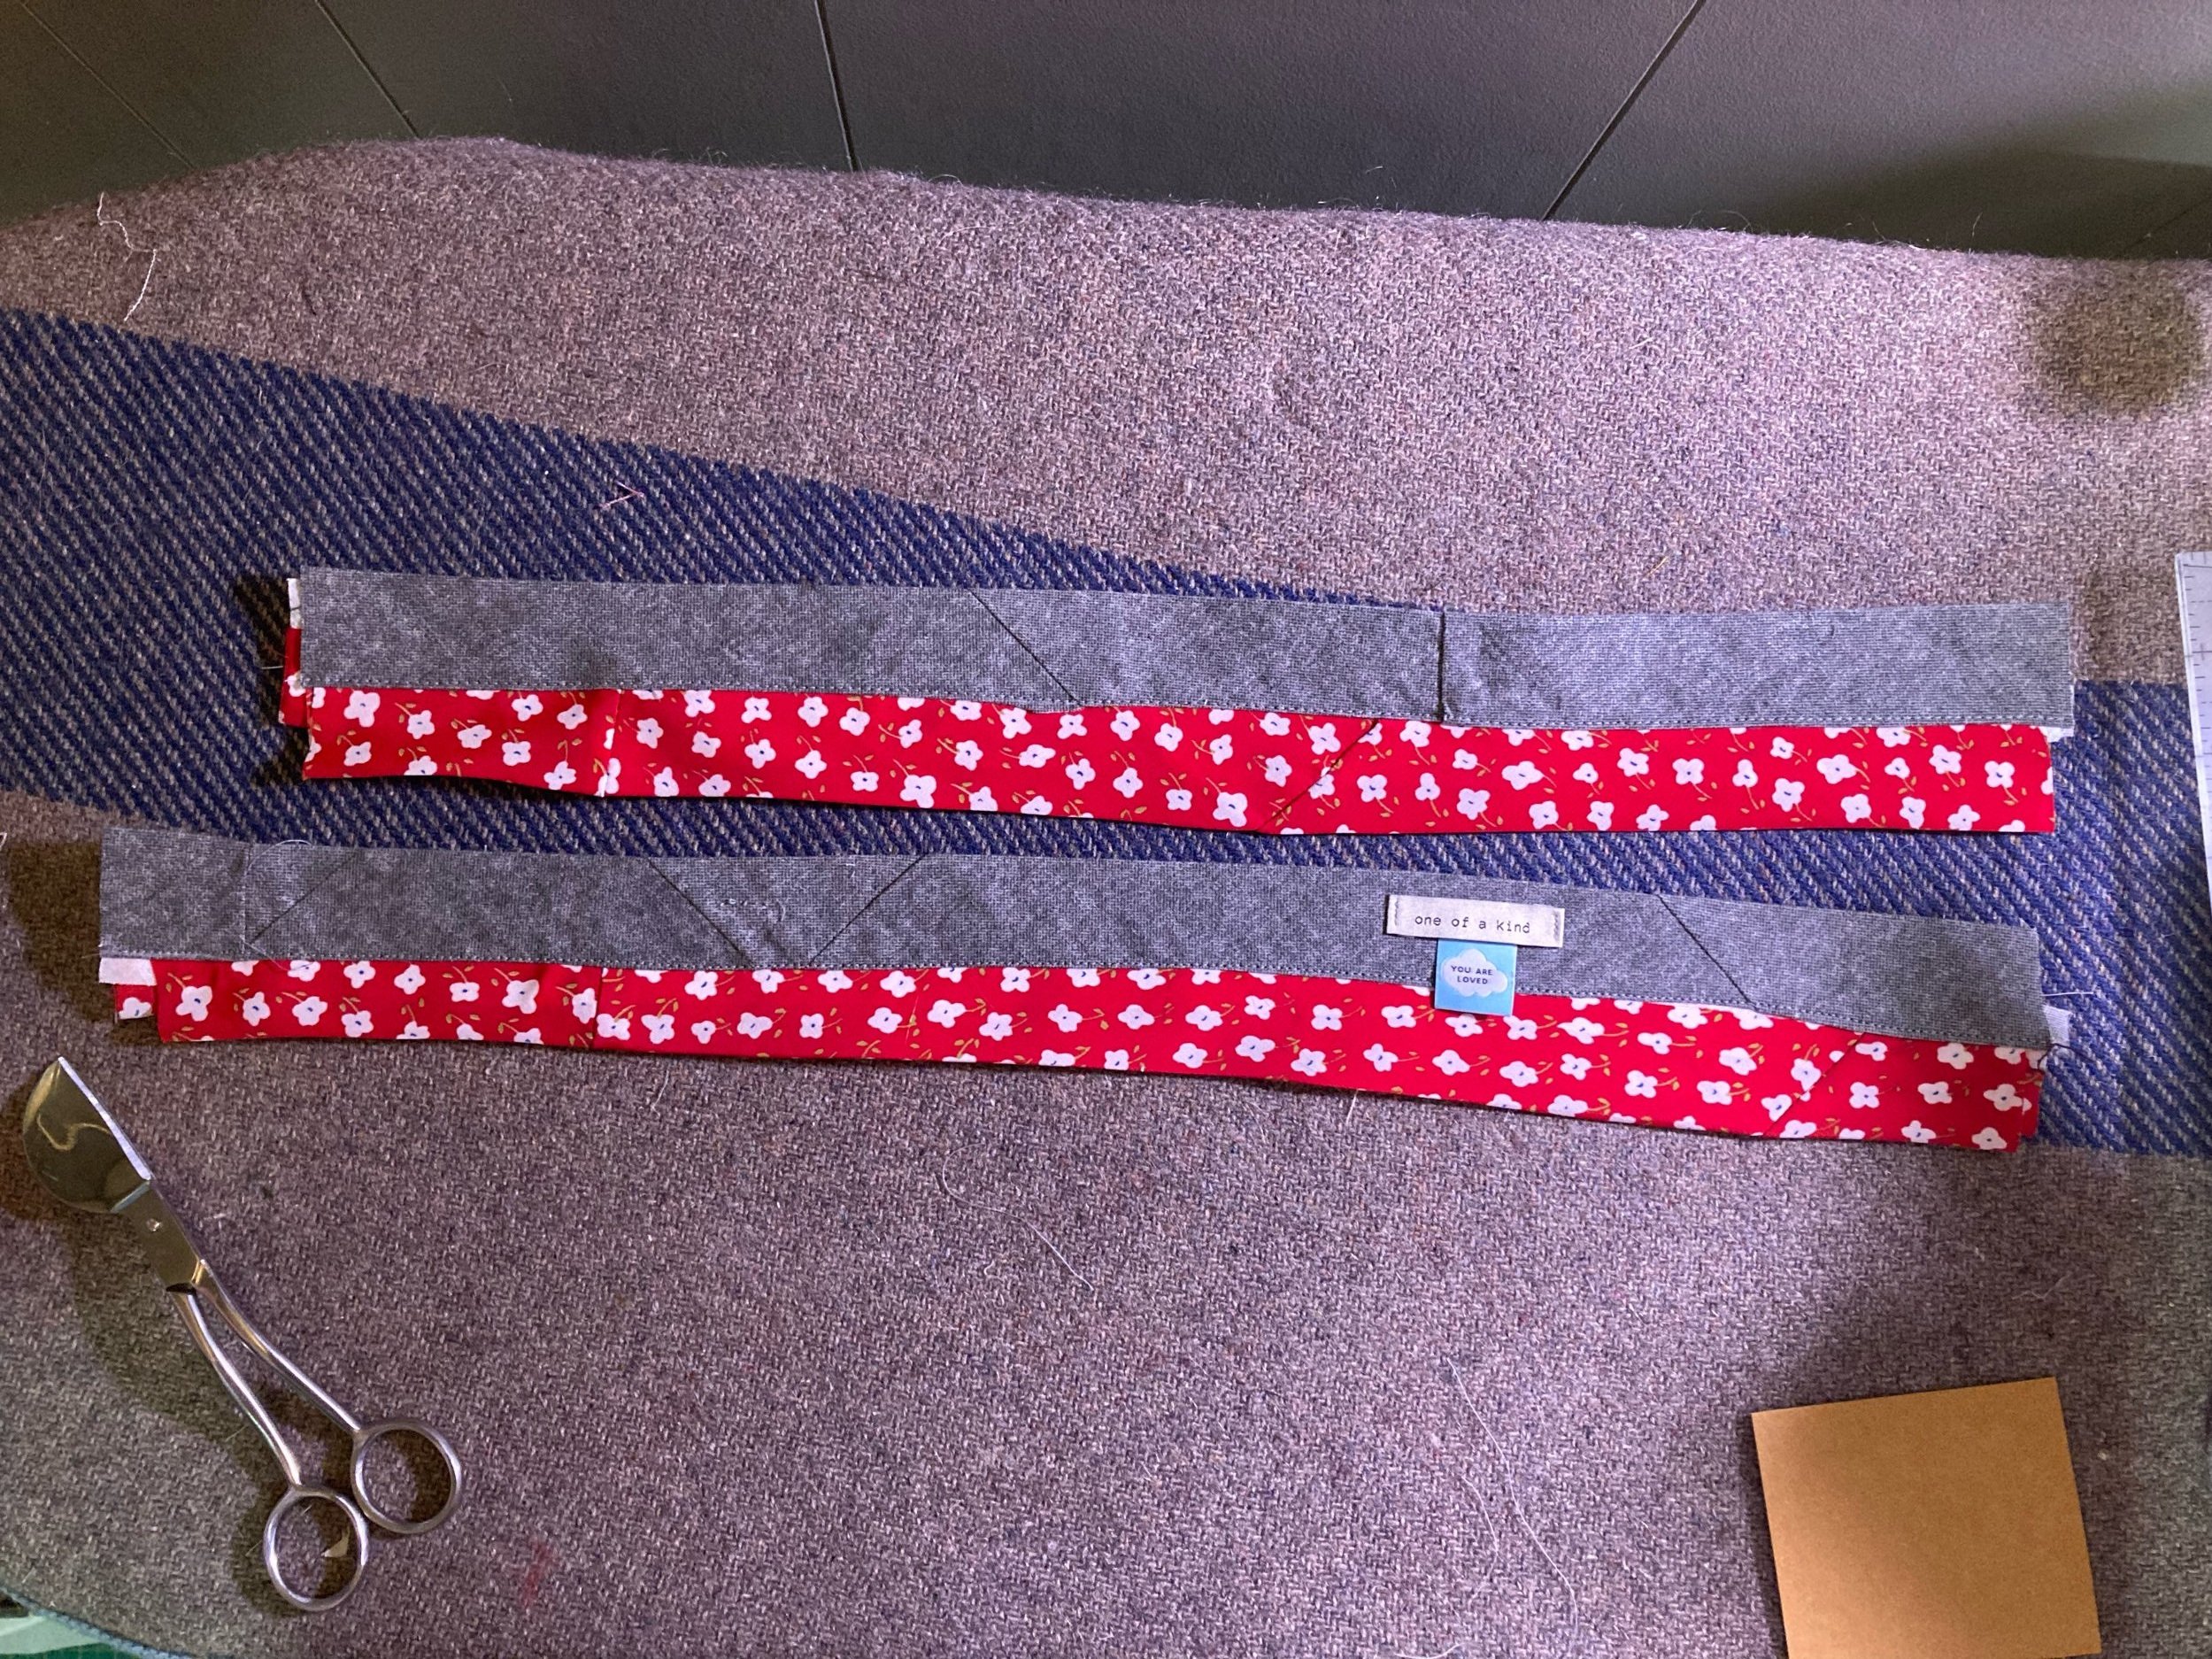
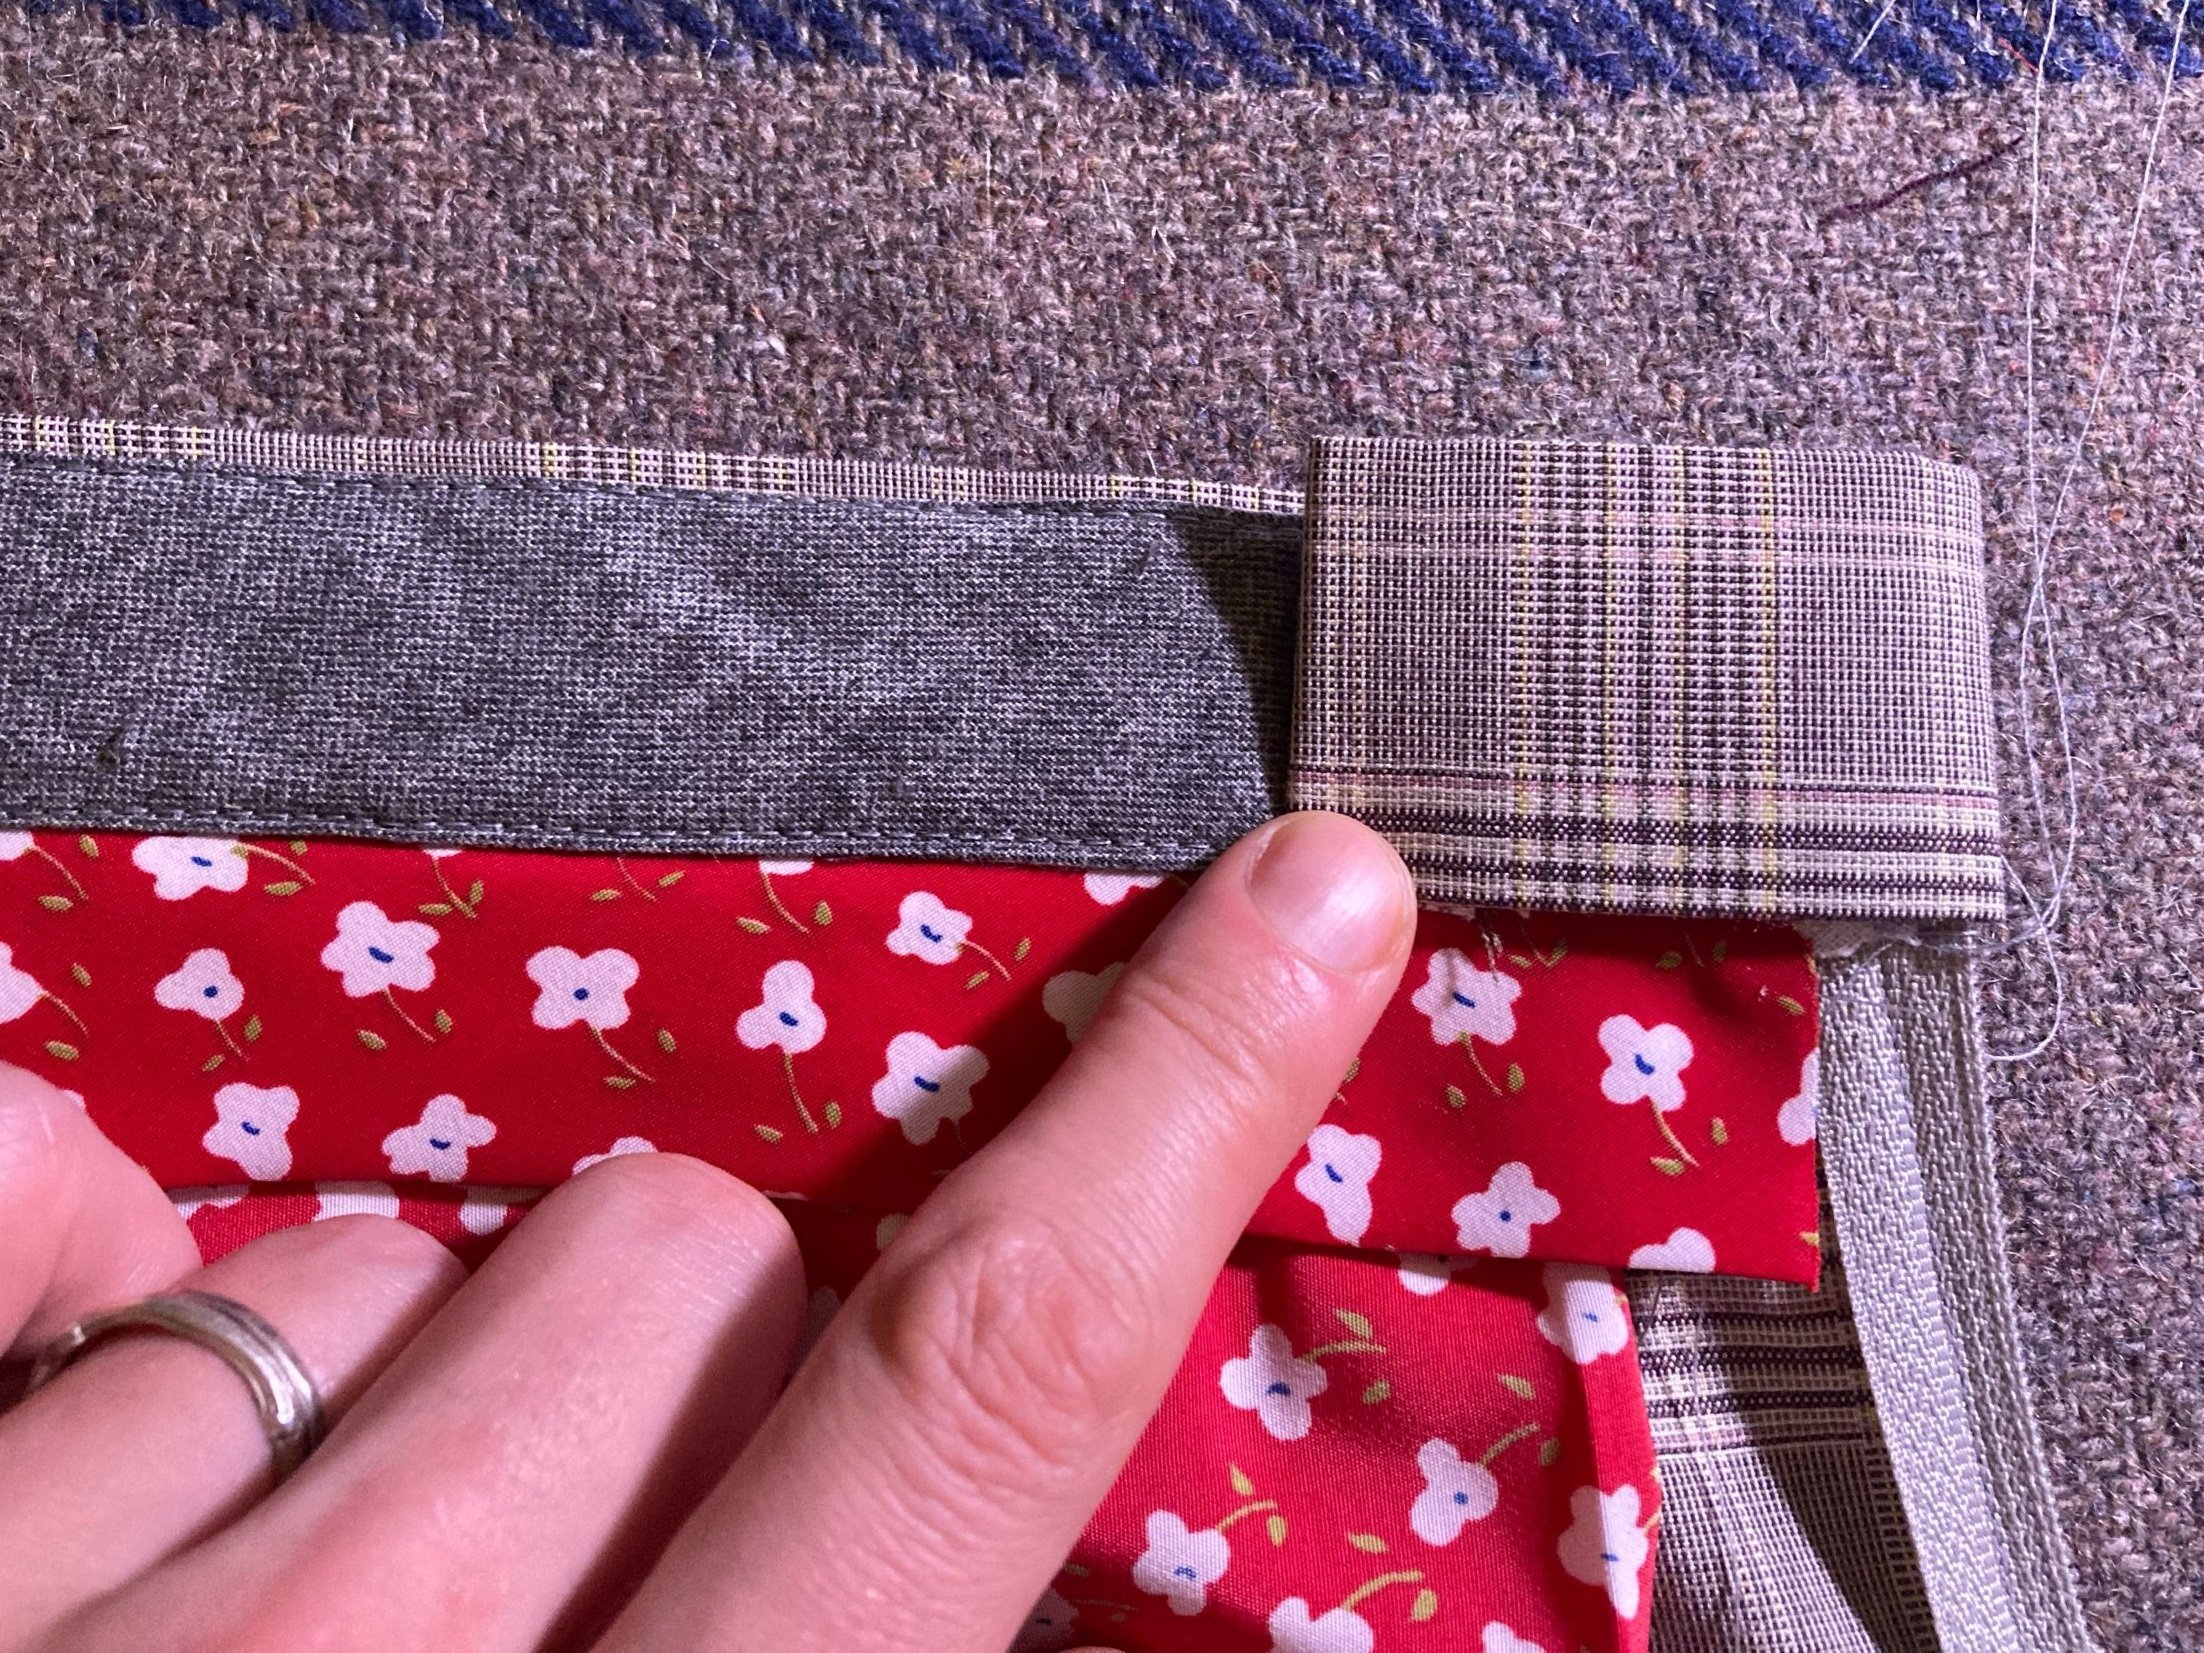
Fold and press the curtain pieces in half across the length, wrong sides together

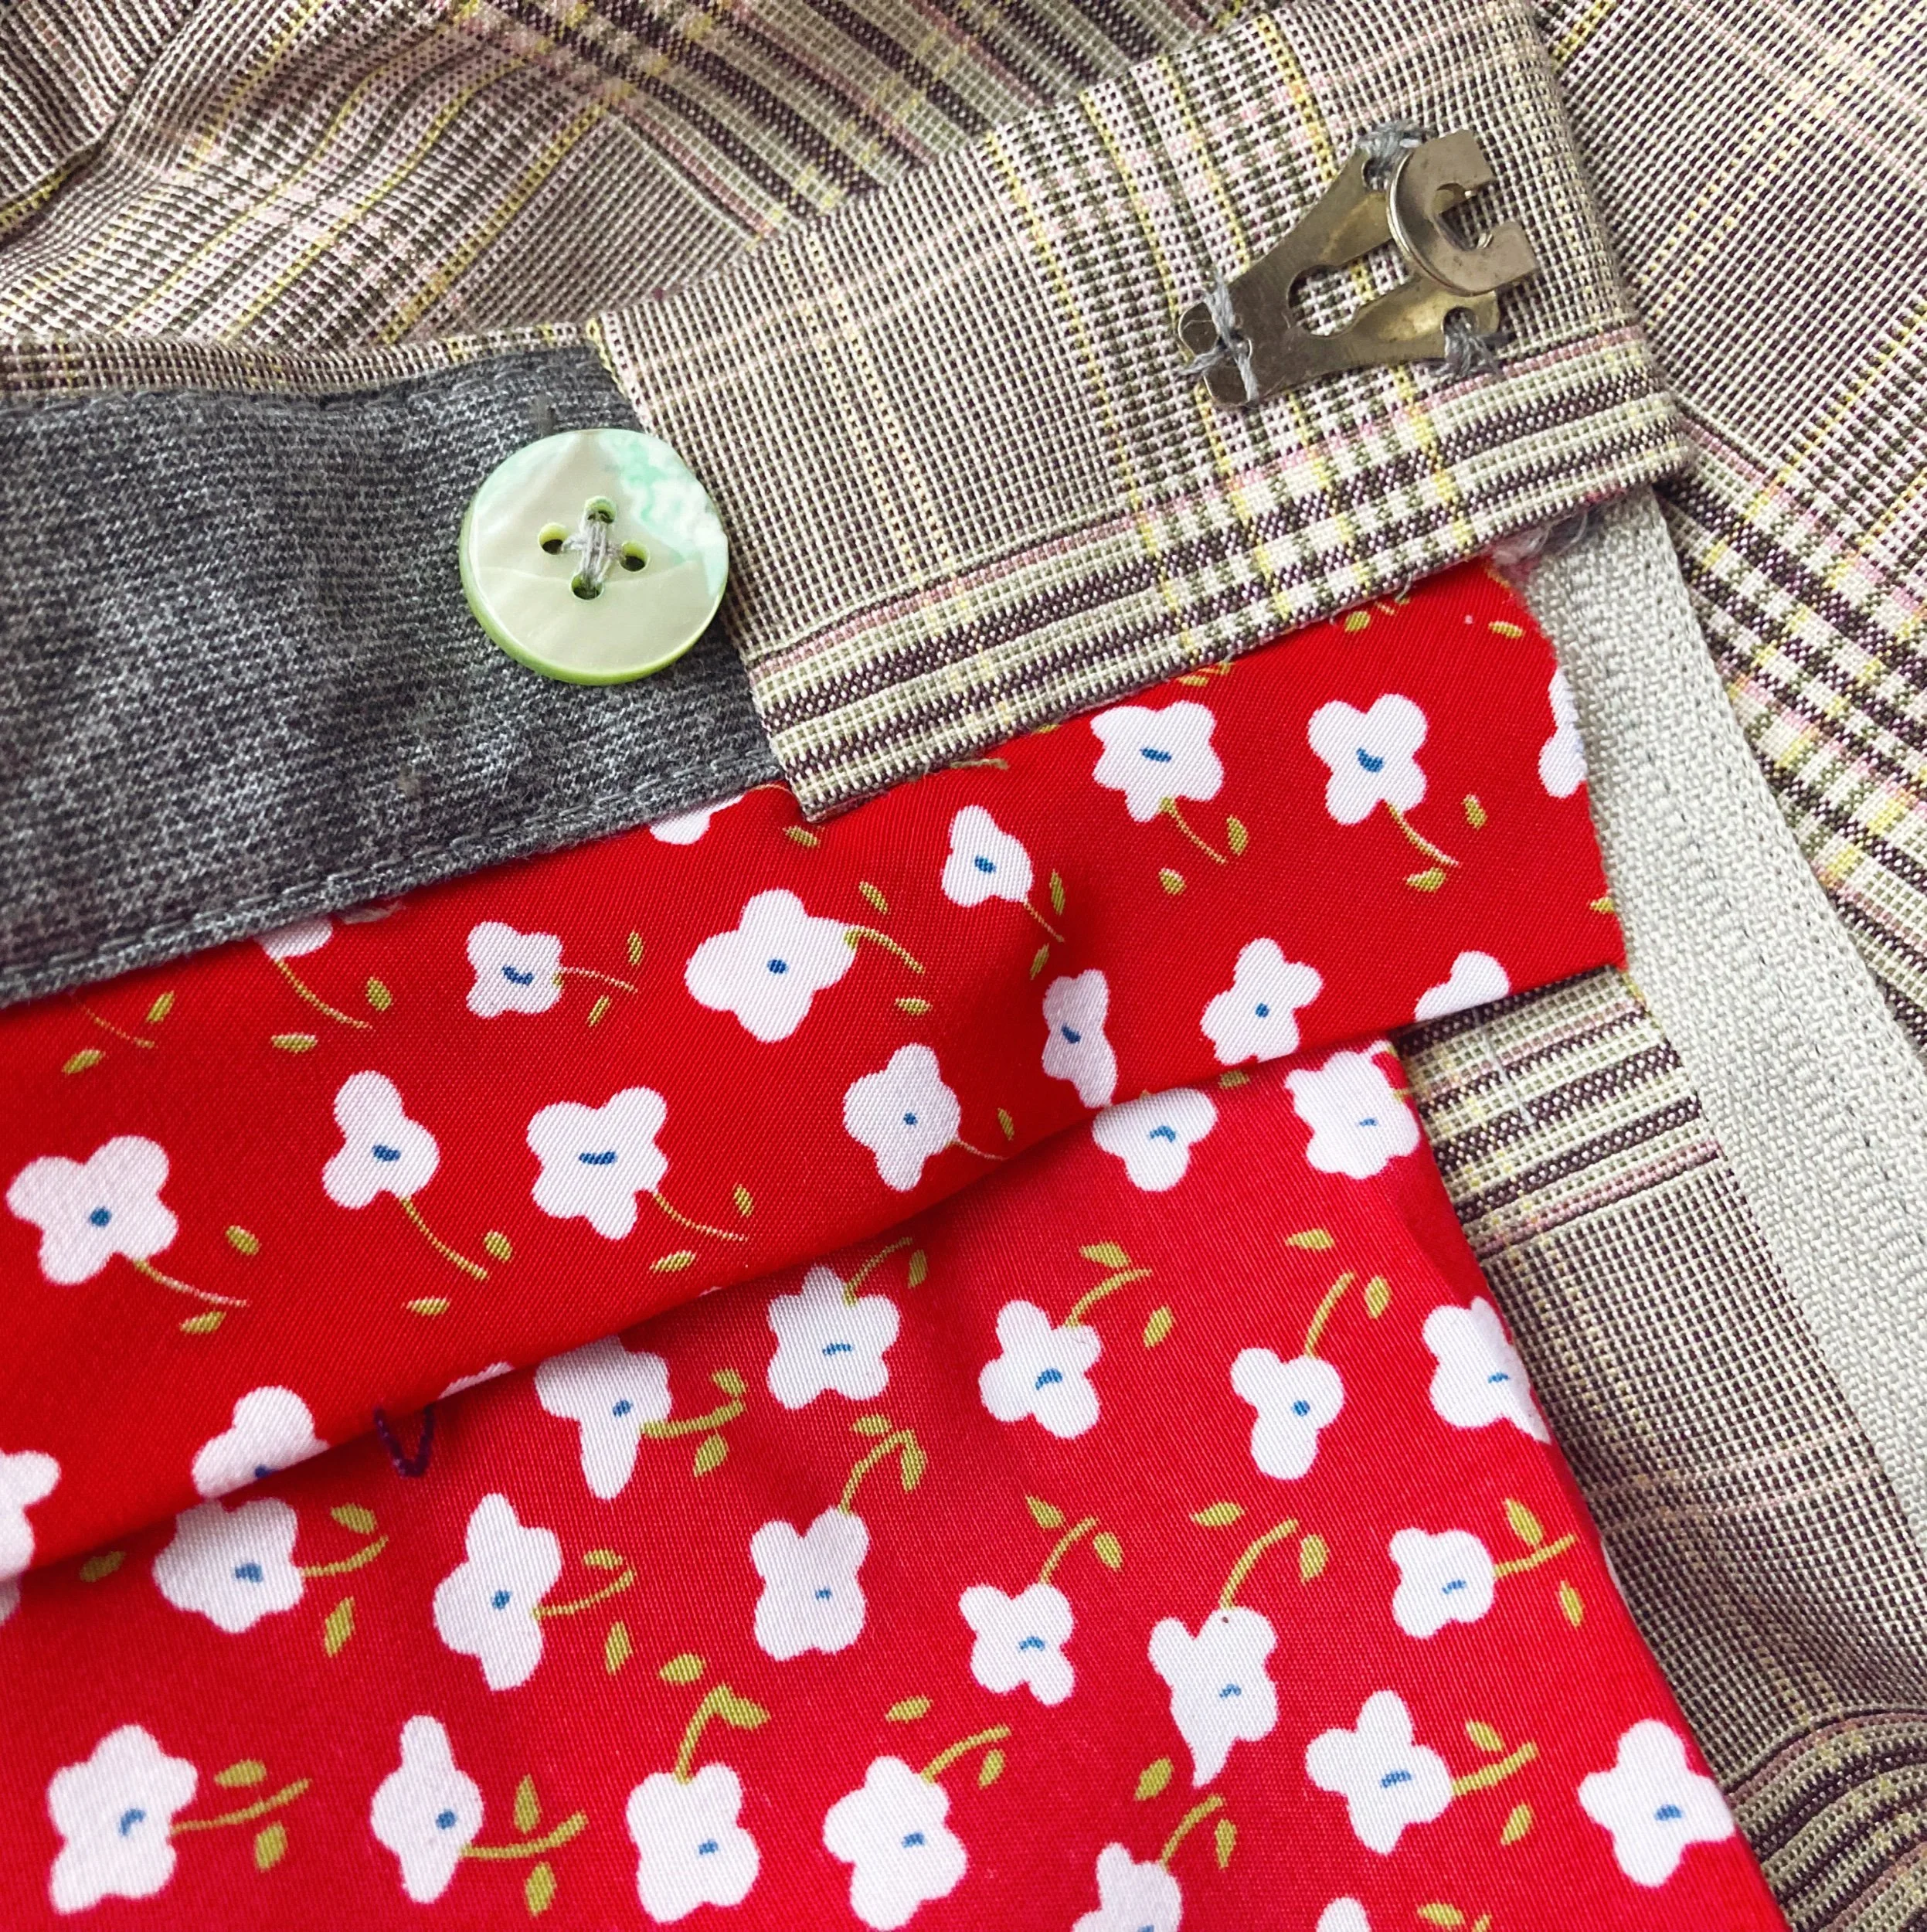
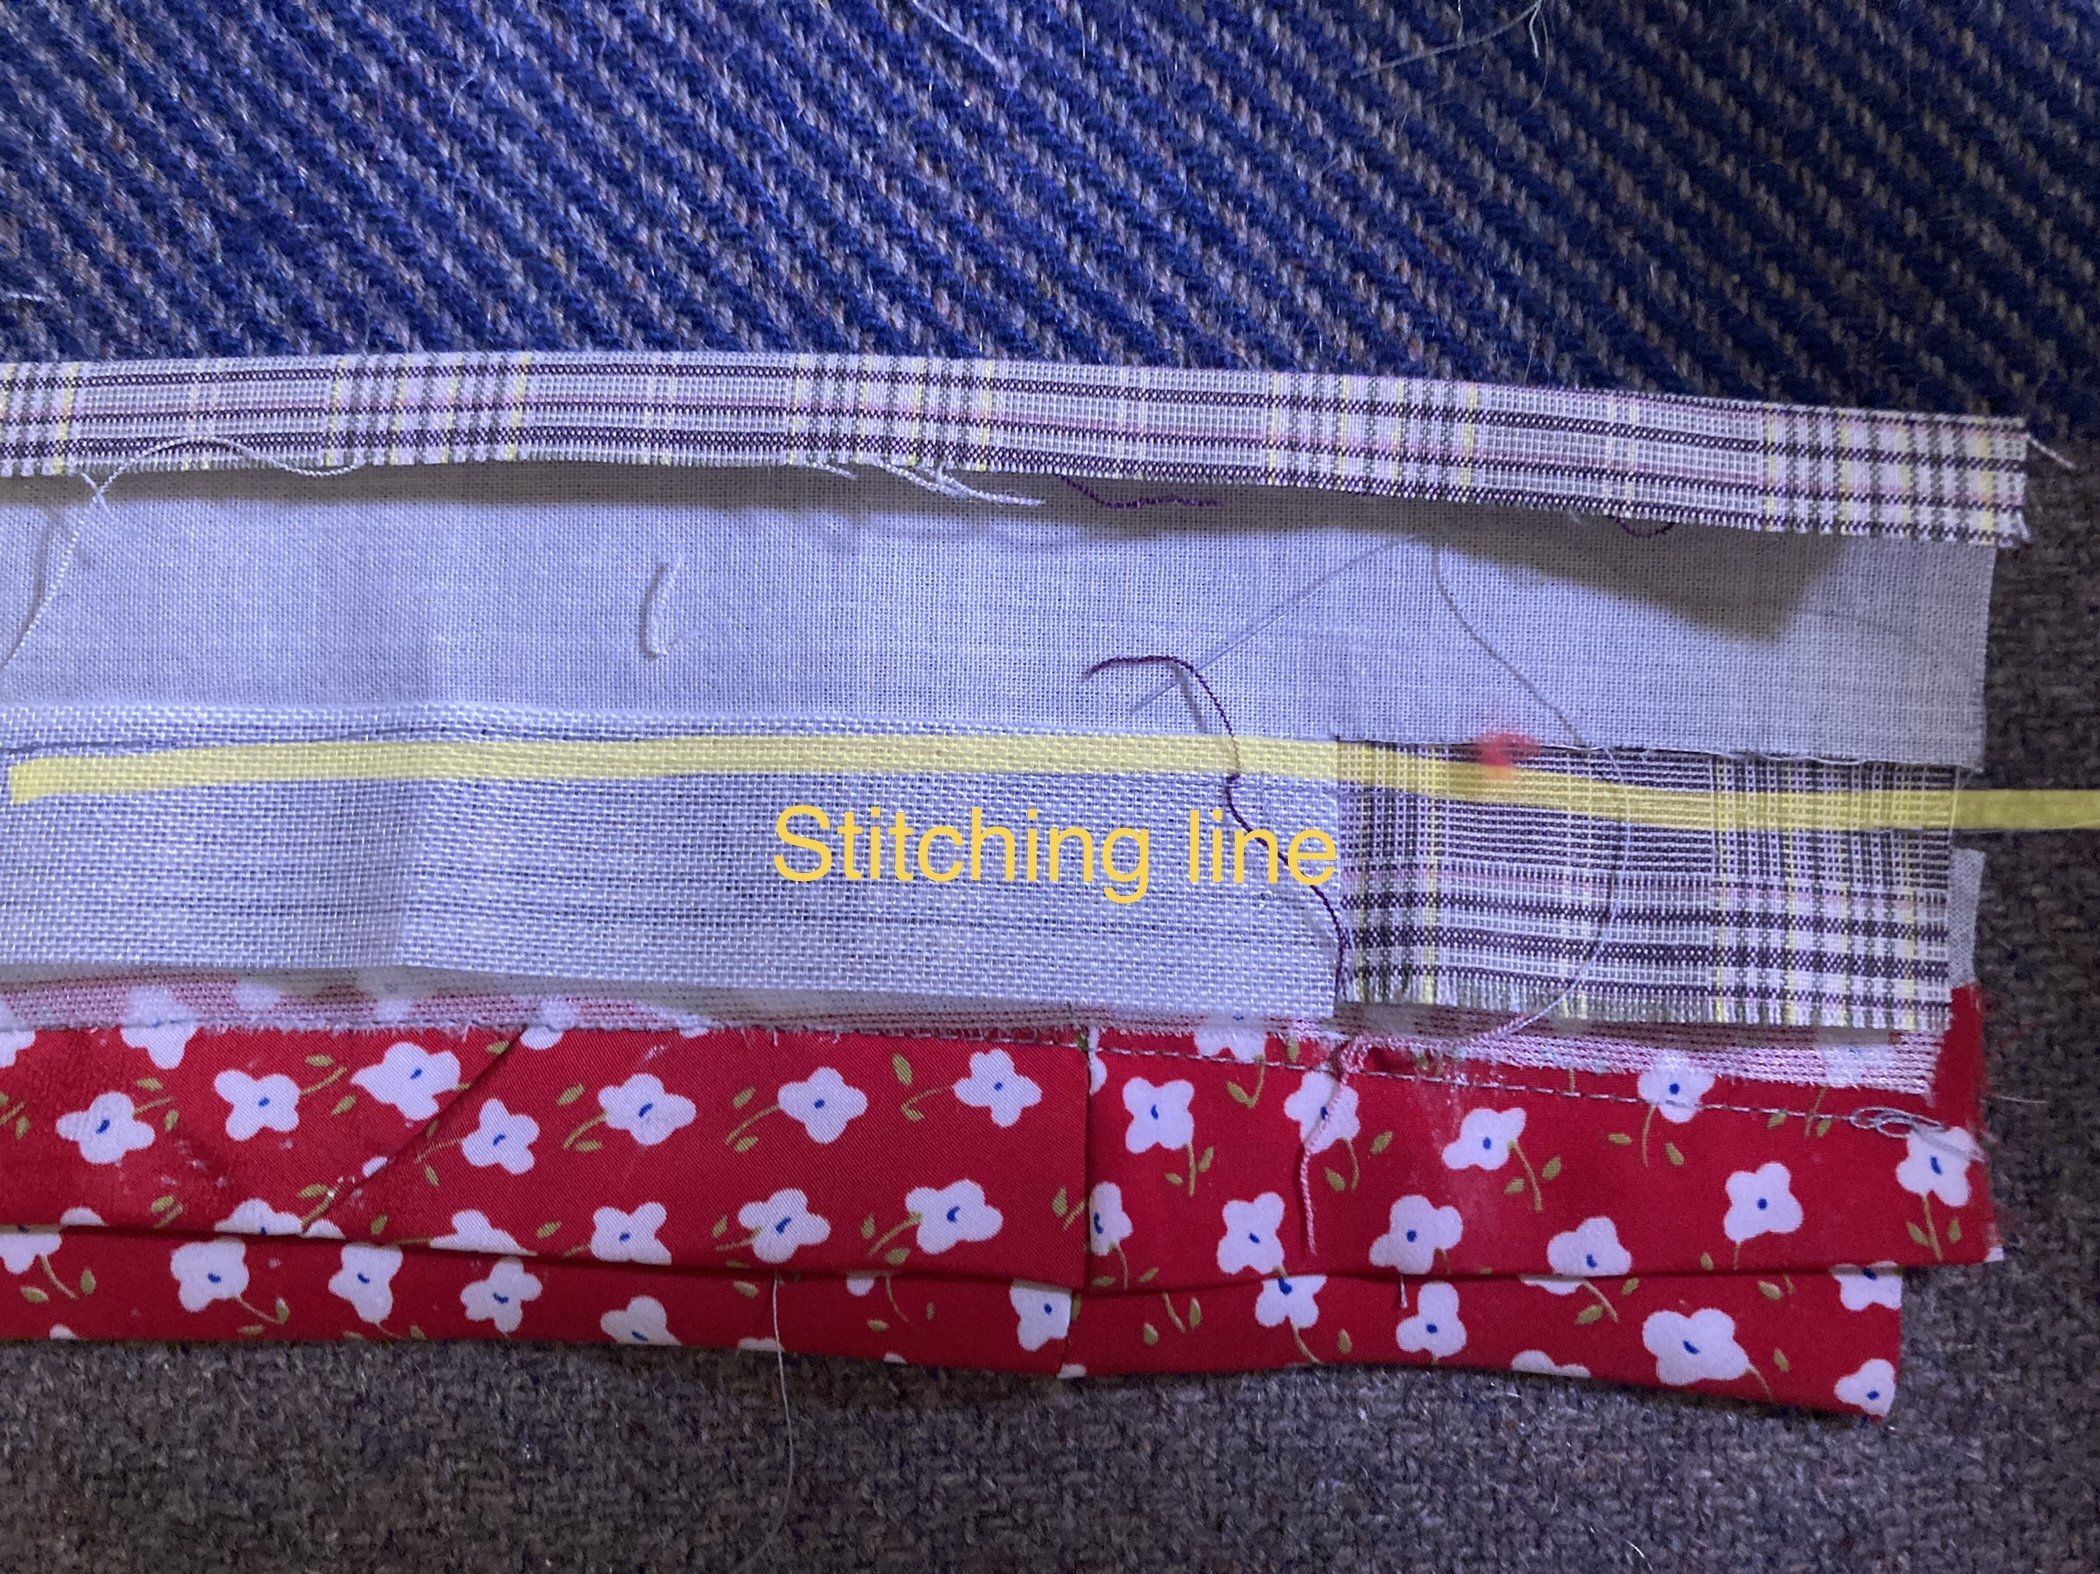
Folded and pressed waistband facing and curtains
Place the wider (outer) curtain so that the cut edges are aligned with the ¼” edge folded up edge of the facing
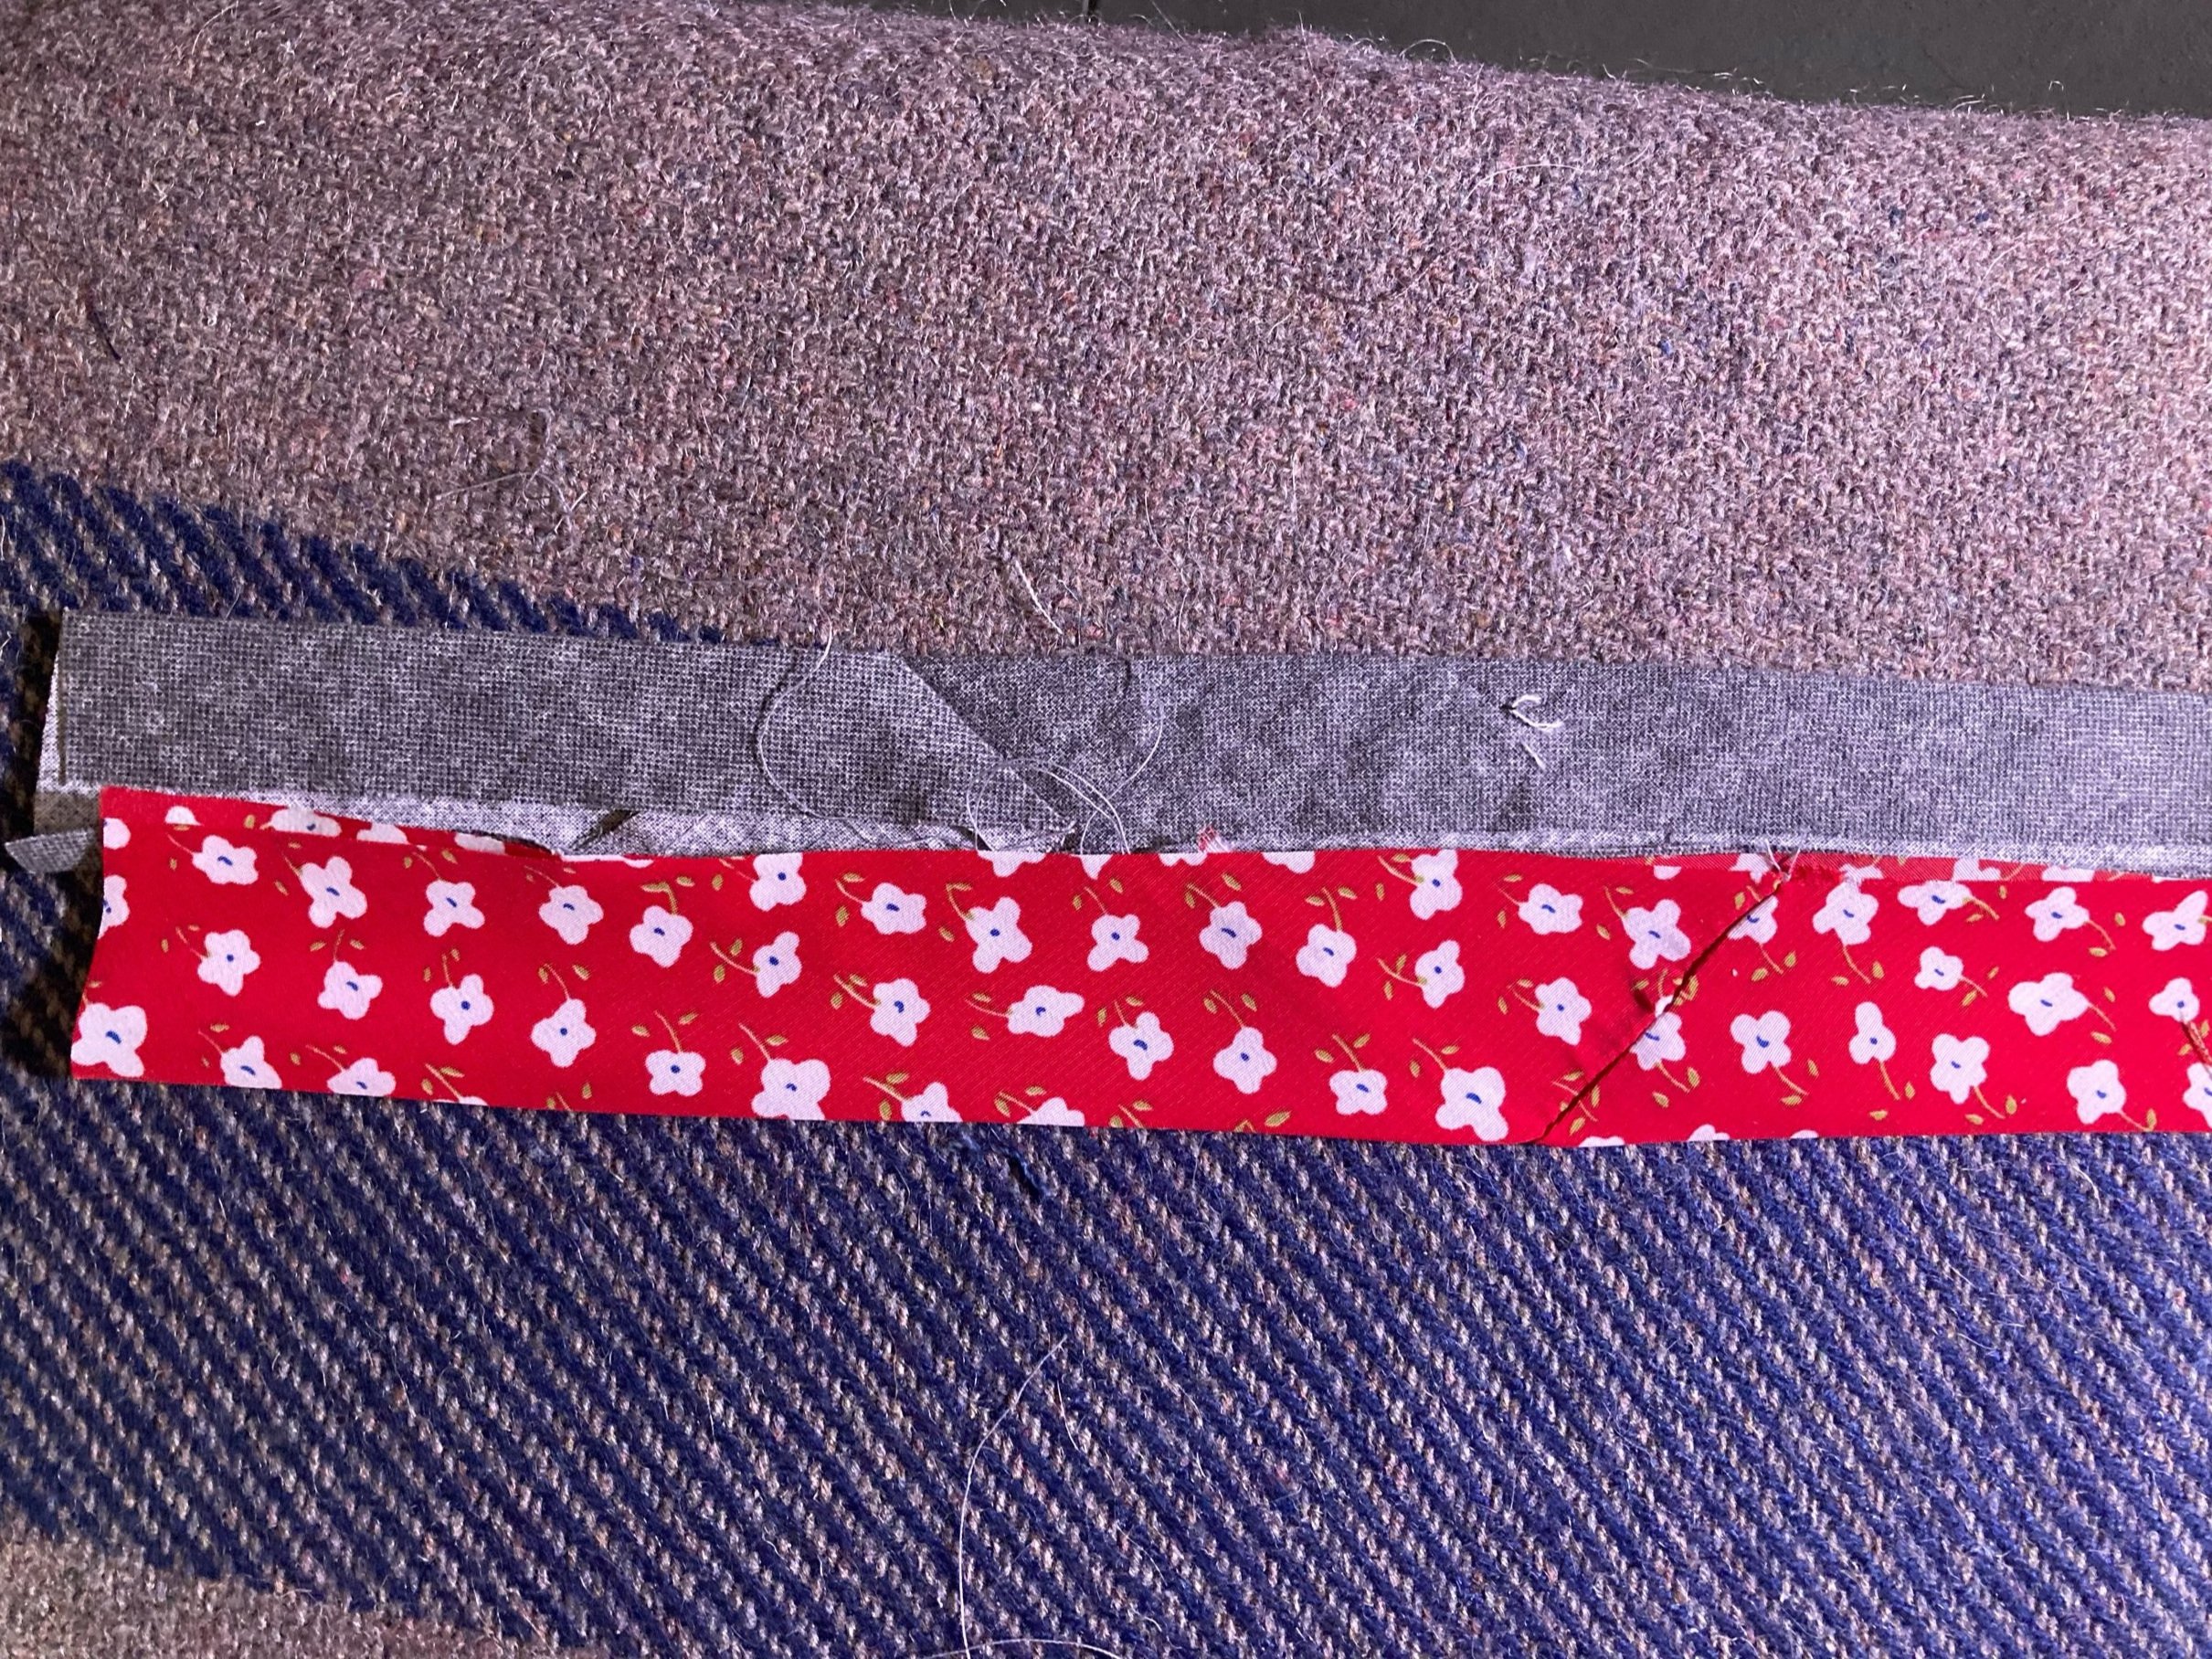
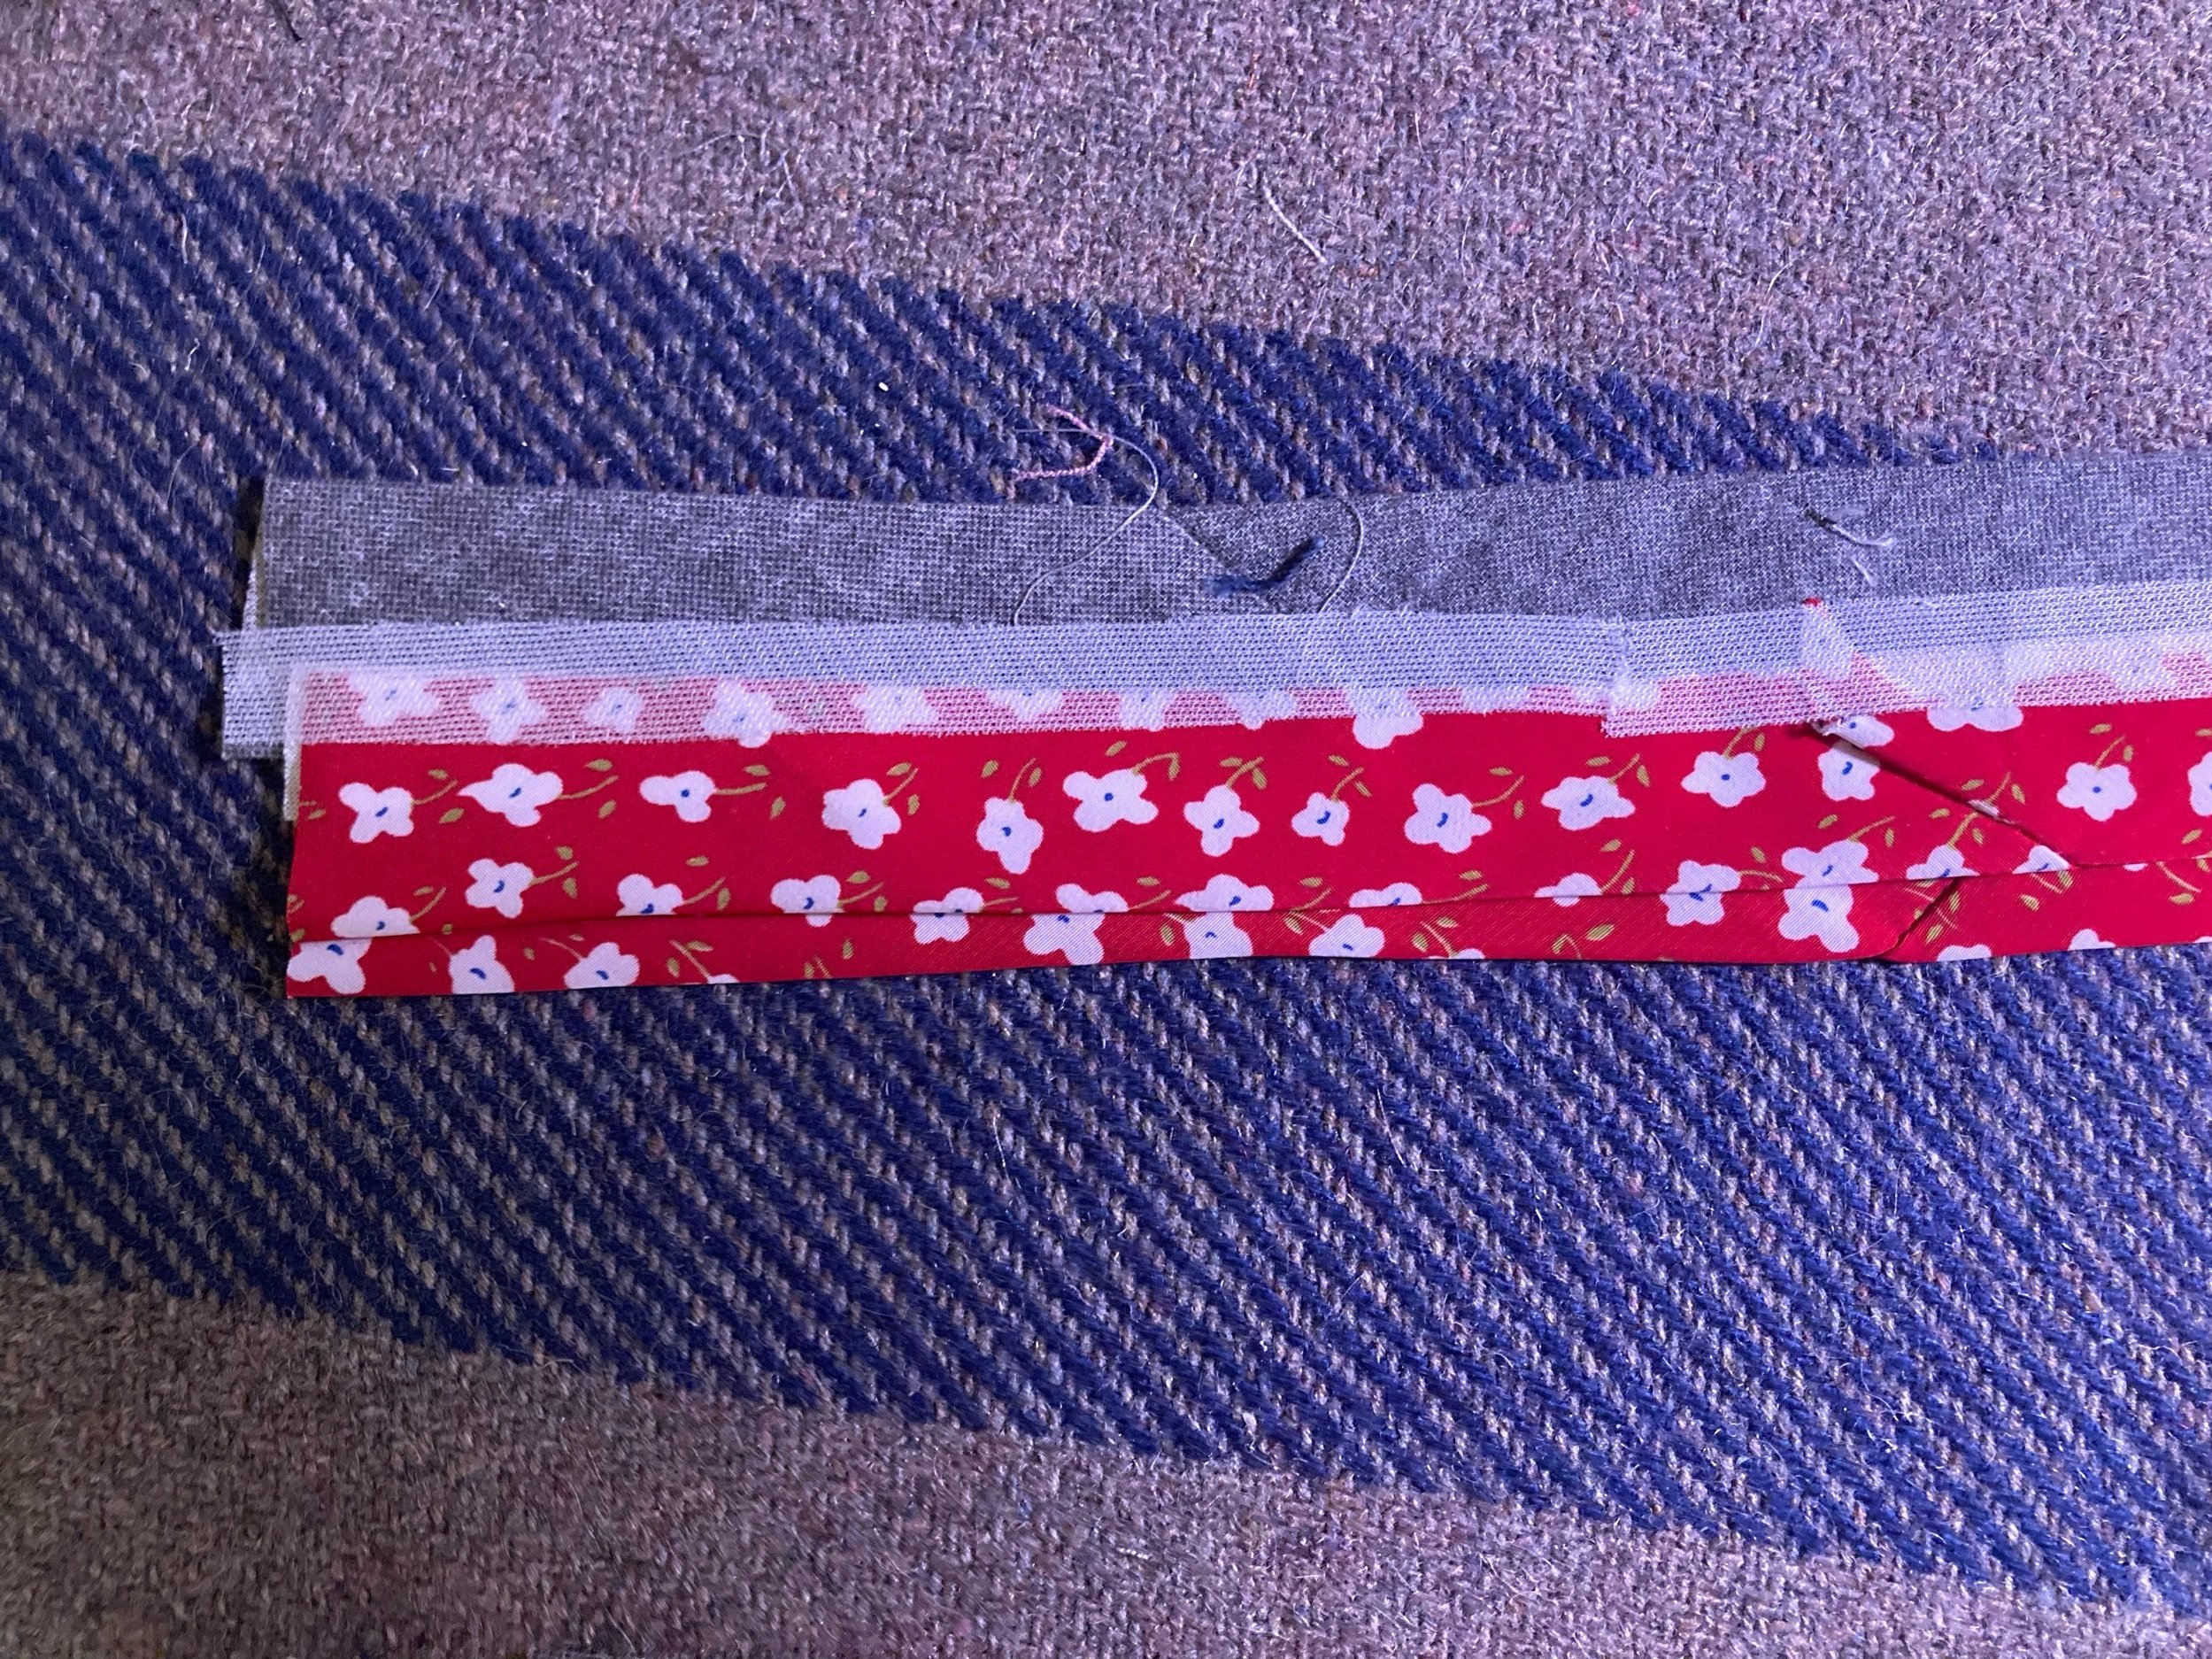
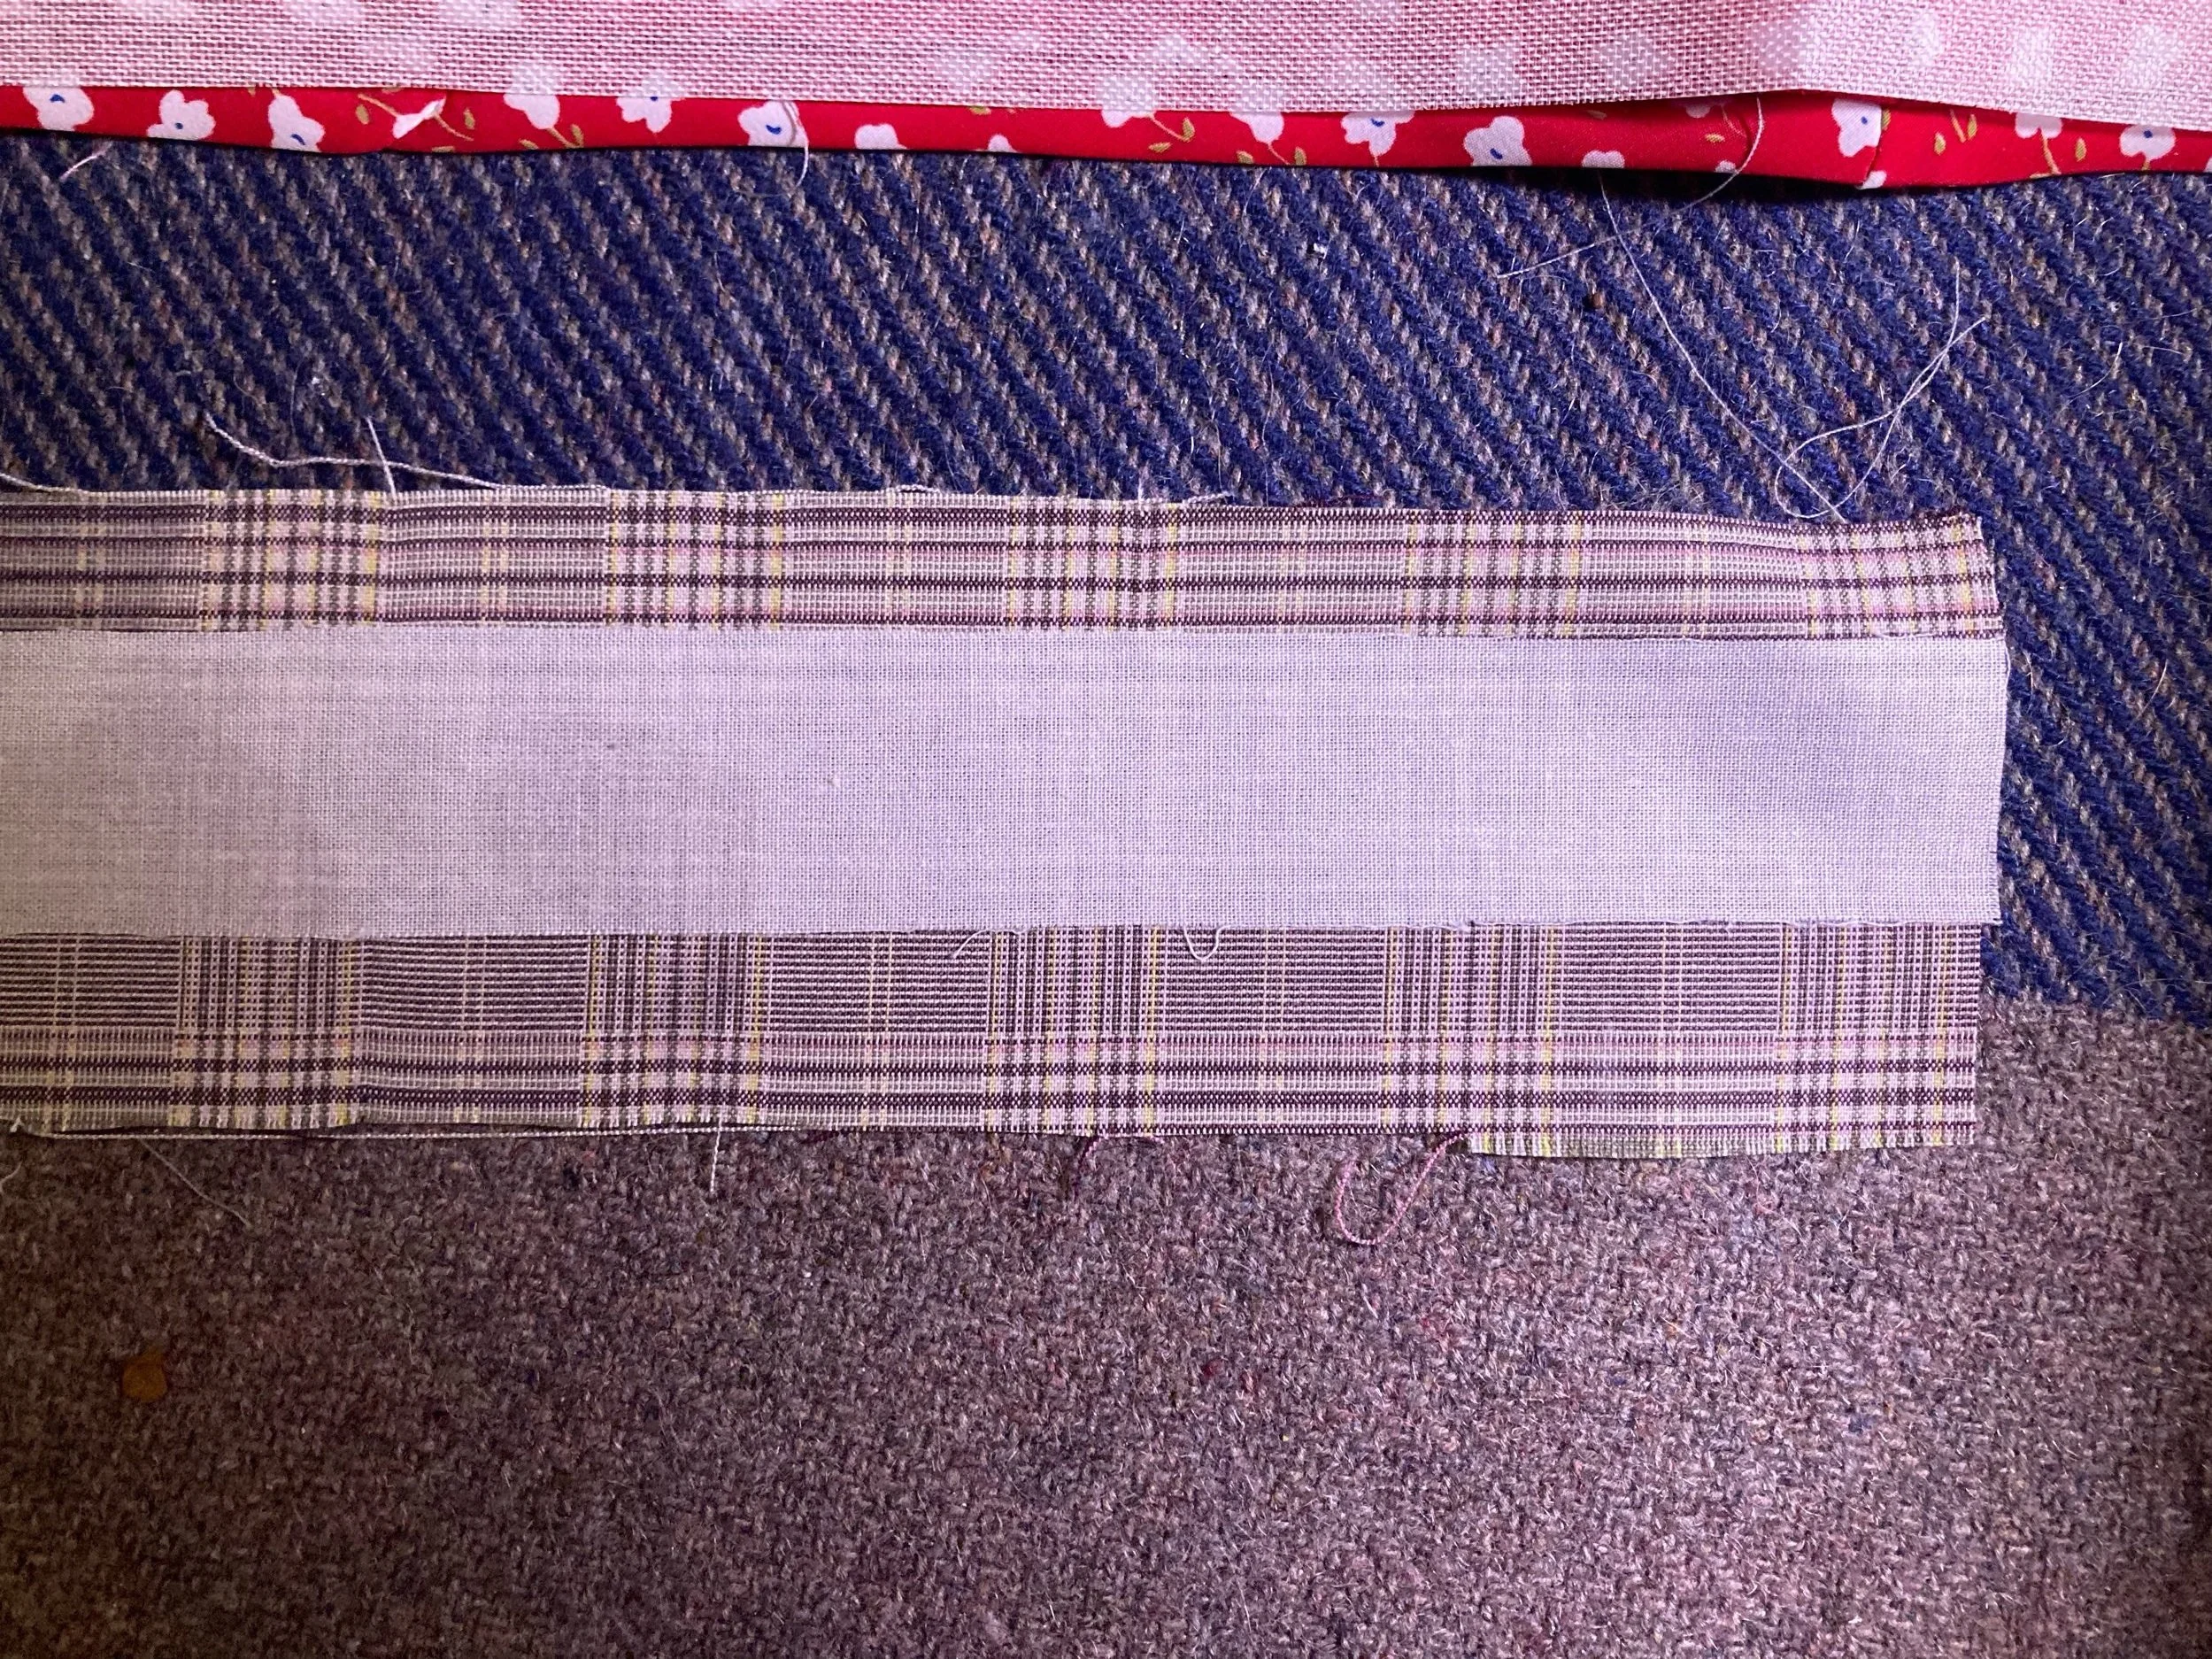
Tuck bias cut inner waistband canvas/interfacing in under the ¾” edge of the waistband, with top edge of interfacing aligned with folded edge. This will overlap the outer curtain.
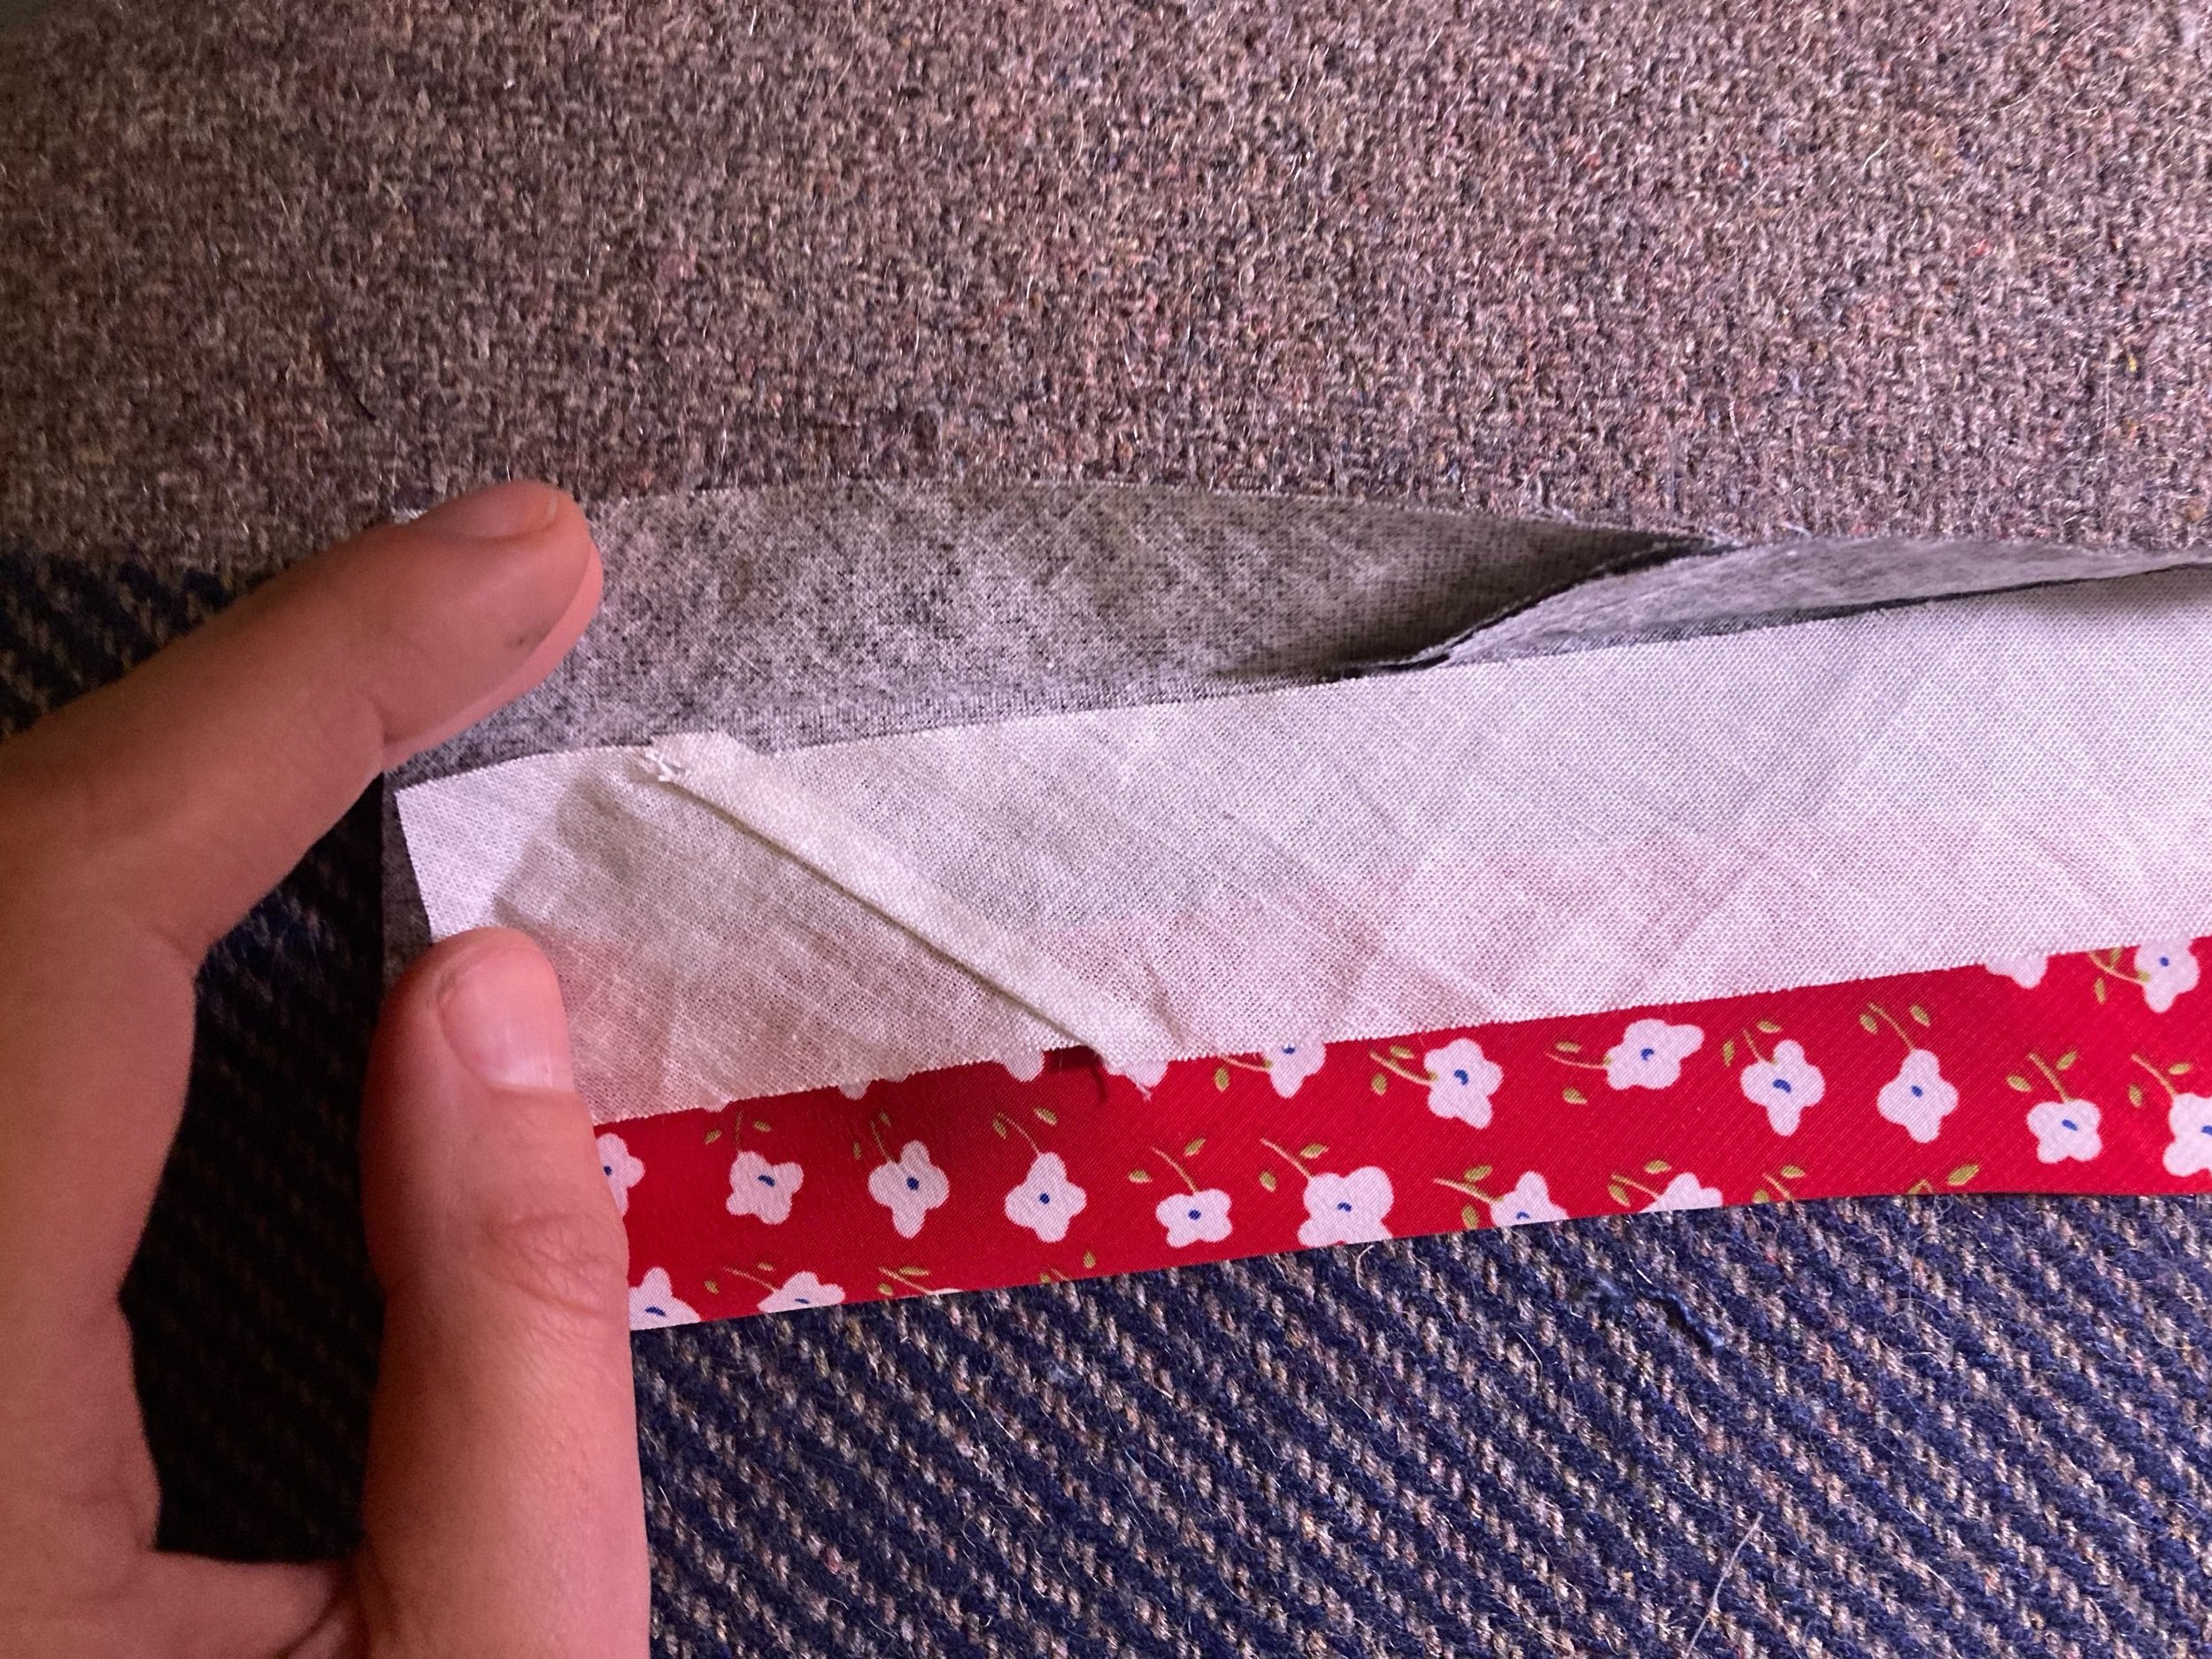
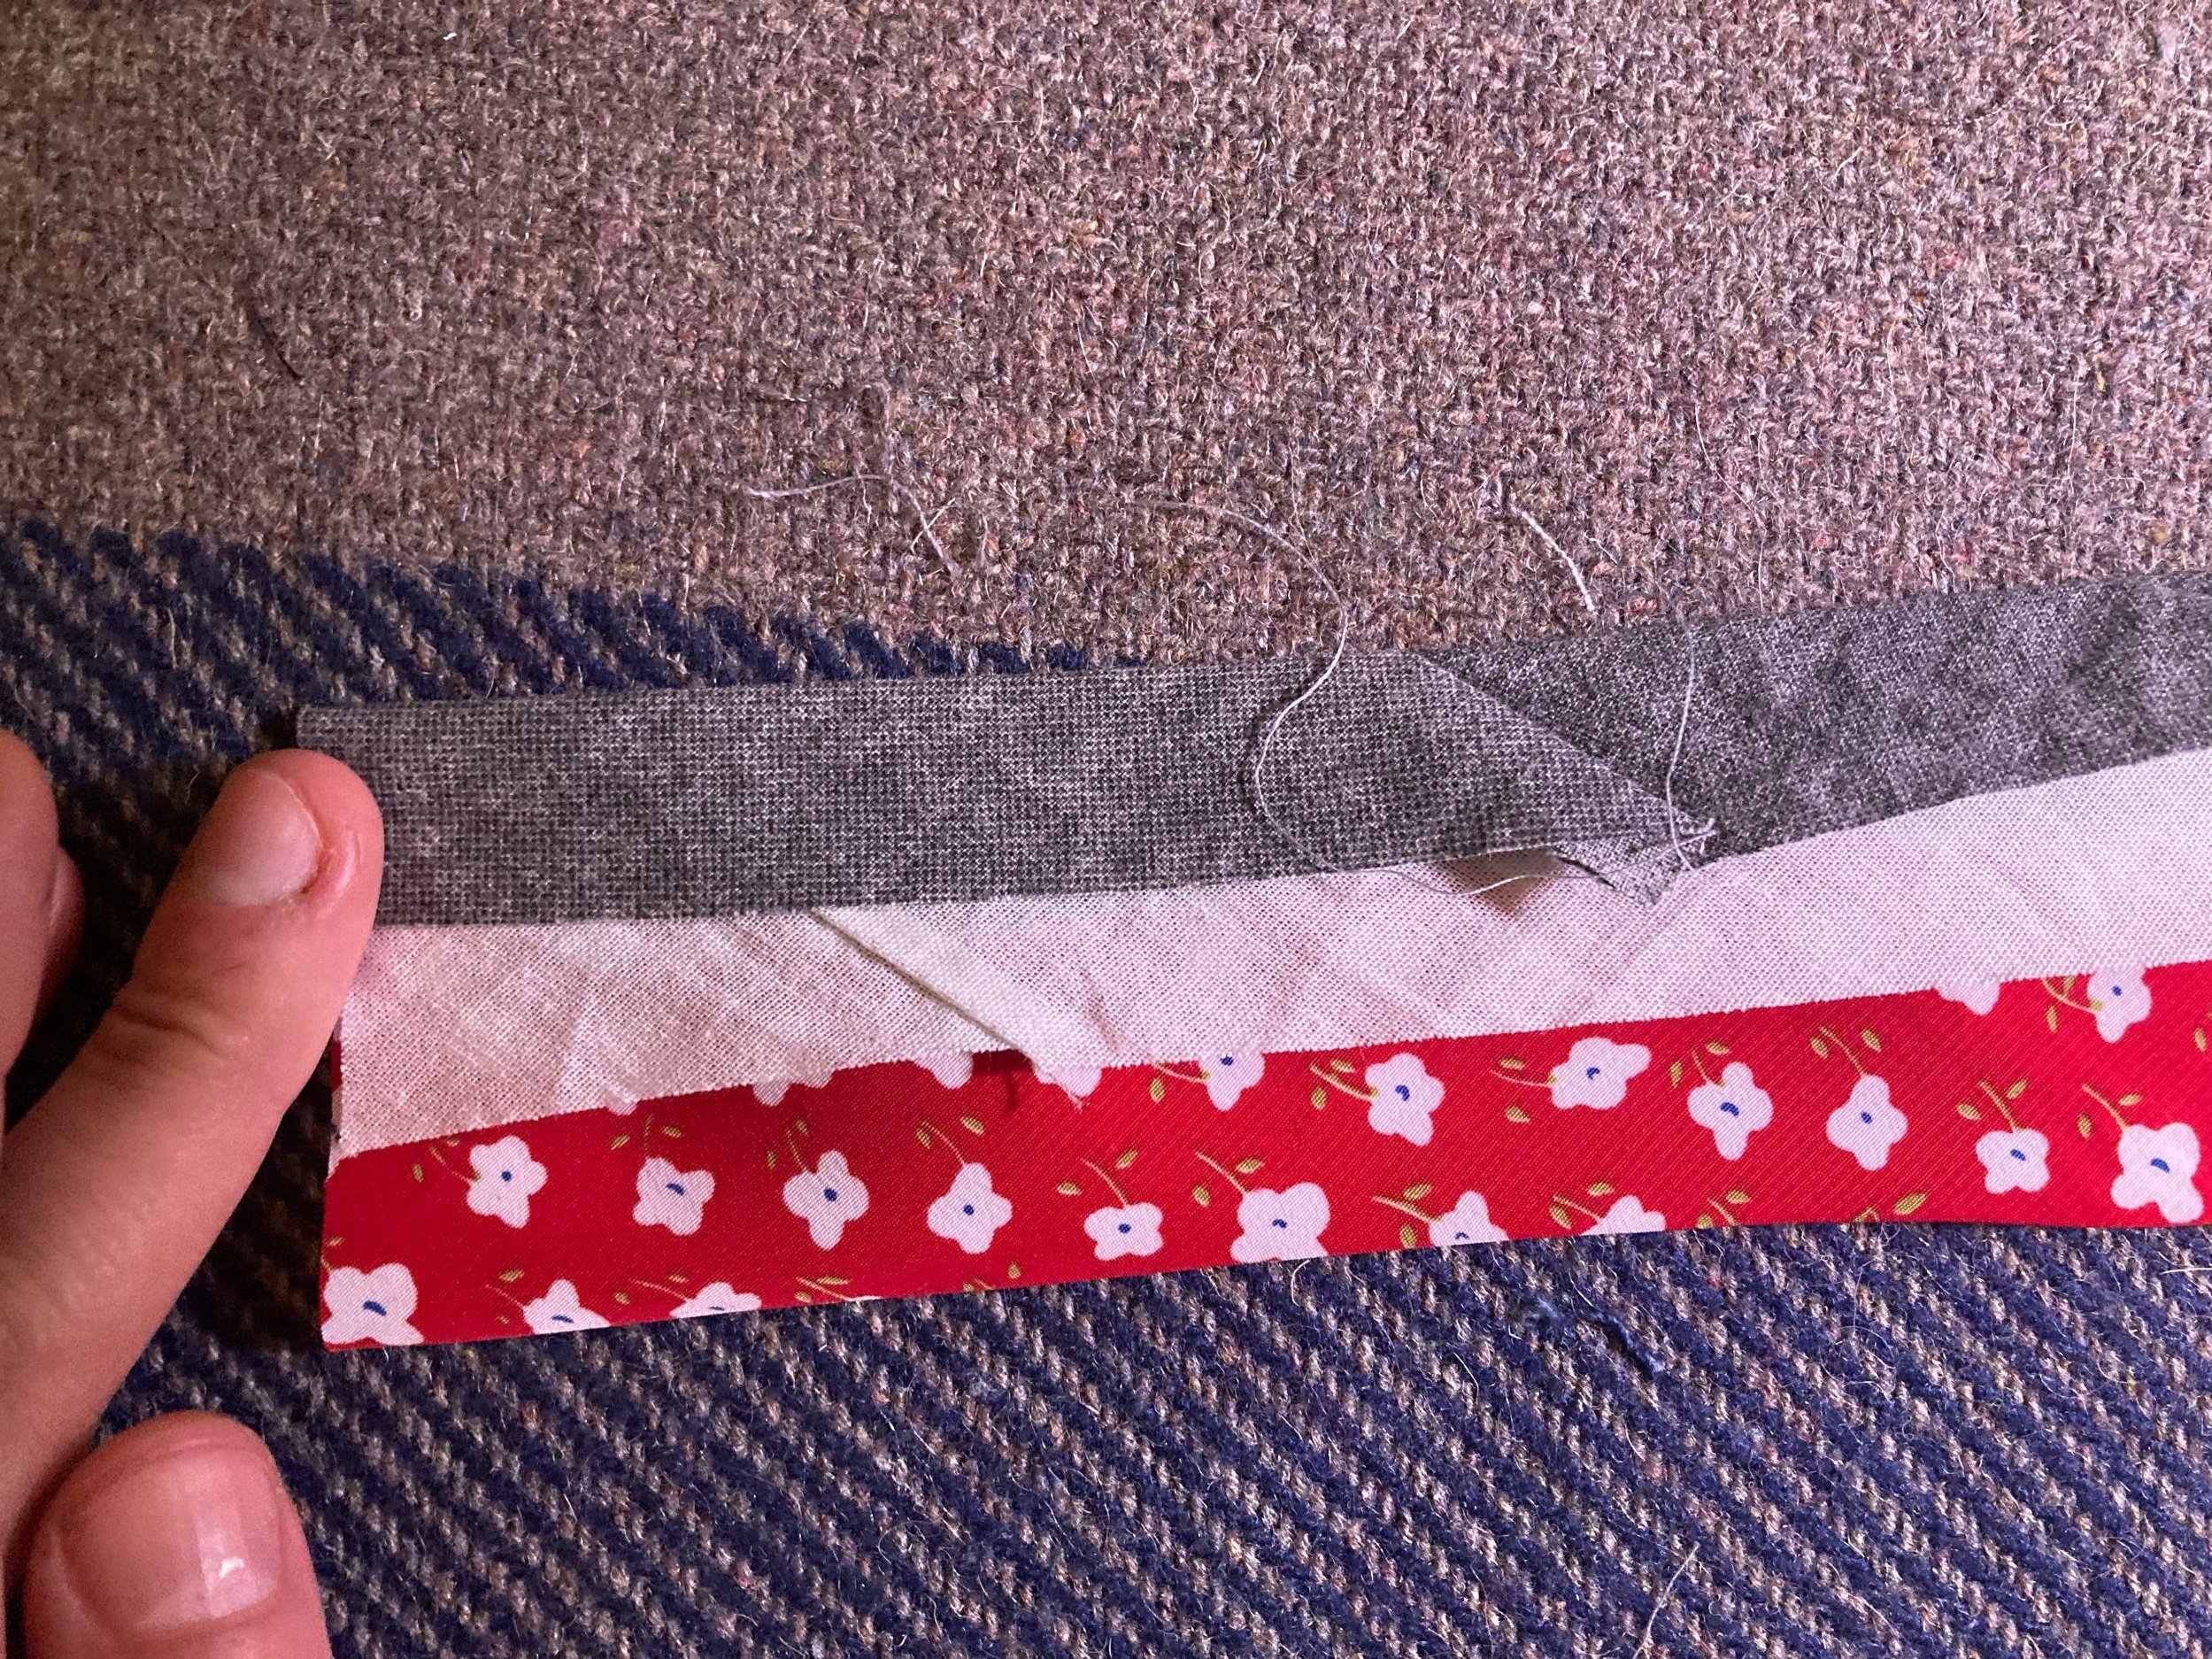
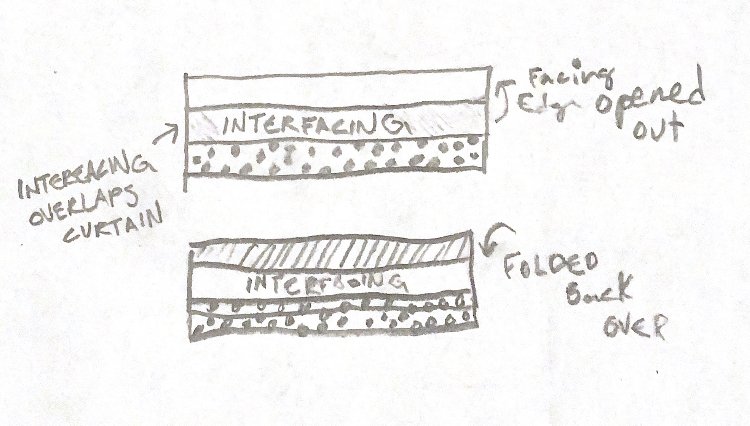
Place the thinner (inner) curtain piece encasing the inner waistband canvas, aligning cut edge with cut edge of wider curtain.
At this point, if you flip the unit, all you should see is the outer curtain and waist band facing looking real clean. Flipping the unit also made it come apart for me, but also let me fix up some of my alignments.
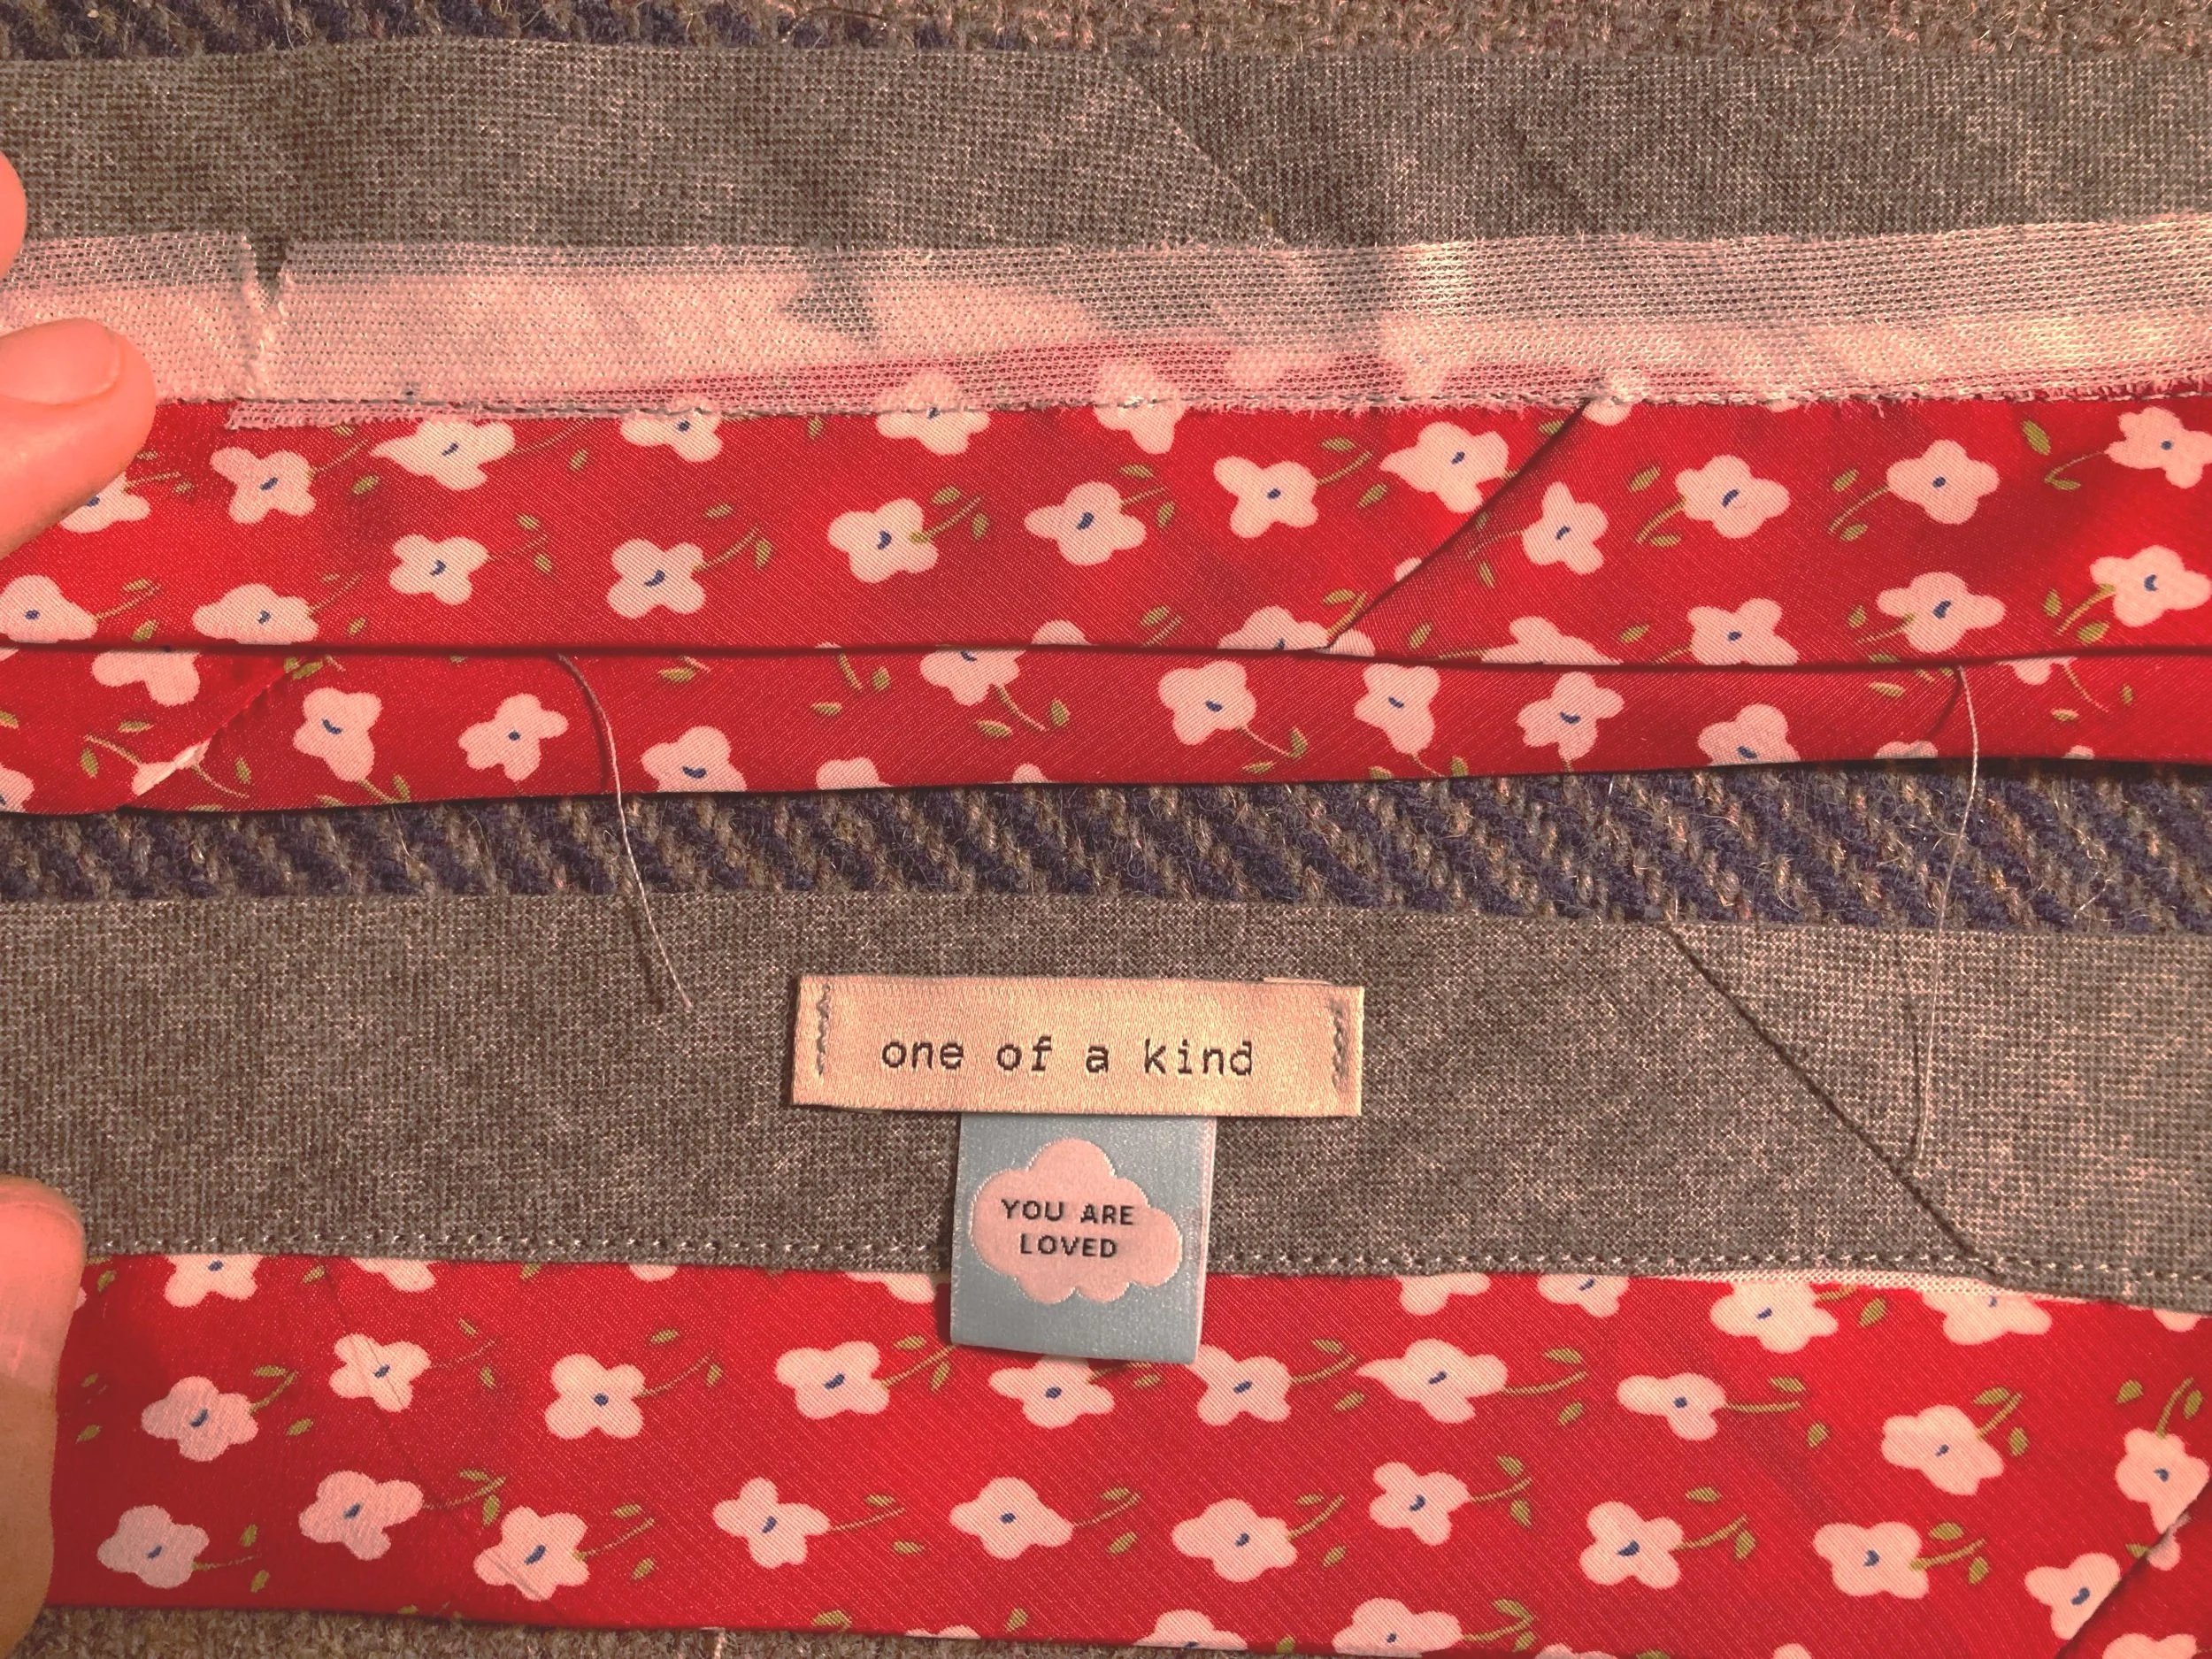
Because my inner waistband canvas was a fusible interfacing, i pressed with steam and heat here to fuse the unit.
The RTW pants used a super lightweight nonfusible interfacing to seal the facing/inner canvas/inner curtain together lightly. I used a lightweight knit.
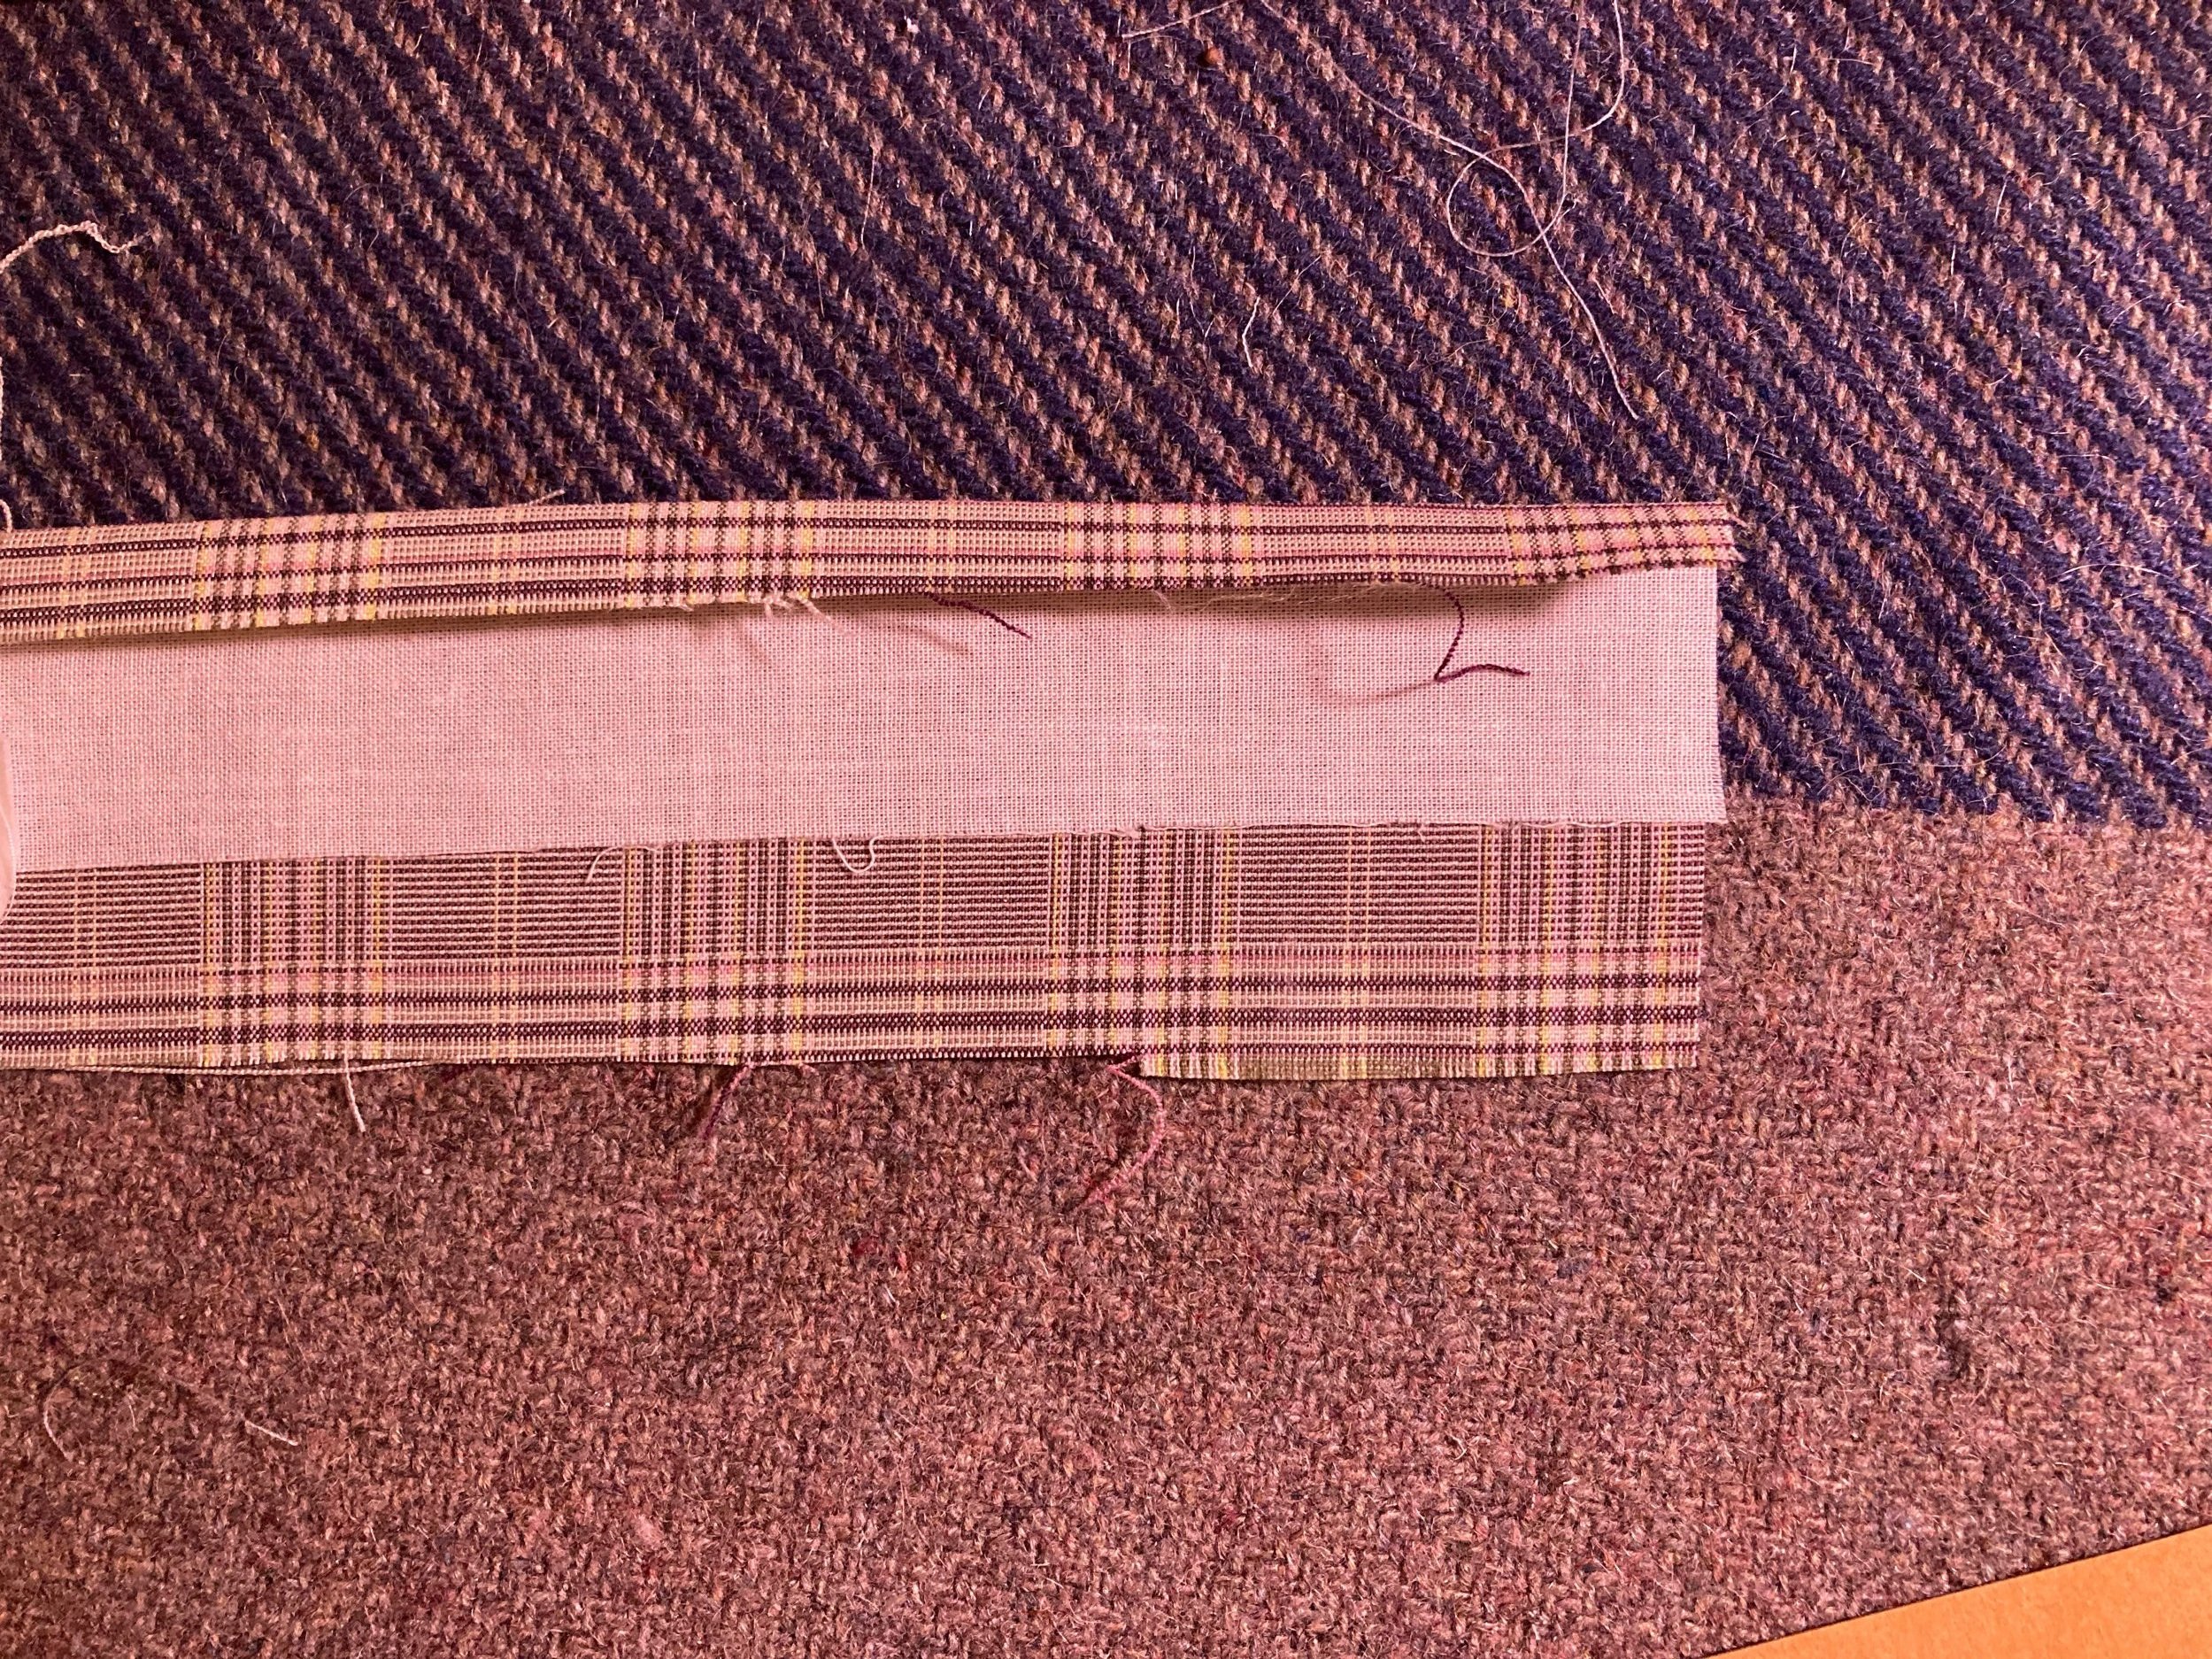
And now, I topstitch the entire unit through the facing, a scant 1/8” from the bottom edge of facing.
Attaching curtain unit to waistband
This is a good time to mark your CB on each piece so you don’t lose track of it. Or at least, make sure that the right piece, which is a bit longer, winds up on the right side.
Apply fusible to center of wrong side of waistband piece. Seam allowance on “top” edge is about a ½” and should line up with the interfacing. Press the “top” edge down, using interfacing as a guide.
Press up lower edge, using interfacing as a guide.
On the RTW pair, the next steps are done in one but I basted in my ban-rol for more security and ease. The ban rol should be aligned ½” short of CB and CF, the idea (I think, lol) being that it's providing ample structure but not adding bulk to any of the seams. It gets basted into the larger “lower” seam, lined right up to the pressed-in fold.

Curtain unit and exterior waistband unit shown with CB marked and Banrol aligned 1/2” short of CB/CF
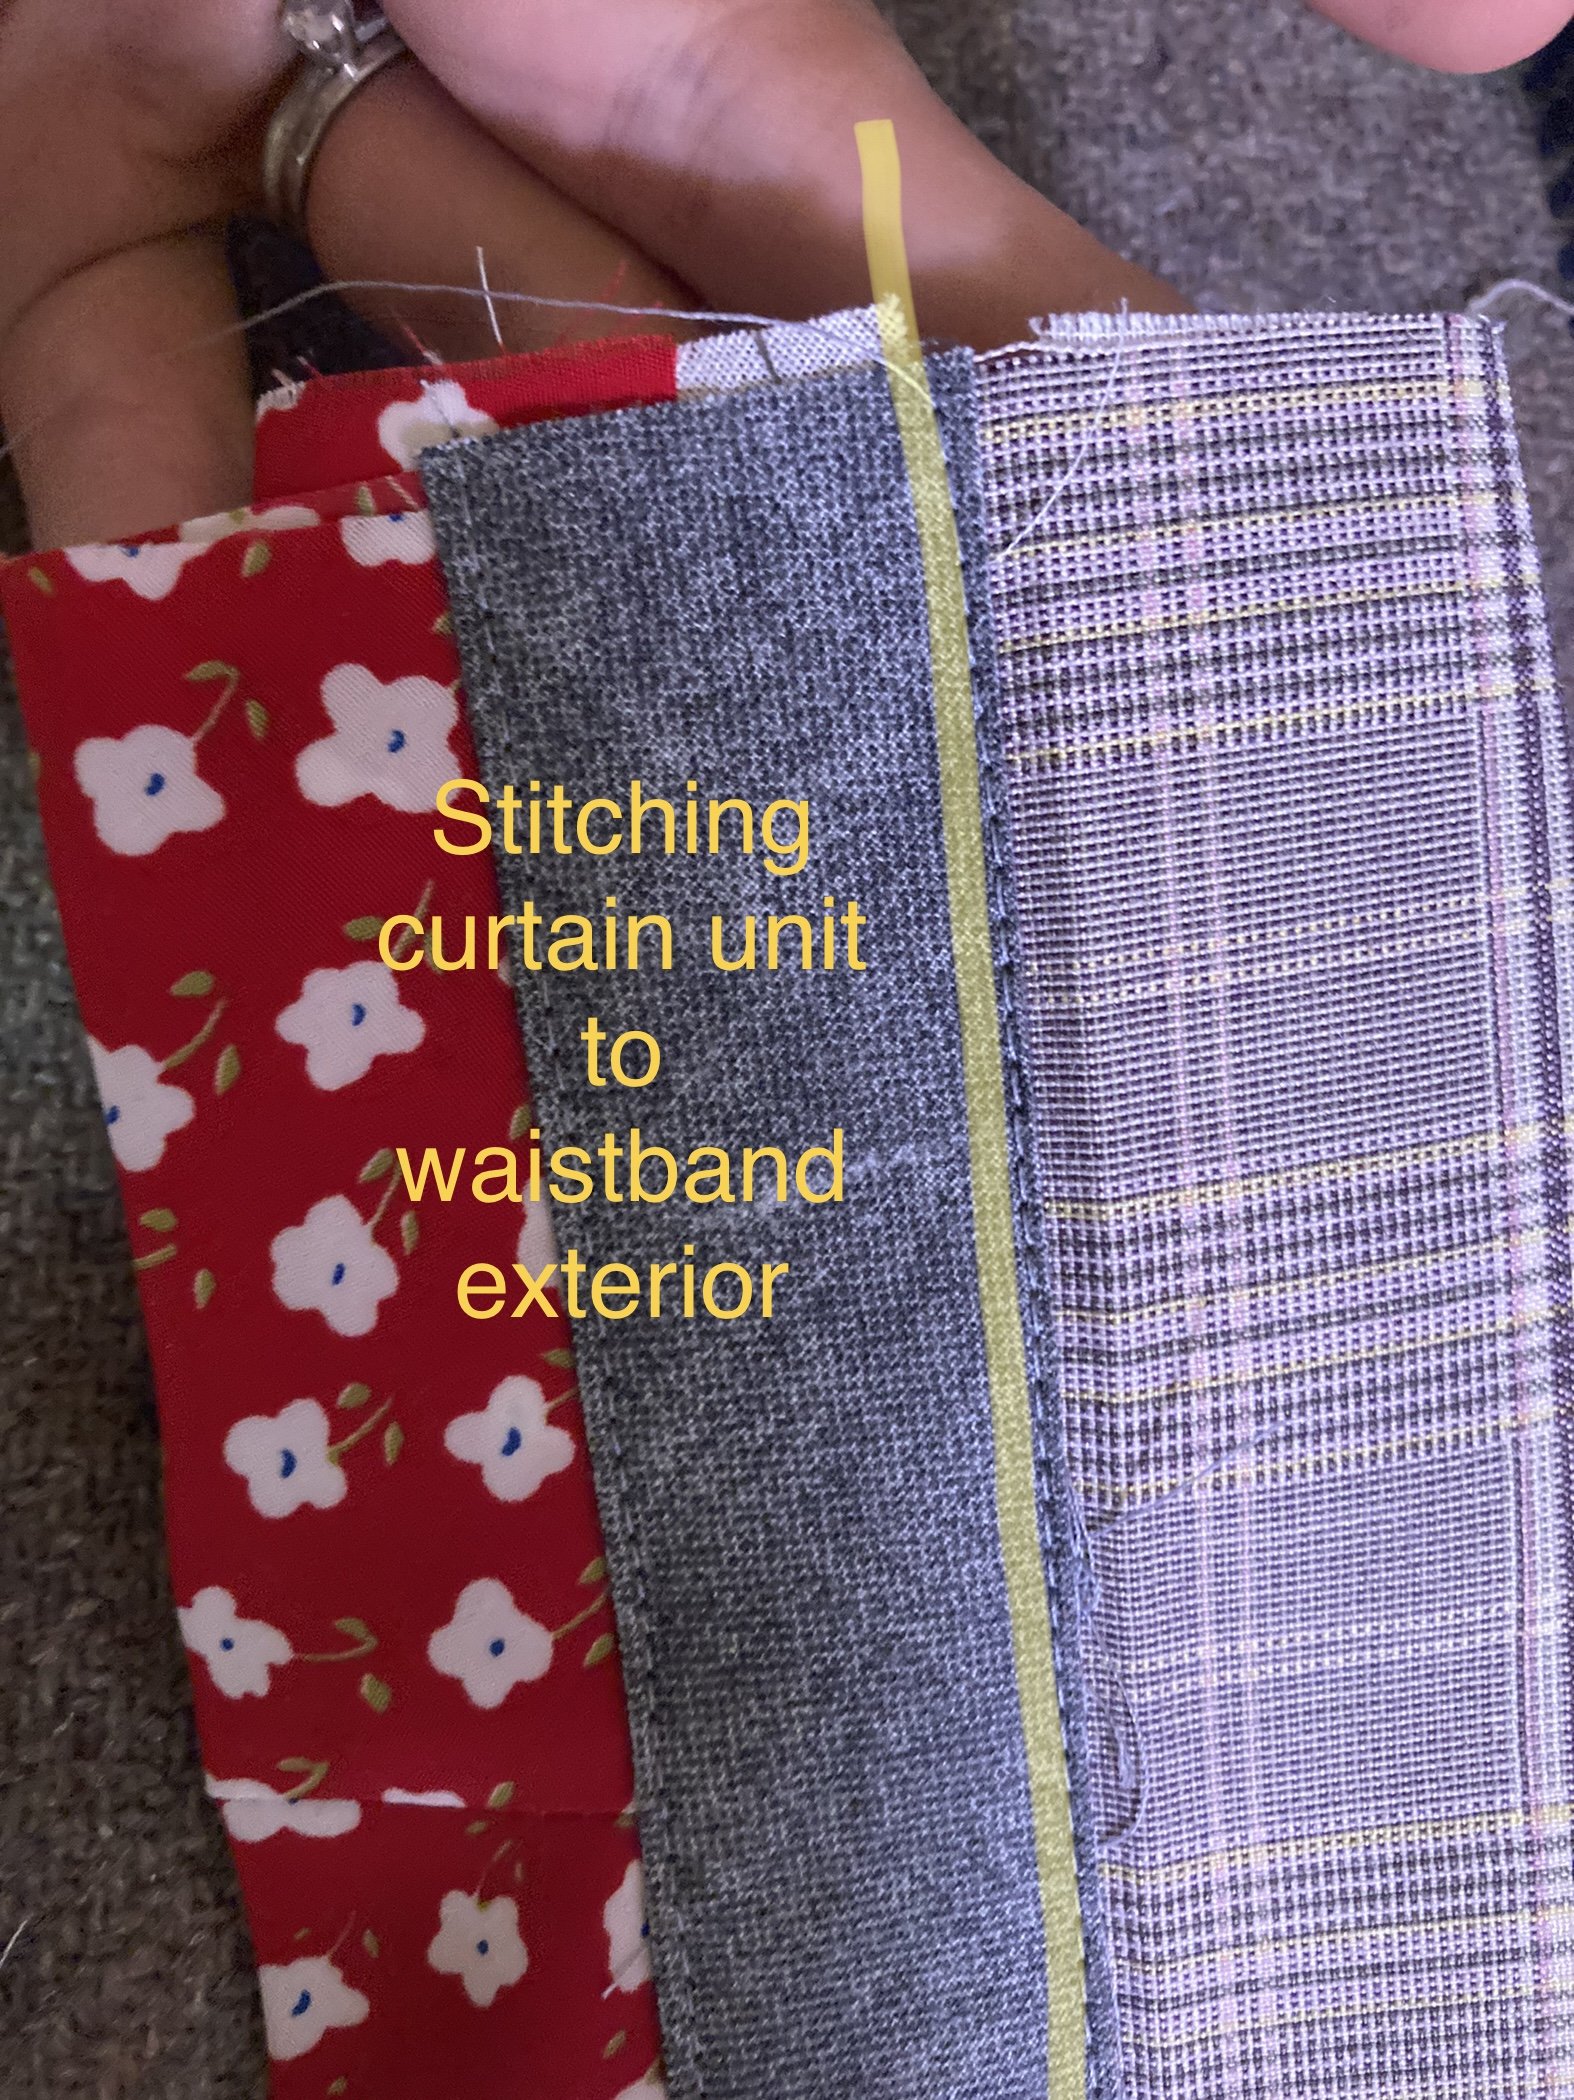
Now sew the waistband exterior to the curtain, aligned so the facing is a scant ⅛” from the fold, with wrong side of facing to right side of waistband. This is kind of tricky to describe (sorry!) but this is the step at which the waistband becomes a waistband, so if it looks like it will be a waistband it’s good. I definitely did a too-big ⅛” on my first waistband and that causes some alignment issues in getting the whole unit cleanly attached. The idea is just to not have any risk of the facing peeking out, but leaving enough clearance on the other end that the larger curtain will get caught in stitching when you secure the waistband but nothing else.
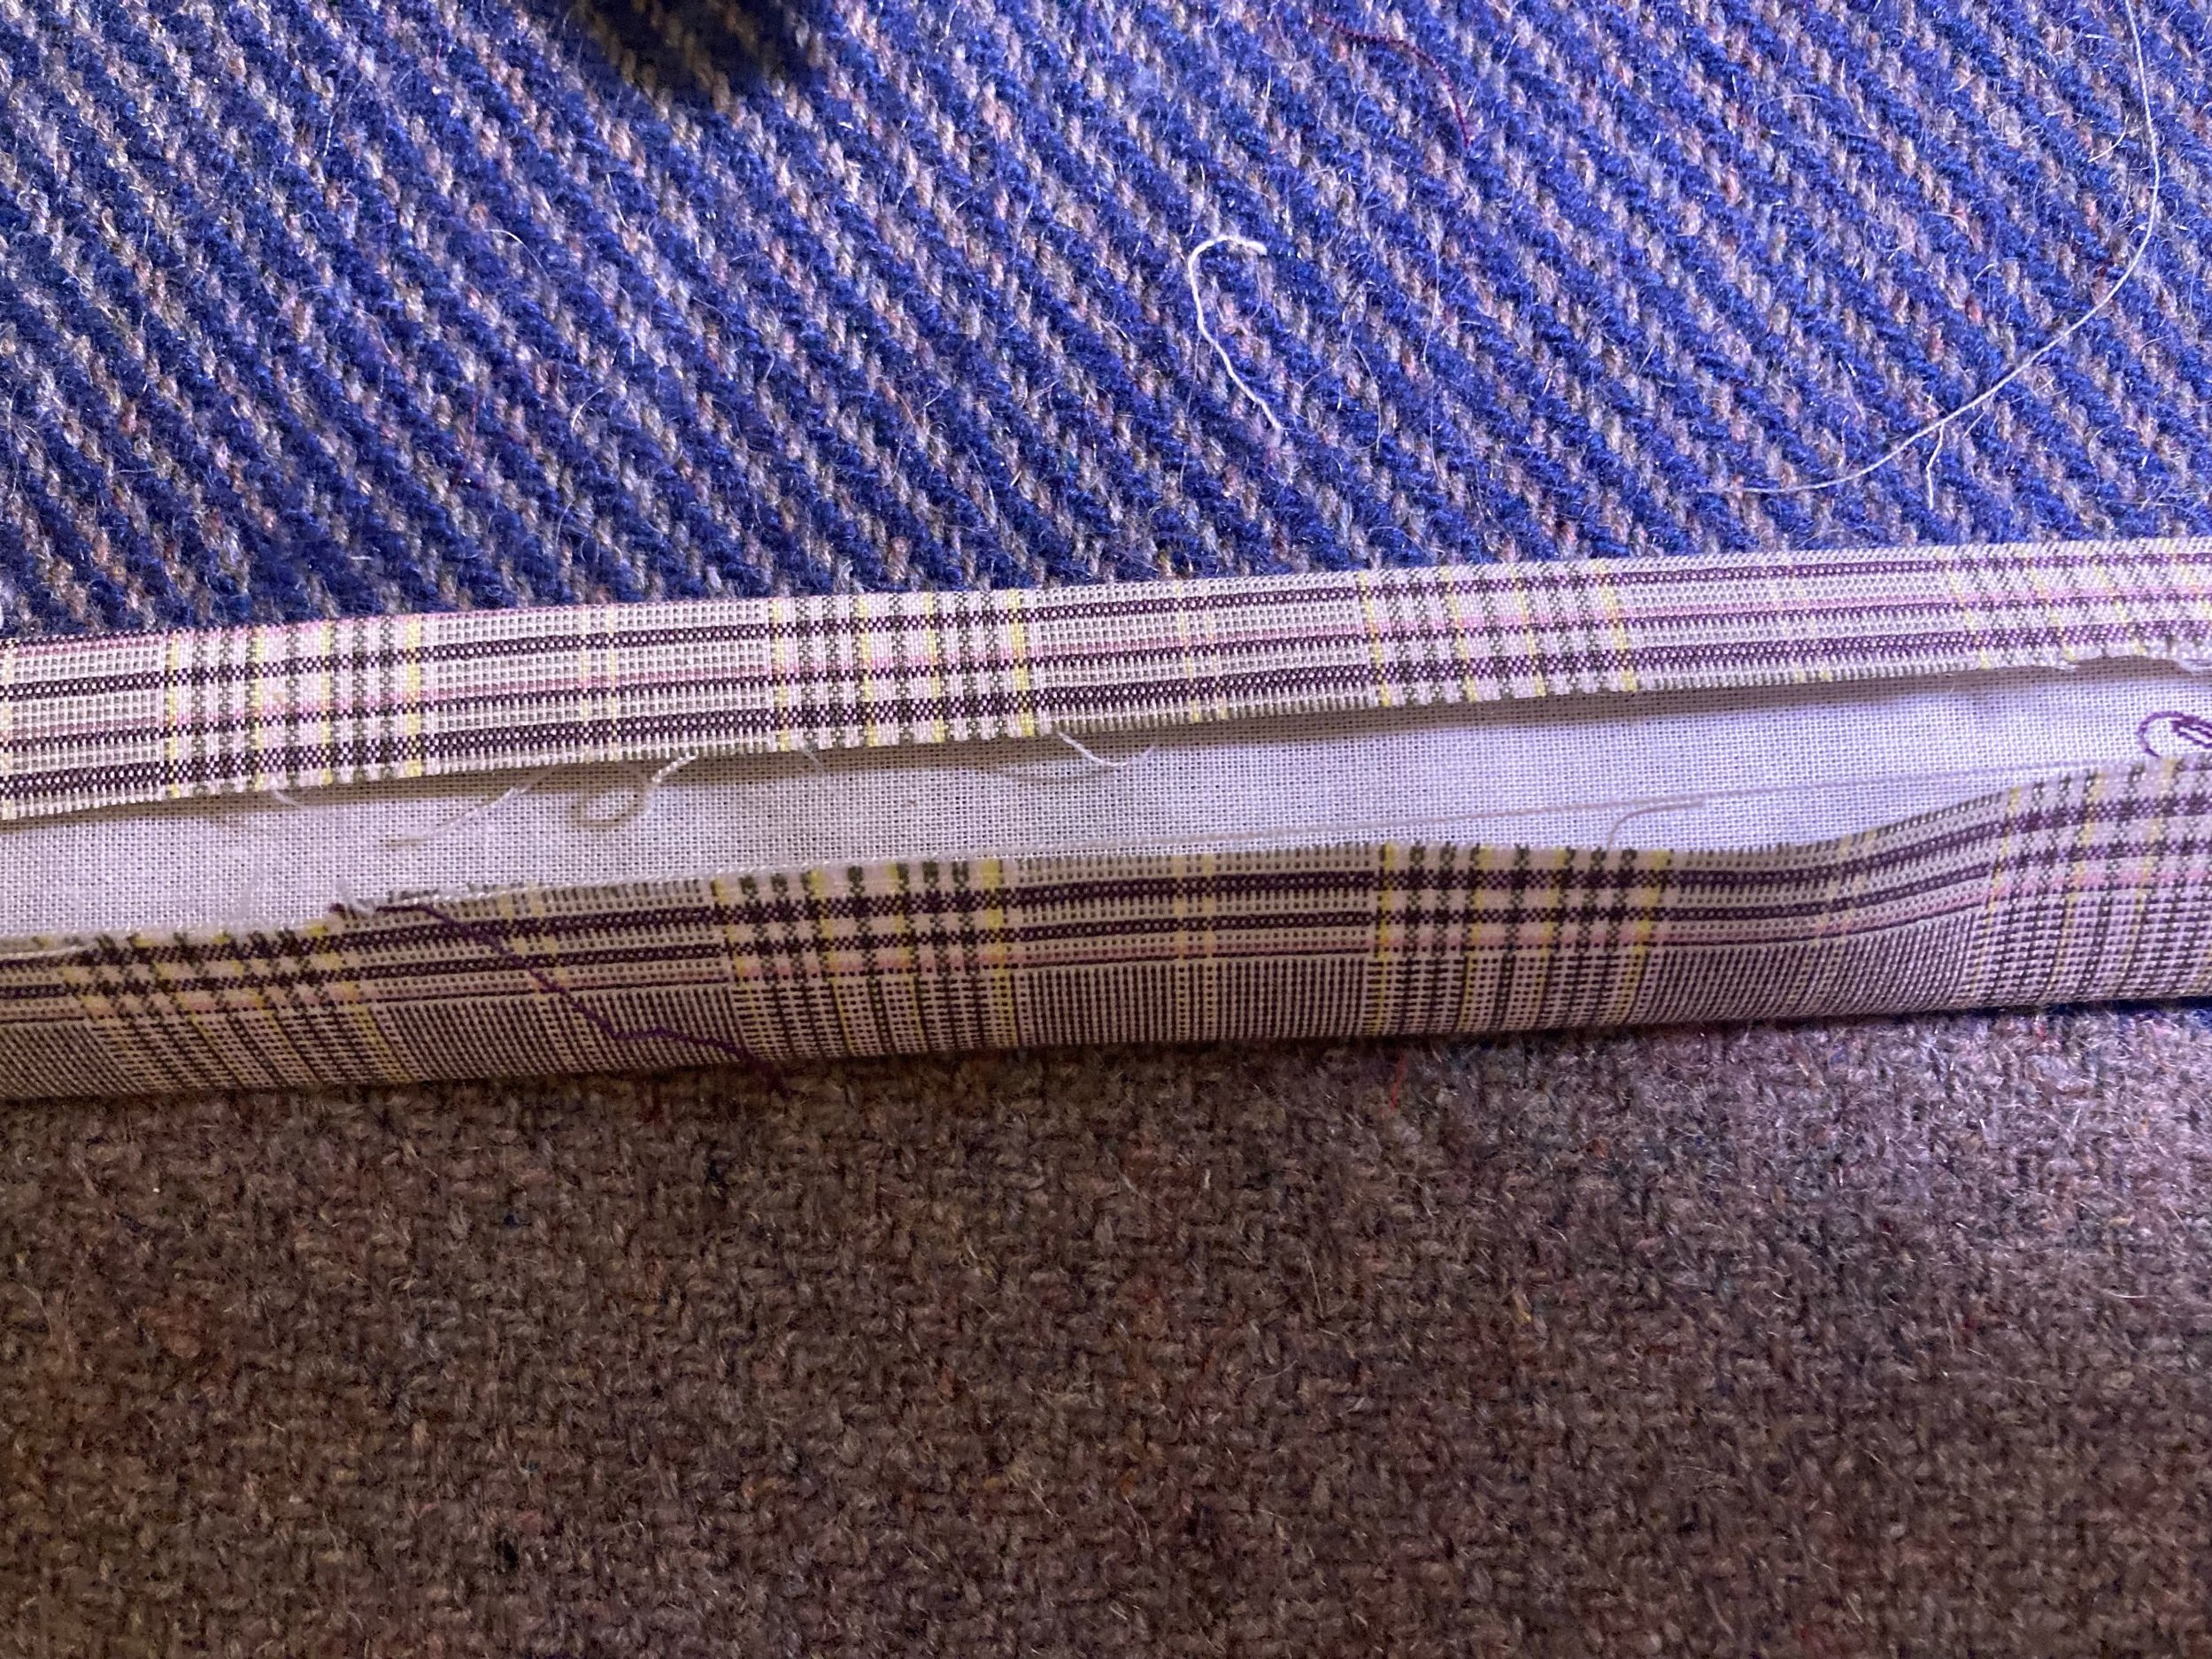
To that end, press up the inner curtain to get it out of your way for attaching to the pants.

Curtain pressed up to prepare for stitching to outer wasitband
Attaching the waistband to the pants
I did this in the flat. That is, pant legs and back had not been sewn up, but the zipper unit and side seams had been. In the RTW pants, and next time, I will attach the waistband unit in the flat and then build the zipper unit, as the zipper shield then can enclose the right hand side of the curtain for a particularly clean finish. I mimicked this despite my order of operations being off, so it has created an unnecessary and ugly seam on the shield.
I also apparently failed to take pictures at this point, presumably because this is where everything felt like attaching a normal waistband. Ugh, sorry.
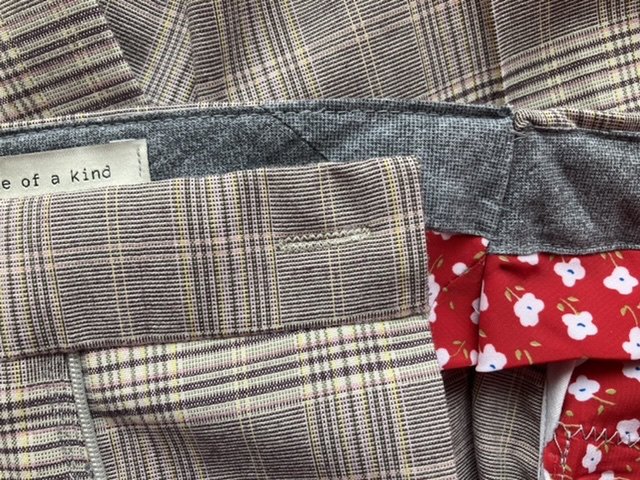
One further note before we get to it, while previously I noted that the facing should be in pocketing, you will see that my pockets are actually made up in the lining fabric. This could be visually confusing, so I am noting it for the few available pictures.
Using the pressed in ½” seam allowance on the “top” (unattached to facing) waistband edge as a guide, connect waistband pieces to pants. It was more reliable to start at CF, so that all the curtain pieces could be aligned just within the edge of the zip. Matching the back edge is not critical given the additional seam allowance present. For the right hand side, the exterior waistband should go the full length of the fly extension, while the curtain only comes slightly under the extension/ to the zip.
Press seam up into waistband. Since you've already pressed the upper fold, the waistband should fall into place with the inner curtain up and out of your way for the next step. Photo below is after the unit has been stitched down, but still demonstrates what we should be looking at now.
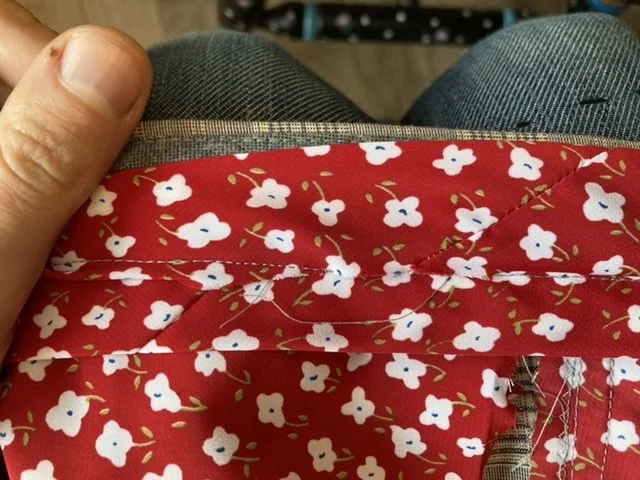
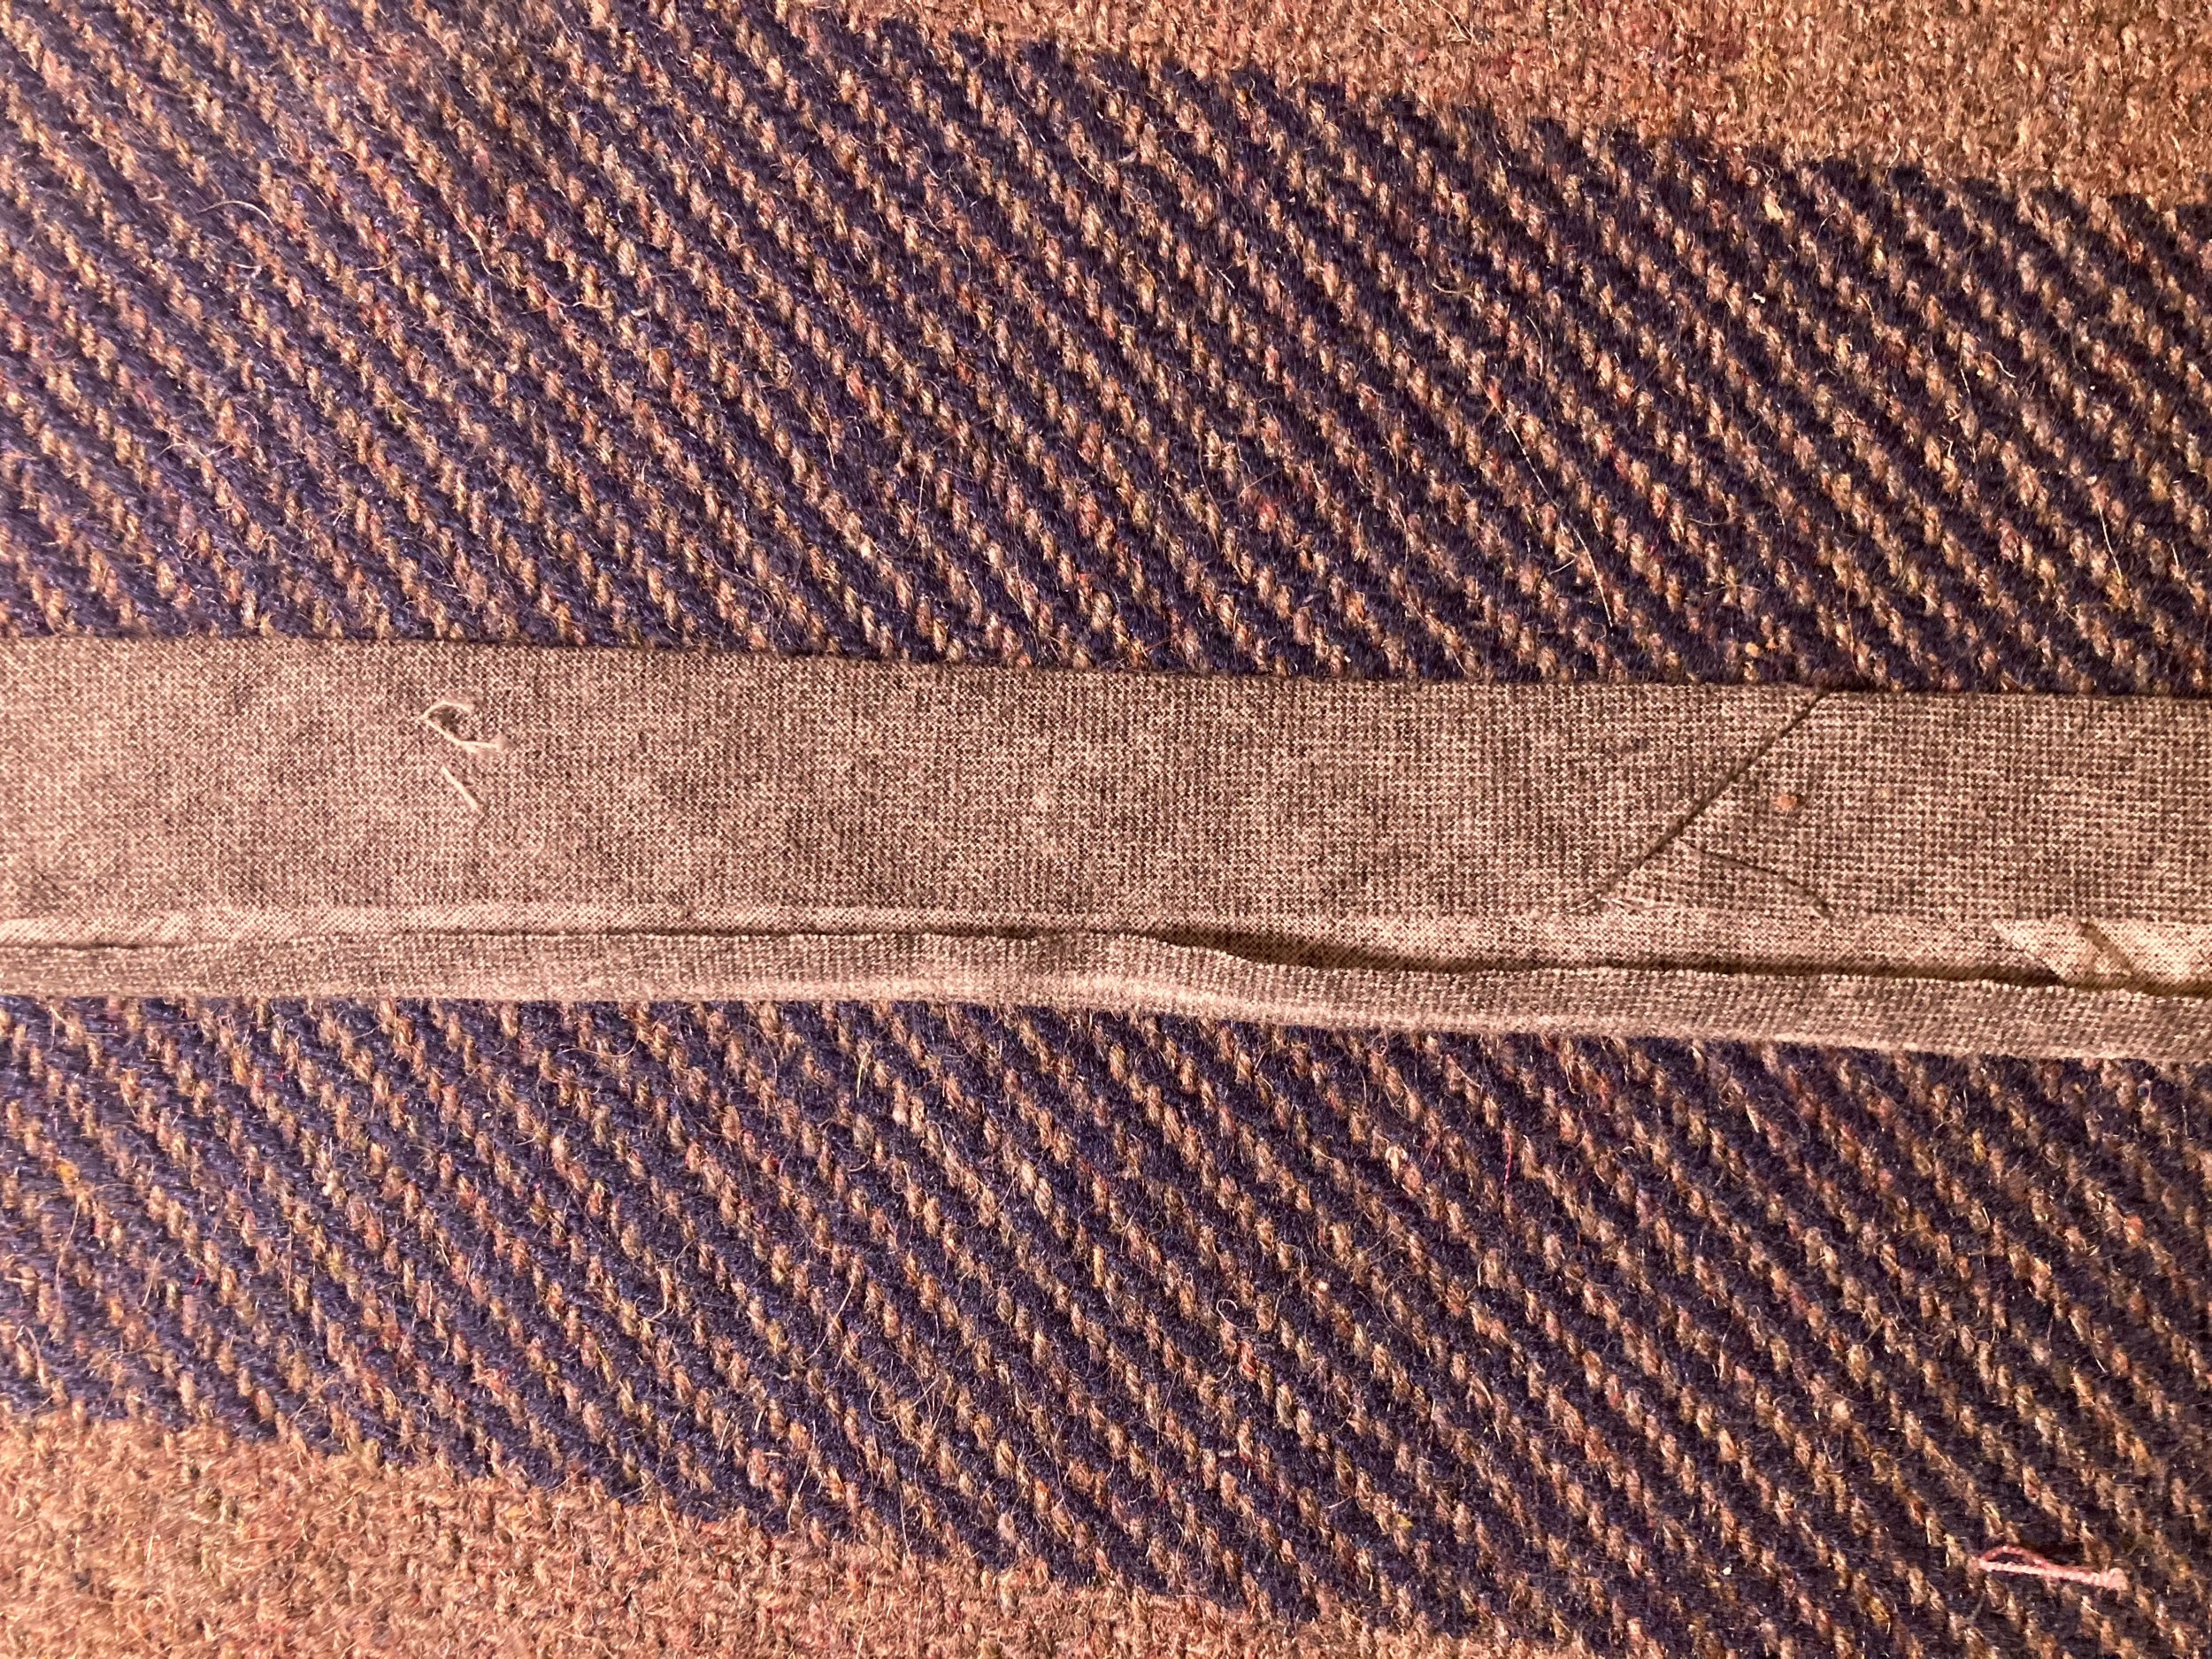
Waistband interior, stitch-in-the-ditch pass completed connecting hidden curtain to exterior.
Close up the waistband, topstitching from exterior for a clean line. I opted for stitching in the ditch, while the RTW pants used various tacks to the pocketing etc, not a full-length connection. If you opt for stitching in the ditch, stop securing well before you reach center back, as the extended seam allowance will need to be pressed back into the waistband. The below also shows this finished up, but as you can see, you need the full seam allowance space plus a bit not secured to the exterior to get this clean join. It still looks as if it's all been stitched thanks to the earlier topstitching to join the curtain to the facing.

Center back waistband seam interior, facing and curtain unit excess seam allowance pressed back and hidden away
Now you would do the zip and join up center back. You join center back with the waistband unit folded open at the facing/exterior join so that you can fold the seam excess back into the waistband (omg I'm so sorry I stopped taking process photos).
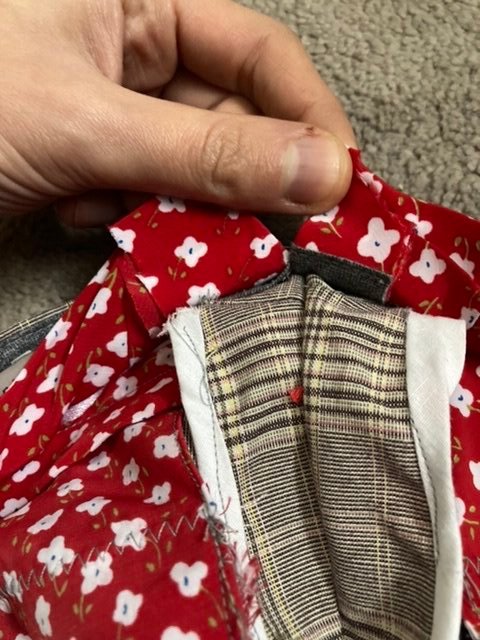
Another view of center back seam, showing how facing and curtain seam allowance are pressed back and under
To finish the left hand side, simply press back the excess of the waistband at the zip, and press under again. Ladder stitch top, side edge and bottom edge closed.
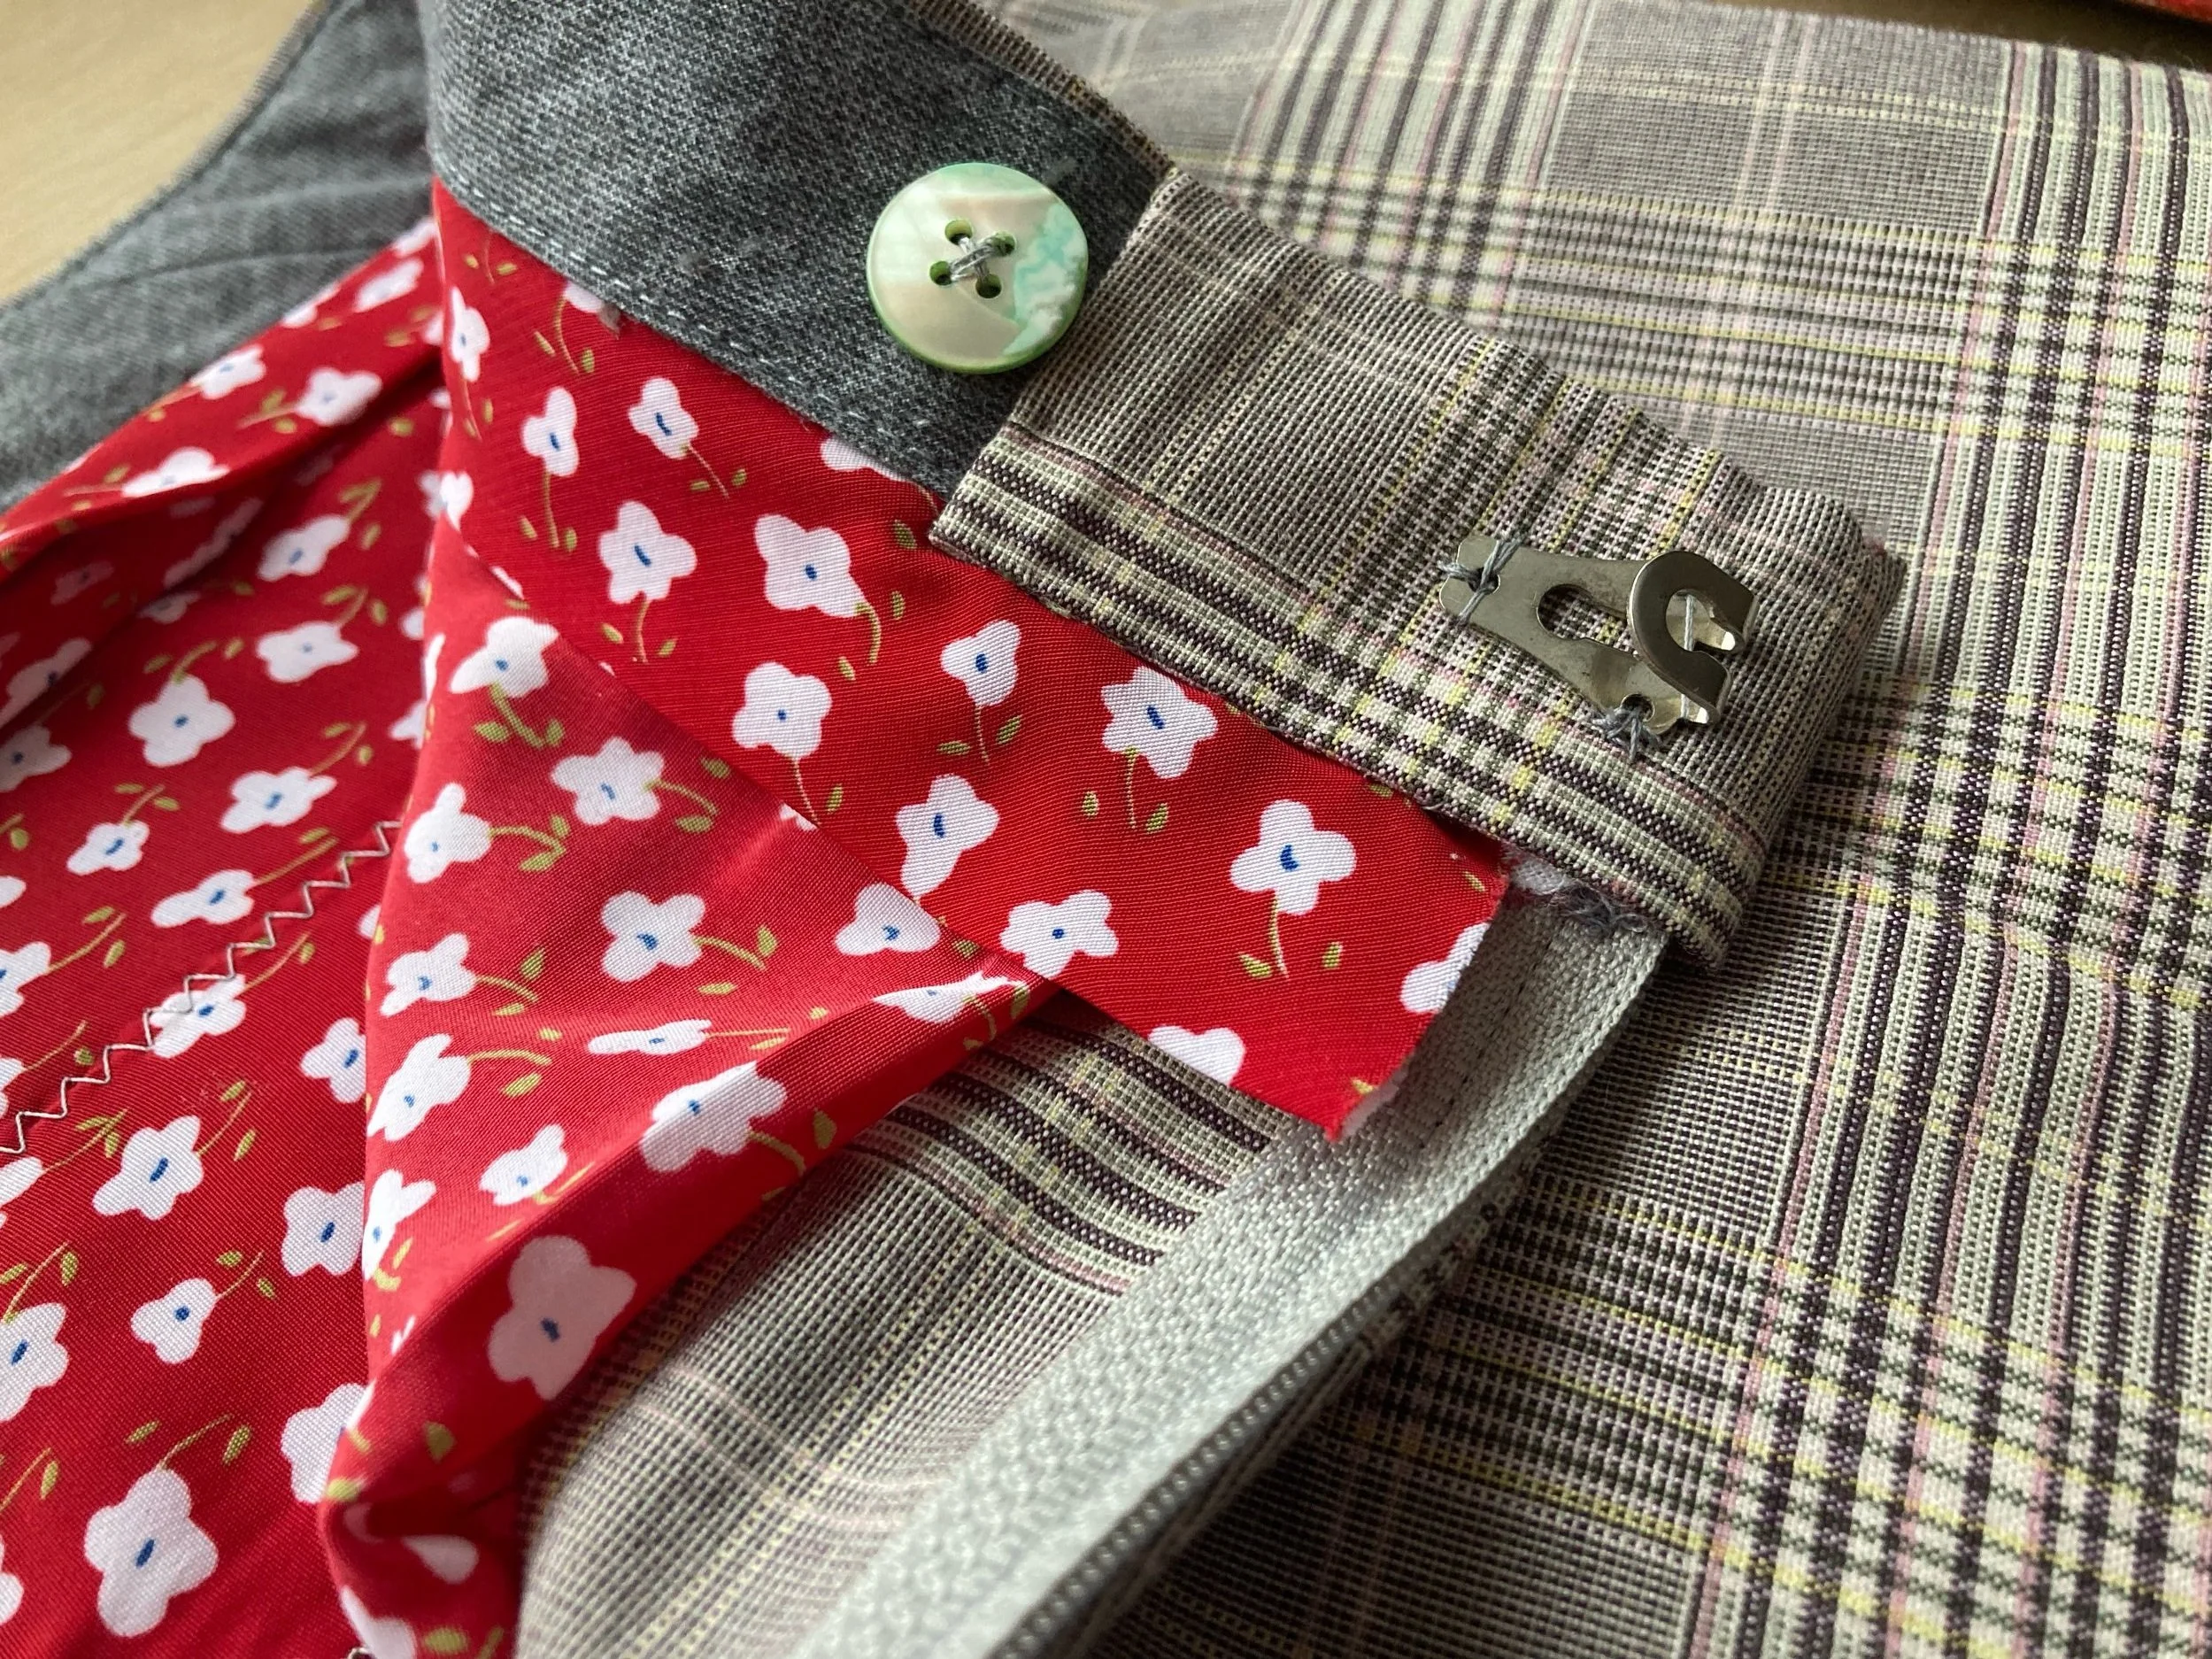
For the right hand side, enclose the curtain in the fly shield extension. The exterior waistband should extend the full length of the shield and be joined at the outer edge. The inner facing and curtain unit will be enclosed by the shield itself at CF.

Then you just have closures to add, and for security, bar tack the CB waistband seam.

Summing up
My goal here was in large part to explain this process to myself for next time, but as there will be a next time, and I know I’ve missed details, please let me know what’s unclear and I may do an update. I think I'll at the very least have to do a part two with pictures for the whole adding the waistband to the pants process. And one would hope, the zipper unit?? Thanks for sticking through this anyhow!