Fulford Jeans in teak 12 oz denim
Xmas gift number one! Or two, in order of finished. But the model/recipient lives with me so it was easier to get photos.
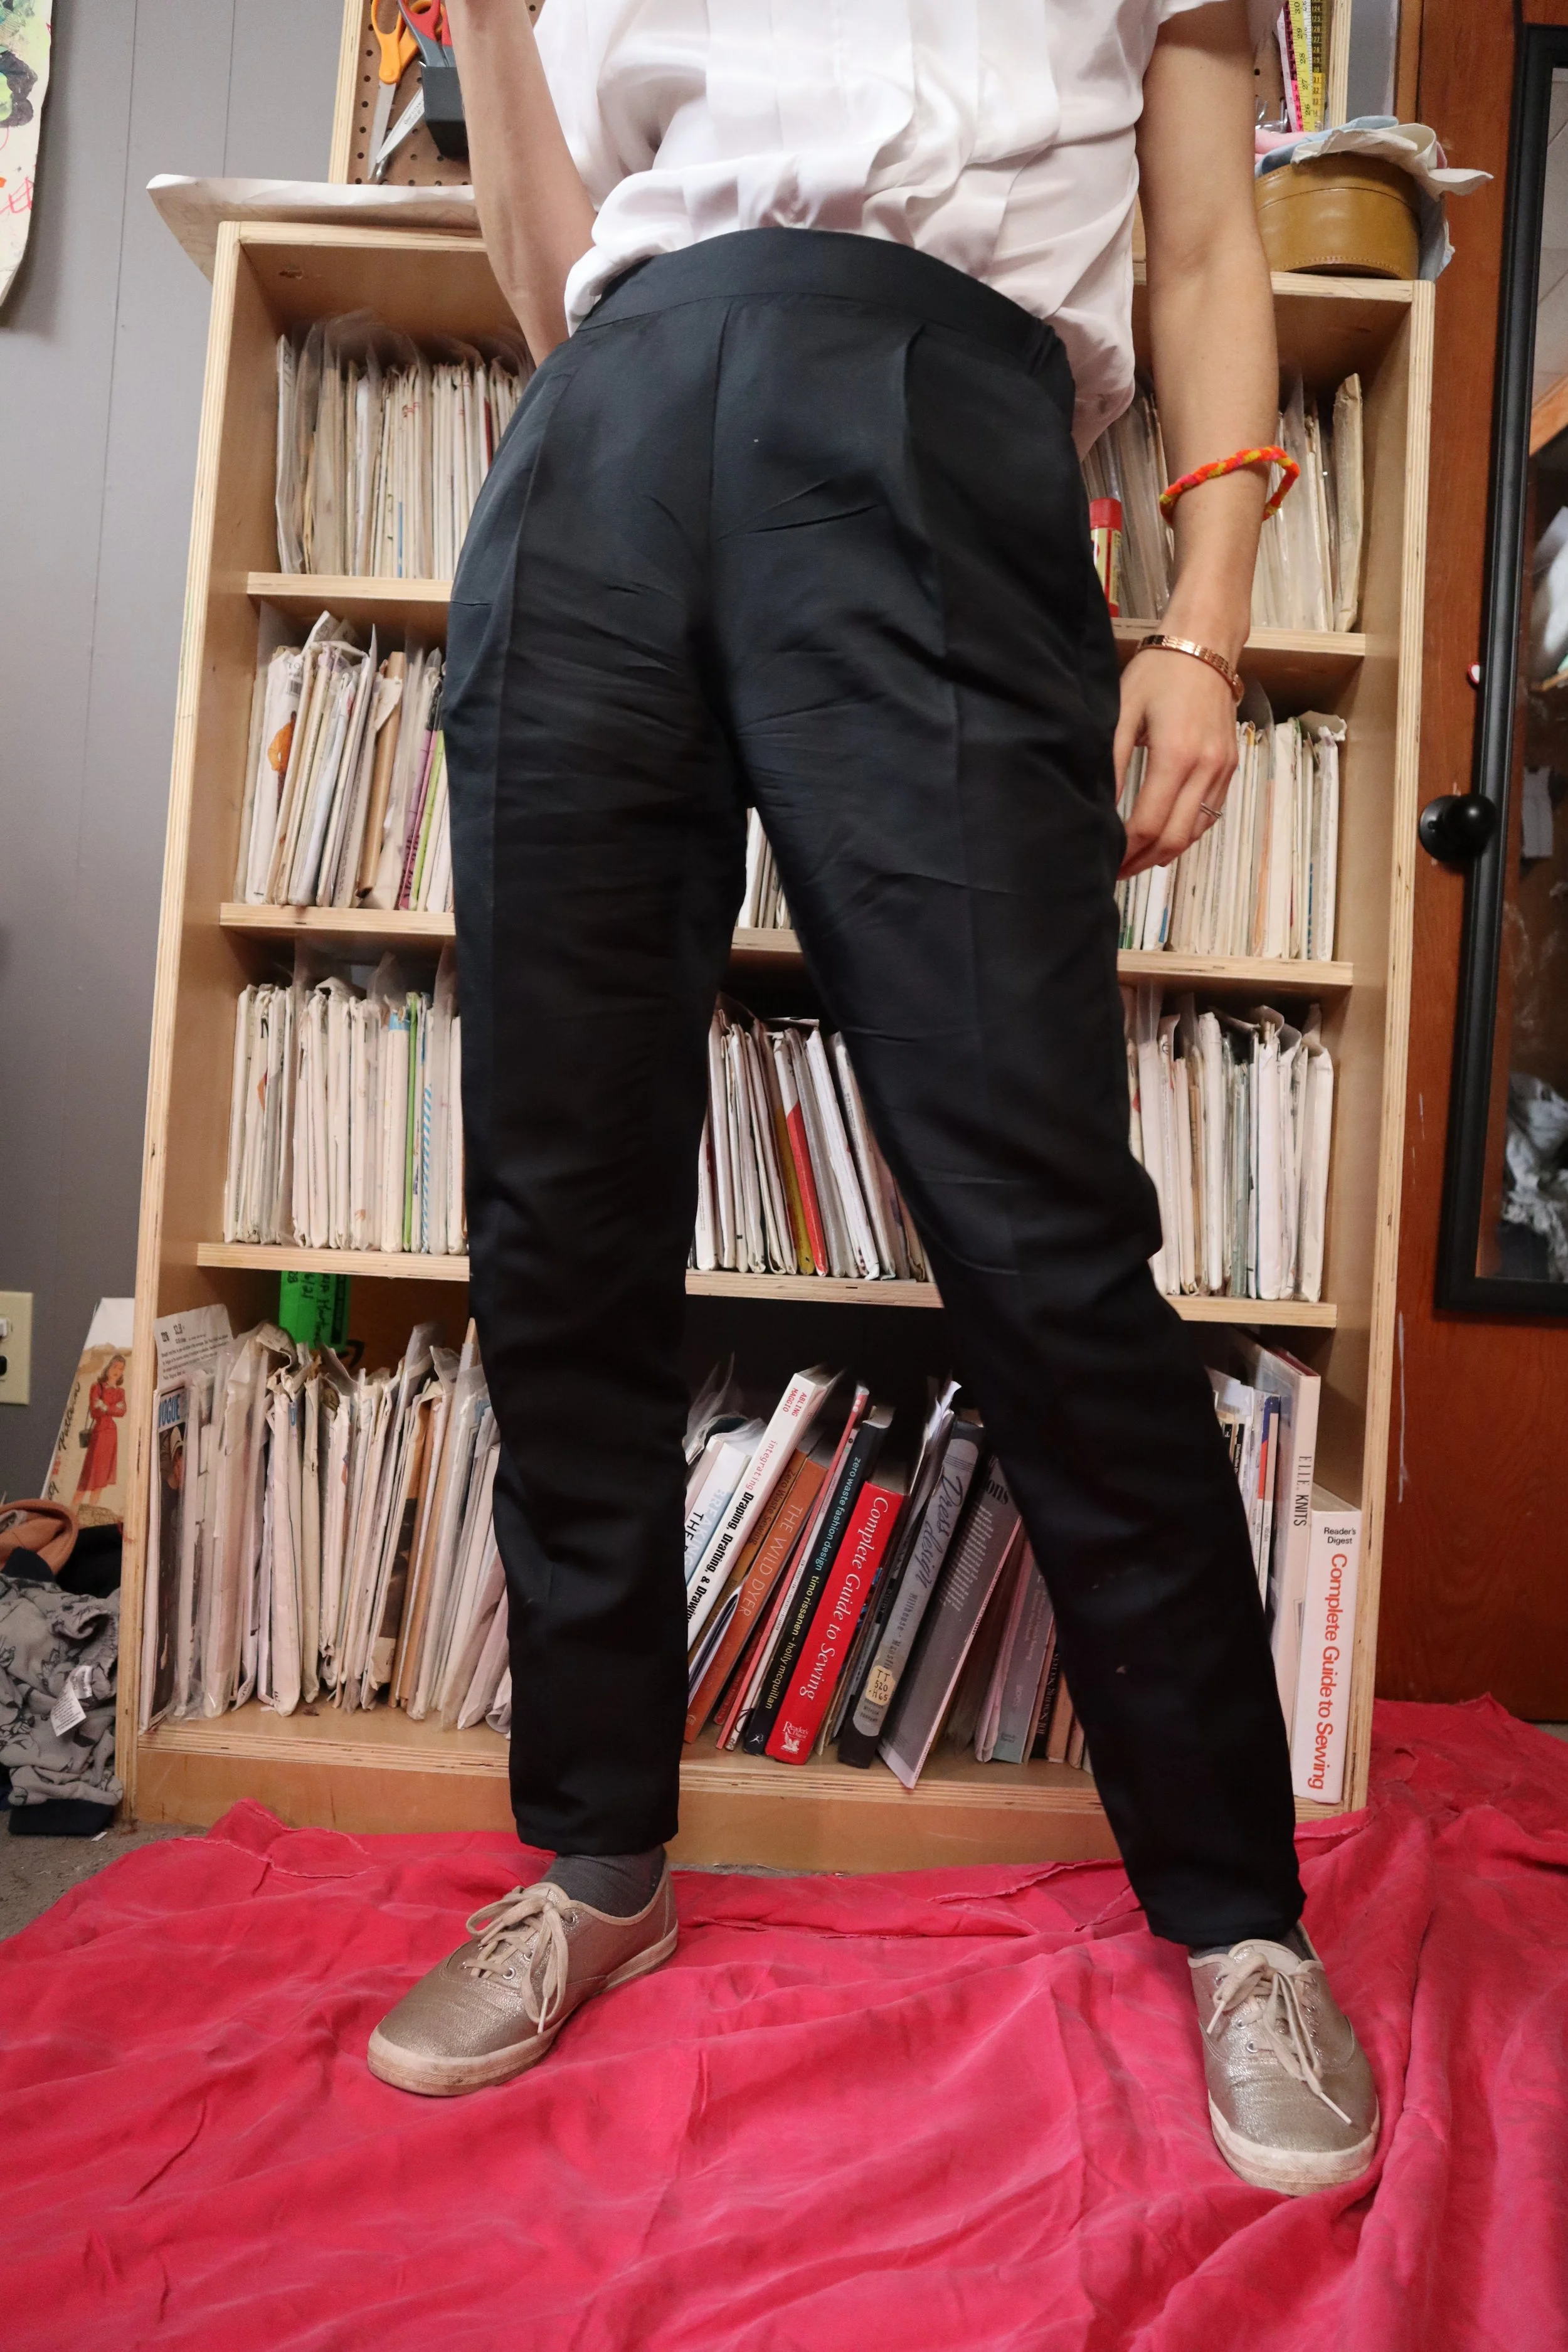
Bit of a dark full ‘fit image
I was super, super relieved at the fit of these. I compared Fulford to my husband’s preferred jeans around the house and was certain, even with the change from a stretch denim (the preferred Levi’s) to 12 oz non-stretch denim (the new pants!) that the Fulfords would be too big, following the chart. Most obviously, the 34” waist pattern gave a 38” waist so as to fit below the waist. I nevertheless cut the pattern out as recommended by the size chart, then made some guesses, rather than size down at the hop.
I of course cannot find my notes on what I did to the pattern to get to this result, which is doubly annoying because I was hoping to transfer the edits to the pattern in order to have it ready to go for next time. I do know I sewed the inseams with 1” seam allowances (3/8” more than called for in the pattern). I believe that I also took some from the back pieces at the side seam but cannot remember how much. Hopefully my sketch/notes will turn up and I’ll be able to make the pattern updates/share here.
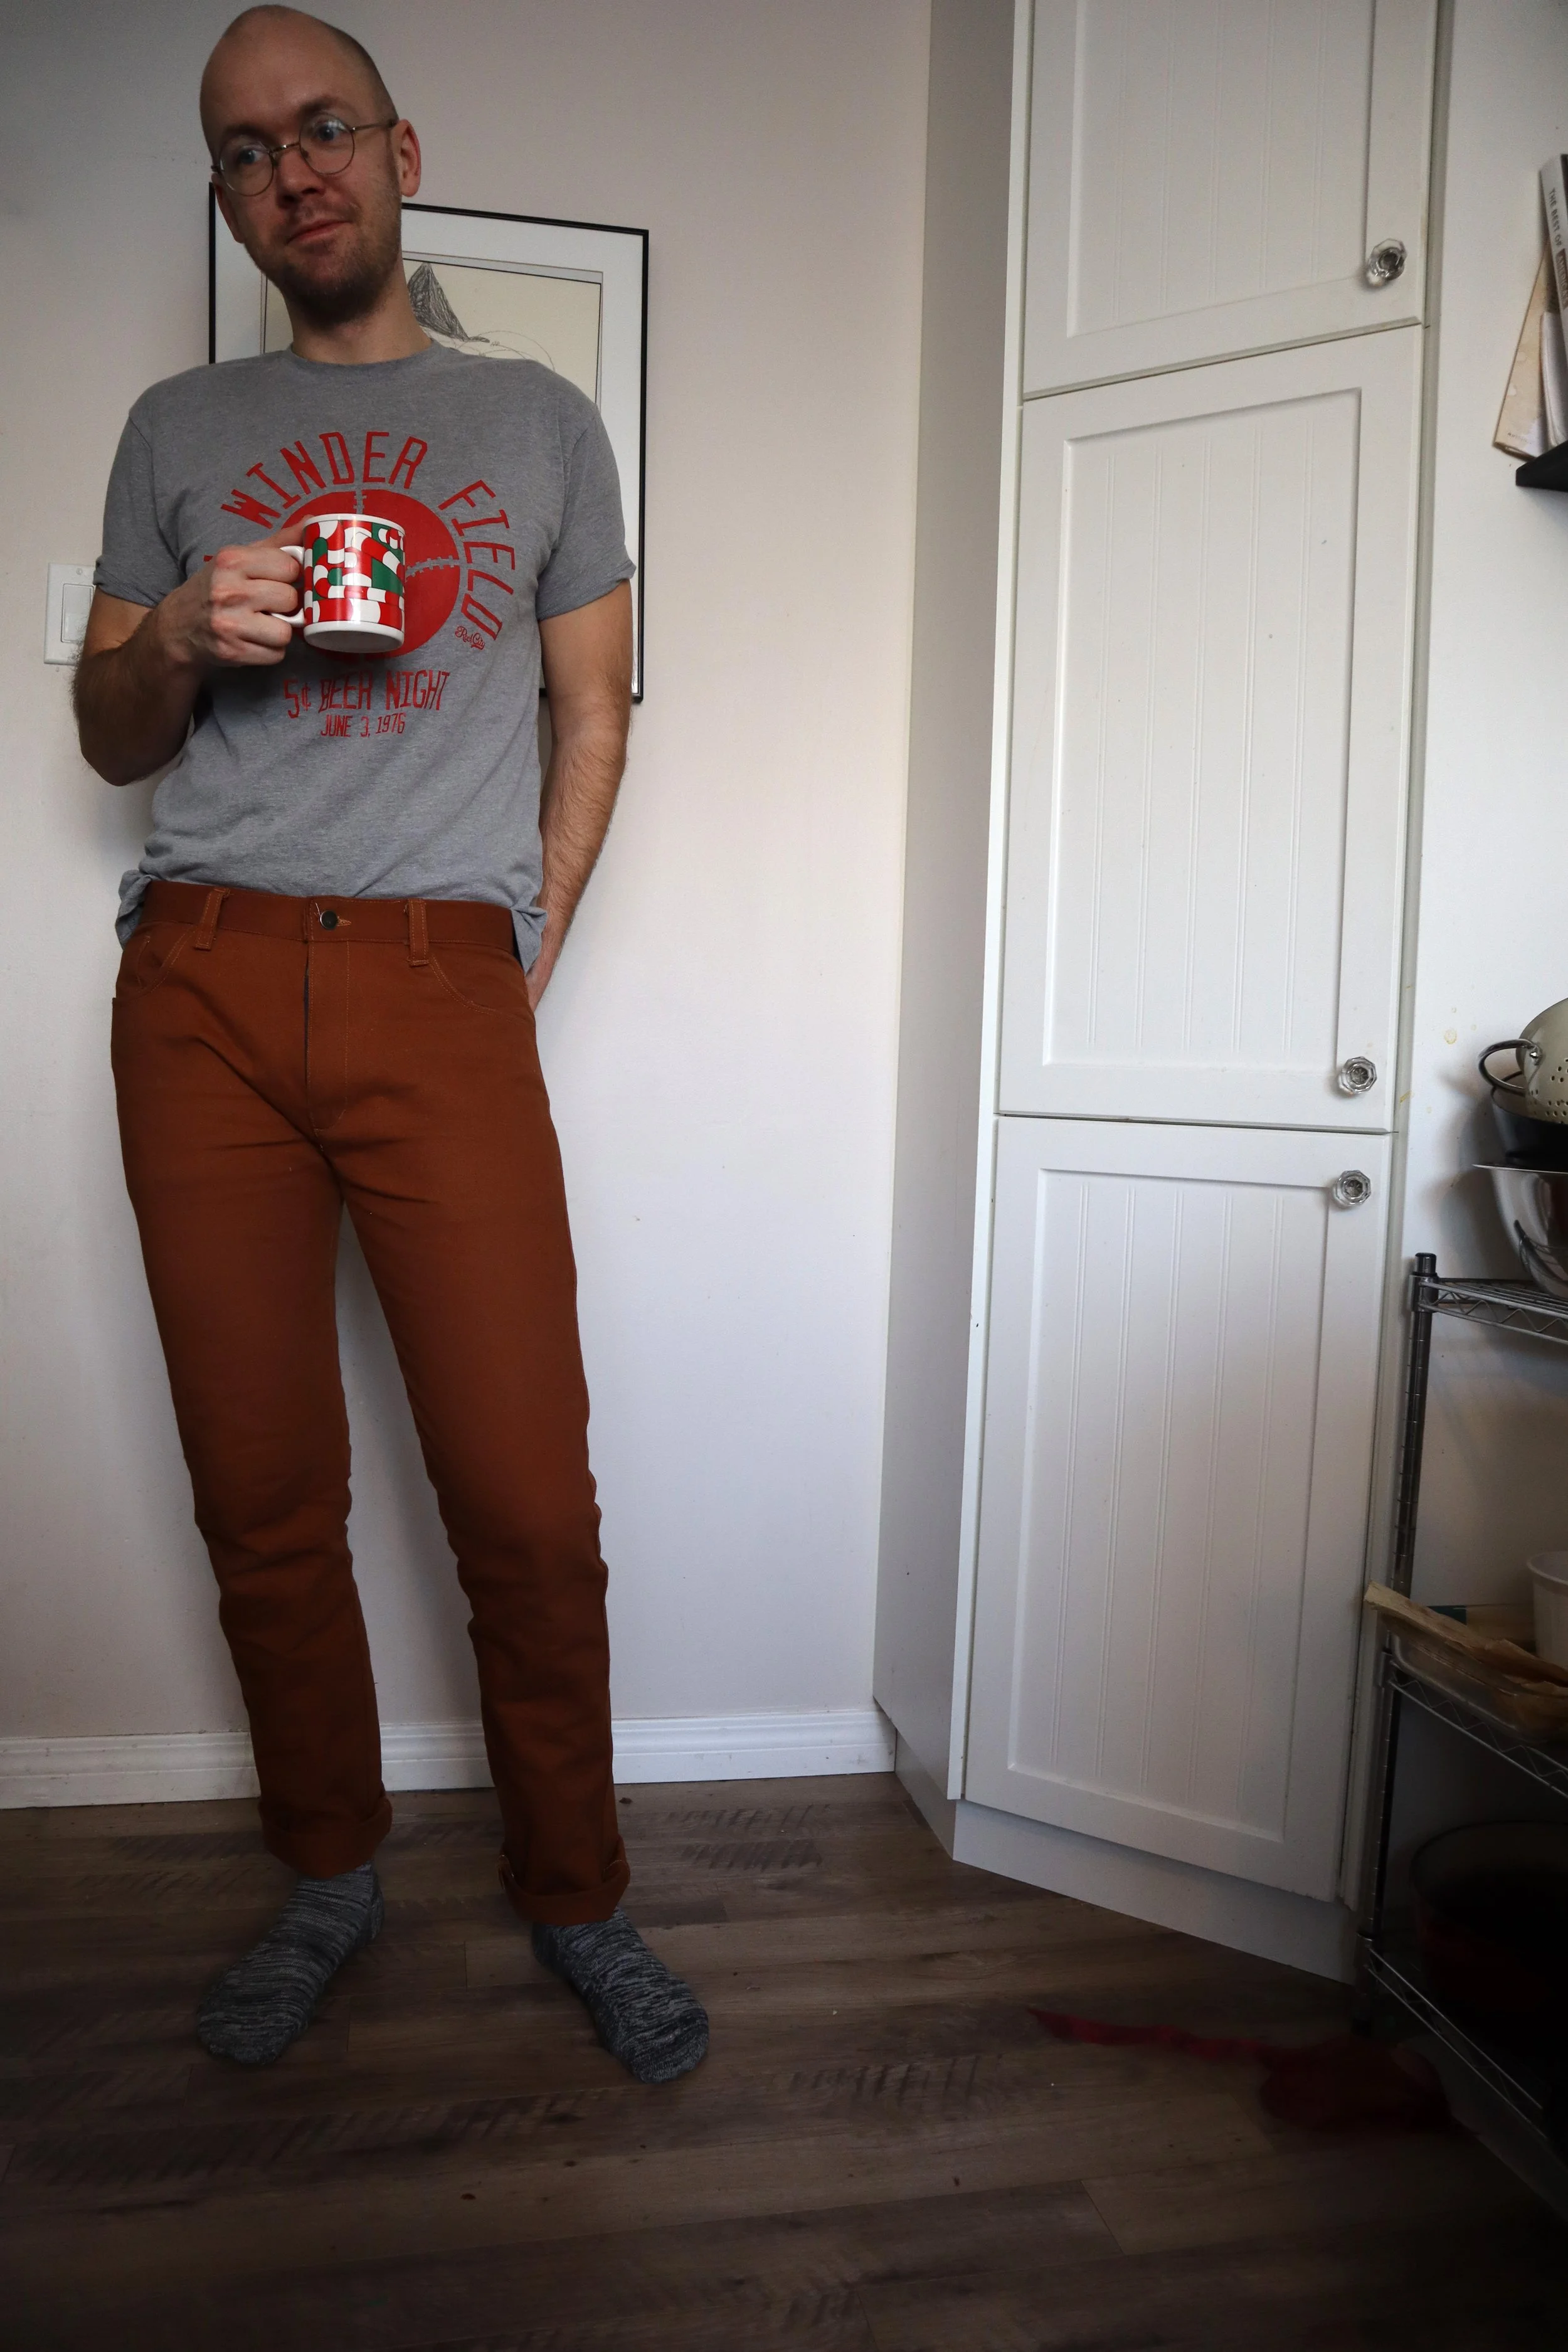
The combo of edits ended up working up PERFECTLY and I do believe we (will) have a basic jeans pattern for Matthew here. He’s certainly been wearing them a lot, which made getting photos pretty straightforward!
Jeans remain my favourite garment type to make, especially with these kinds of heavy denim. I love the structure, I love to press it, topstitching etc.
The topstitching here is probably the best I’ve done, because I used a stitch in the ditch foot to align both lines of stitching! It looks good! In terms of topstitching, it’s all pretty standard, but I fully double topstitched the exterior of the legs and didn’t topstitch the inner thigh. I know that the thigh area is higher stress and that’s why you do it, but I also wanted to seeeeee the topstitching for once. Kind of. It is matching topstitching thread, after all. Pocket patterns go together but the left one has a little freehand heart worked in.

barely visibly heart on pocket
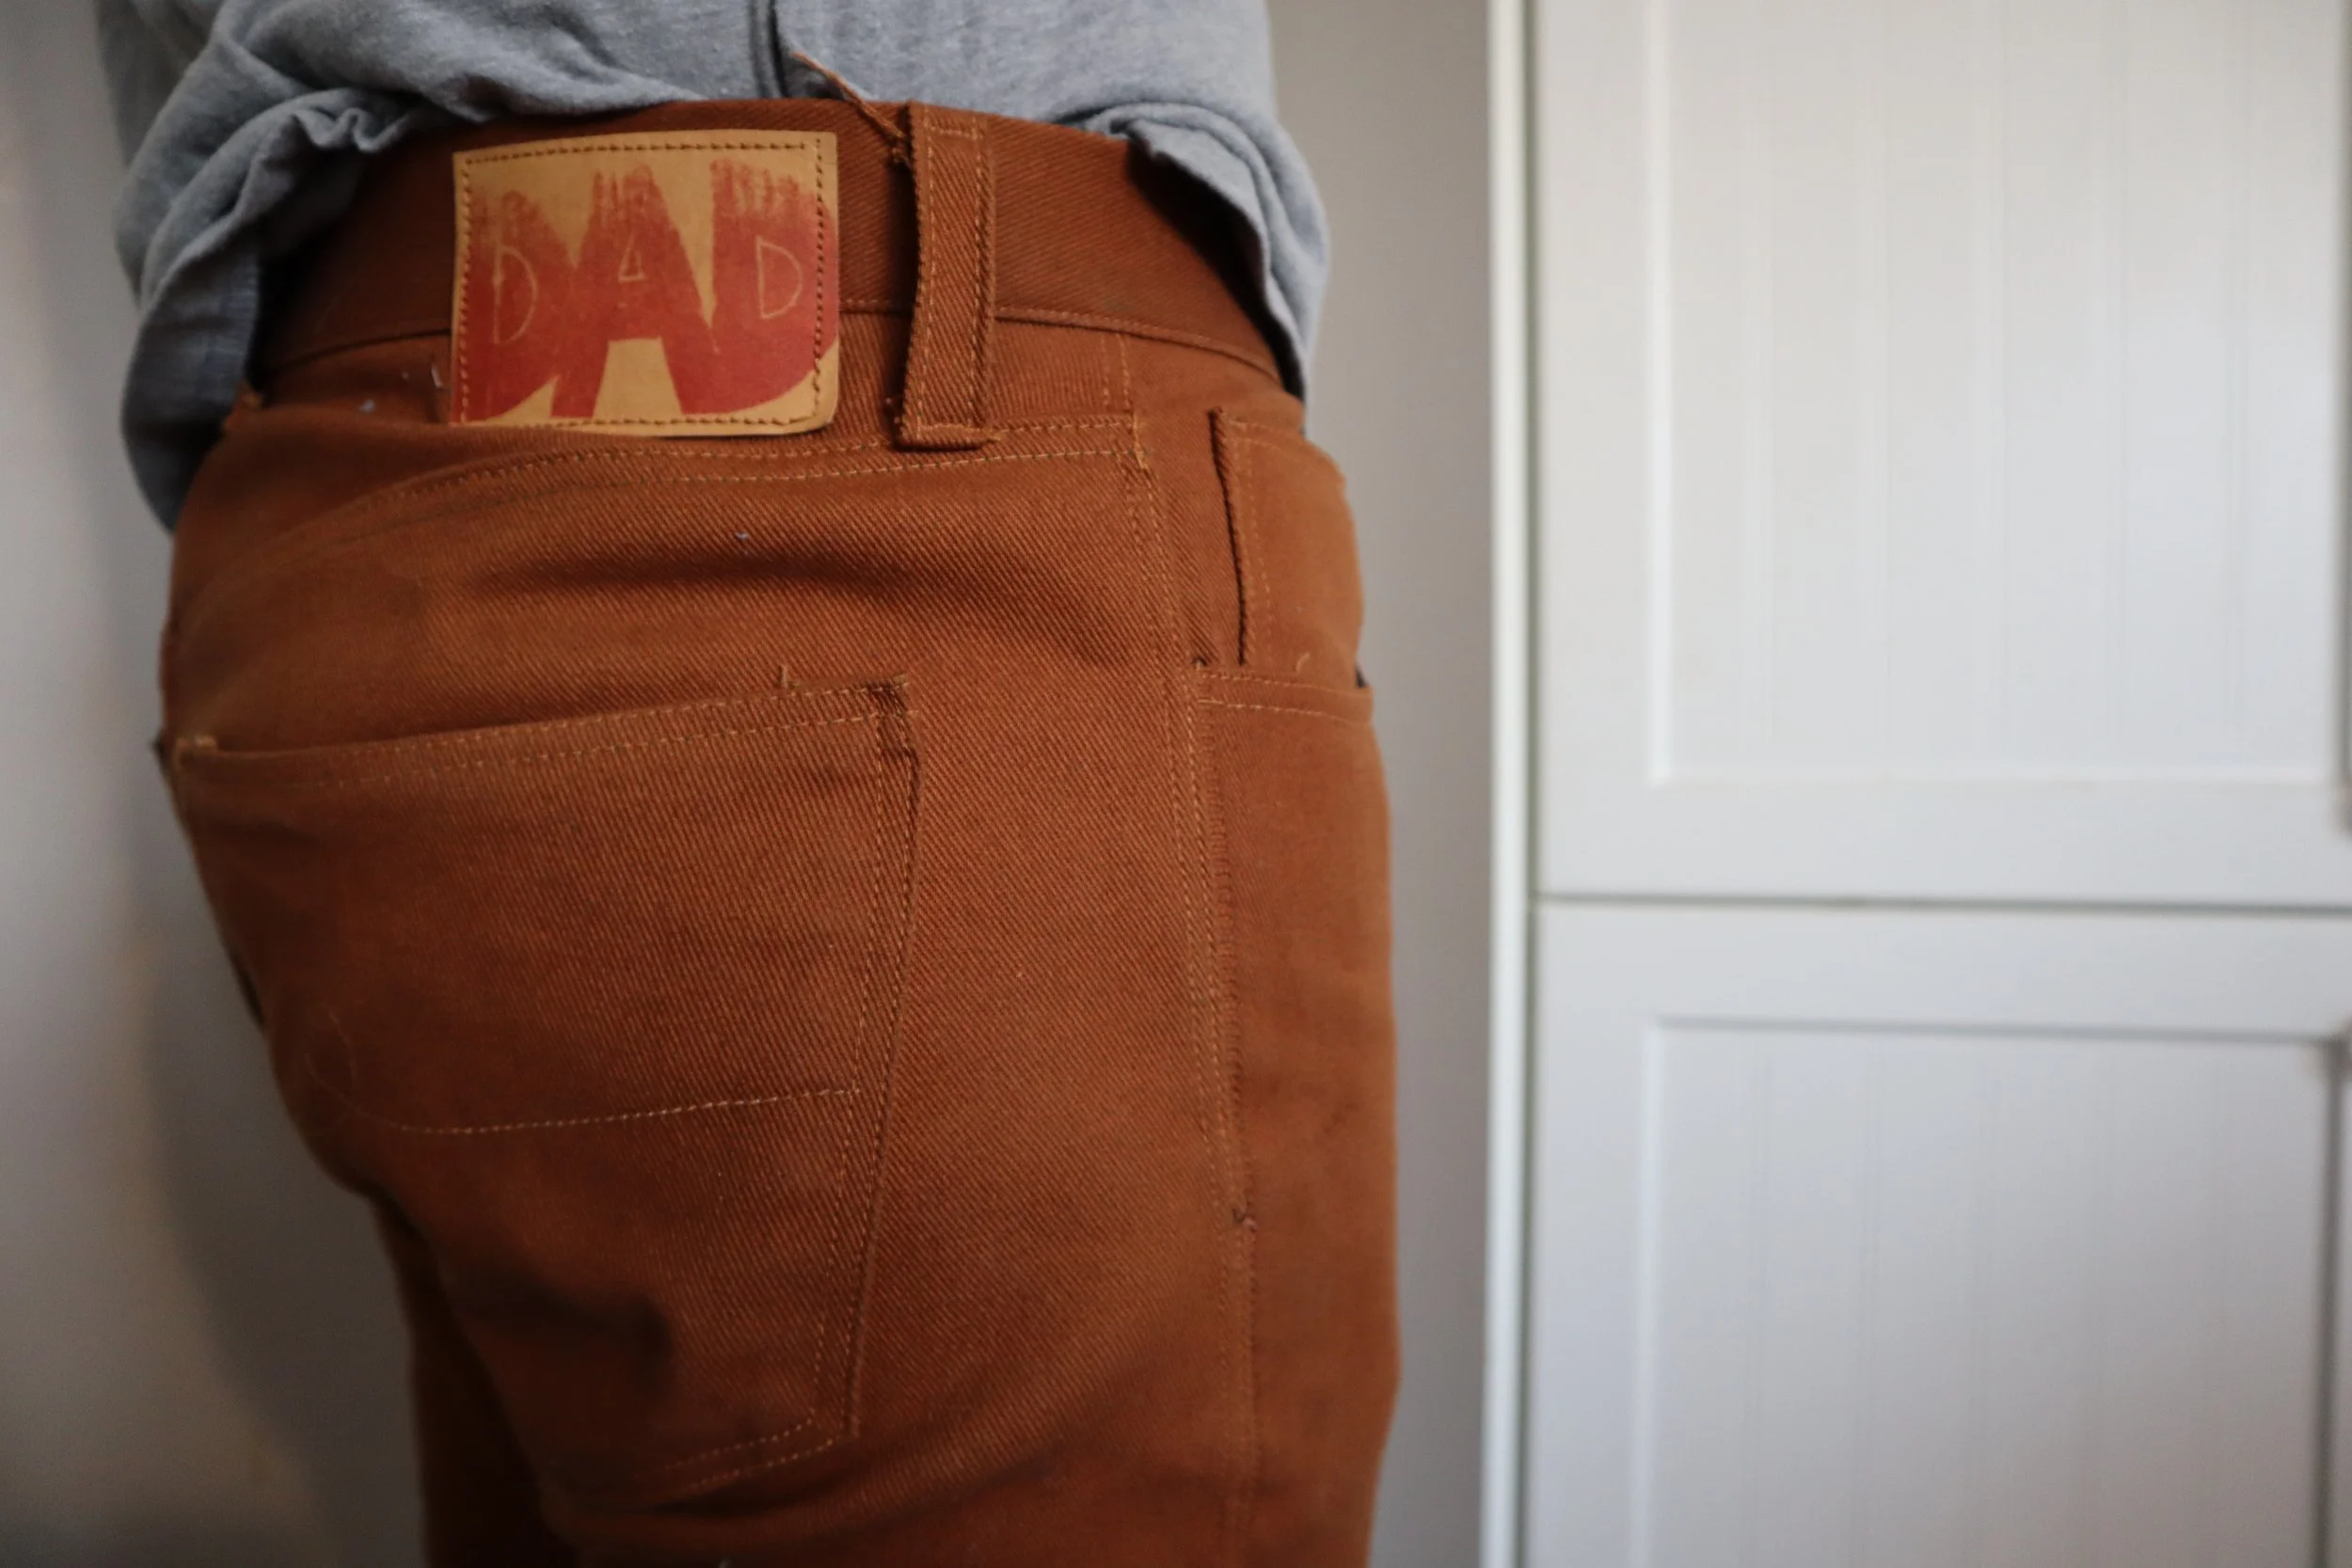
The cutest element of these has got to be the patch. I grabbed a couple Kraft-tex paper jeans tags last year when I ordered my beautiful Wray Parsons darning mushroom from Thread Theory, so had to use one here. I used a washfast/fabric fast archival ink giant stamp pad in Vermillion that I have (only some of their colours are fabric fast, and tho this isn’t fabric, I thought that going that way was my best chance for washfastness) and a stamp the kids and I made from craft foam when we handprinted shirts for Matthew’s birthday. It says DAD, and I say it’s adorable.

Complaints zone
I do, however, have some dissatisfaction with the pattern. First is the sizing, as if I hadn’t slimmed these down, the waist would be just way, way too big for the size stated. Second, and to me much more damning, is the fly instructions. I didn’t love that the instructions called for the trickiest part of jeans construction, the fly, to be completed after the legs had been fully assembled. Now I know in my last post I said I would be modifying my trouser construction such that the waistband would already be attached, but that also results in you being able to attach the fly in the flat.
I also didn’t love that there was a non-functional split waistband included - why make it split if there isn’t going to be extra seam allowance there? Why make it split at all in a jean? Glad I noticed this at the cutting phase so as to replace with a single piece waistband.
Finally, and for me the most irritating/infuriating, was that the pattern asks you to cut AND interface two fly extensions. Then discard one. I get it, the zero-waste dream isn’t every designer’s direction. But building in extra waste for both fabric and interfacing into your instructions? Yuck. Ew. No.
Once I got to the “discard” instruction I had a tough time taking the instructions seriously any more, and just kind of did the fly on my own. Which led to my not offsetting the fly properly, which is annoying to see. I’m sure the instructions had some offsetting planned in but i was irritated and didn’t trust them any more. Next pair I will grow on the fly extensions and go back to the tried and true Closet Core method, which I’ve never had any complaints about.

Front of the jeans
Final notes
The only other major frustrating thing that came up was that I made sure I had all the notions available for the jeans well before starting, but made the Bombazine Oven Mitts and my brother’s xmas trousers in the intervening time before starting the jeans and misplaced them. So there is a distinct lack of rivets on these, and I cannibalized a zip from a pair of jeans in the “use as patches” pile, tho it was shorter than I had intended to use. This also ate up an enormous amount of time but w/e, we met that Xmas deadline.
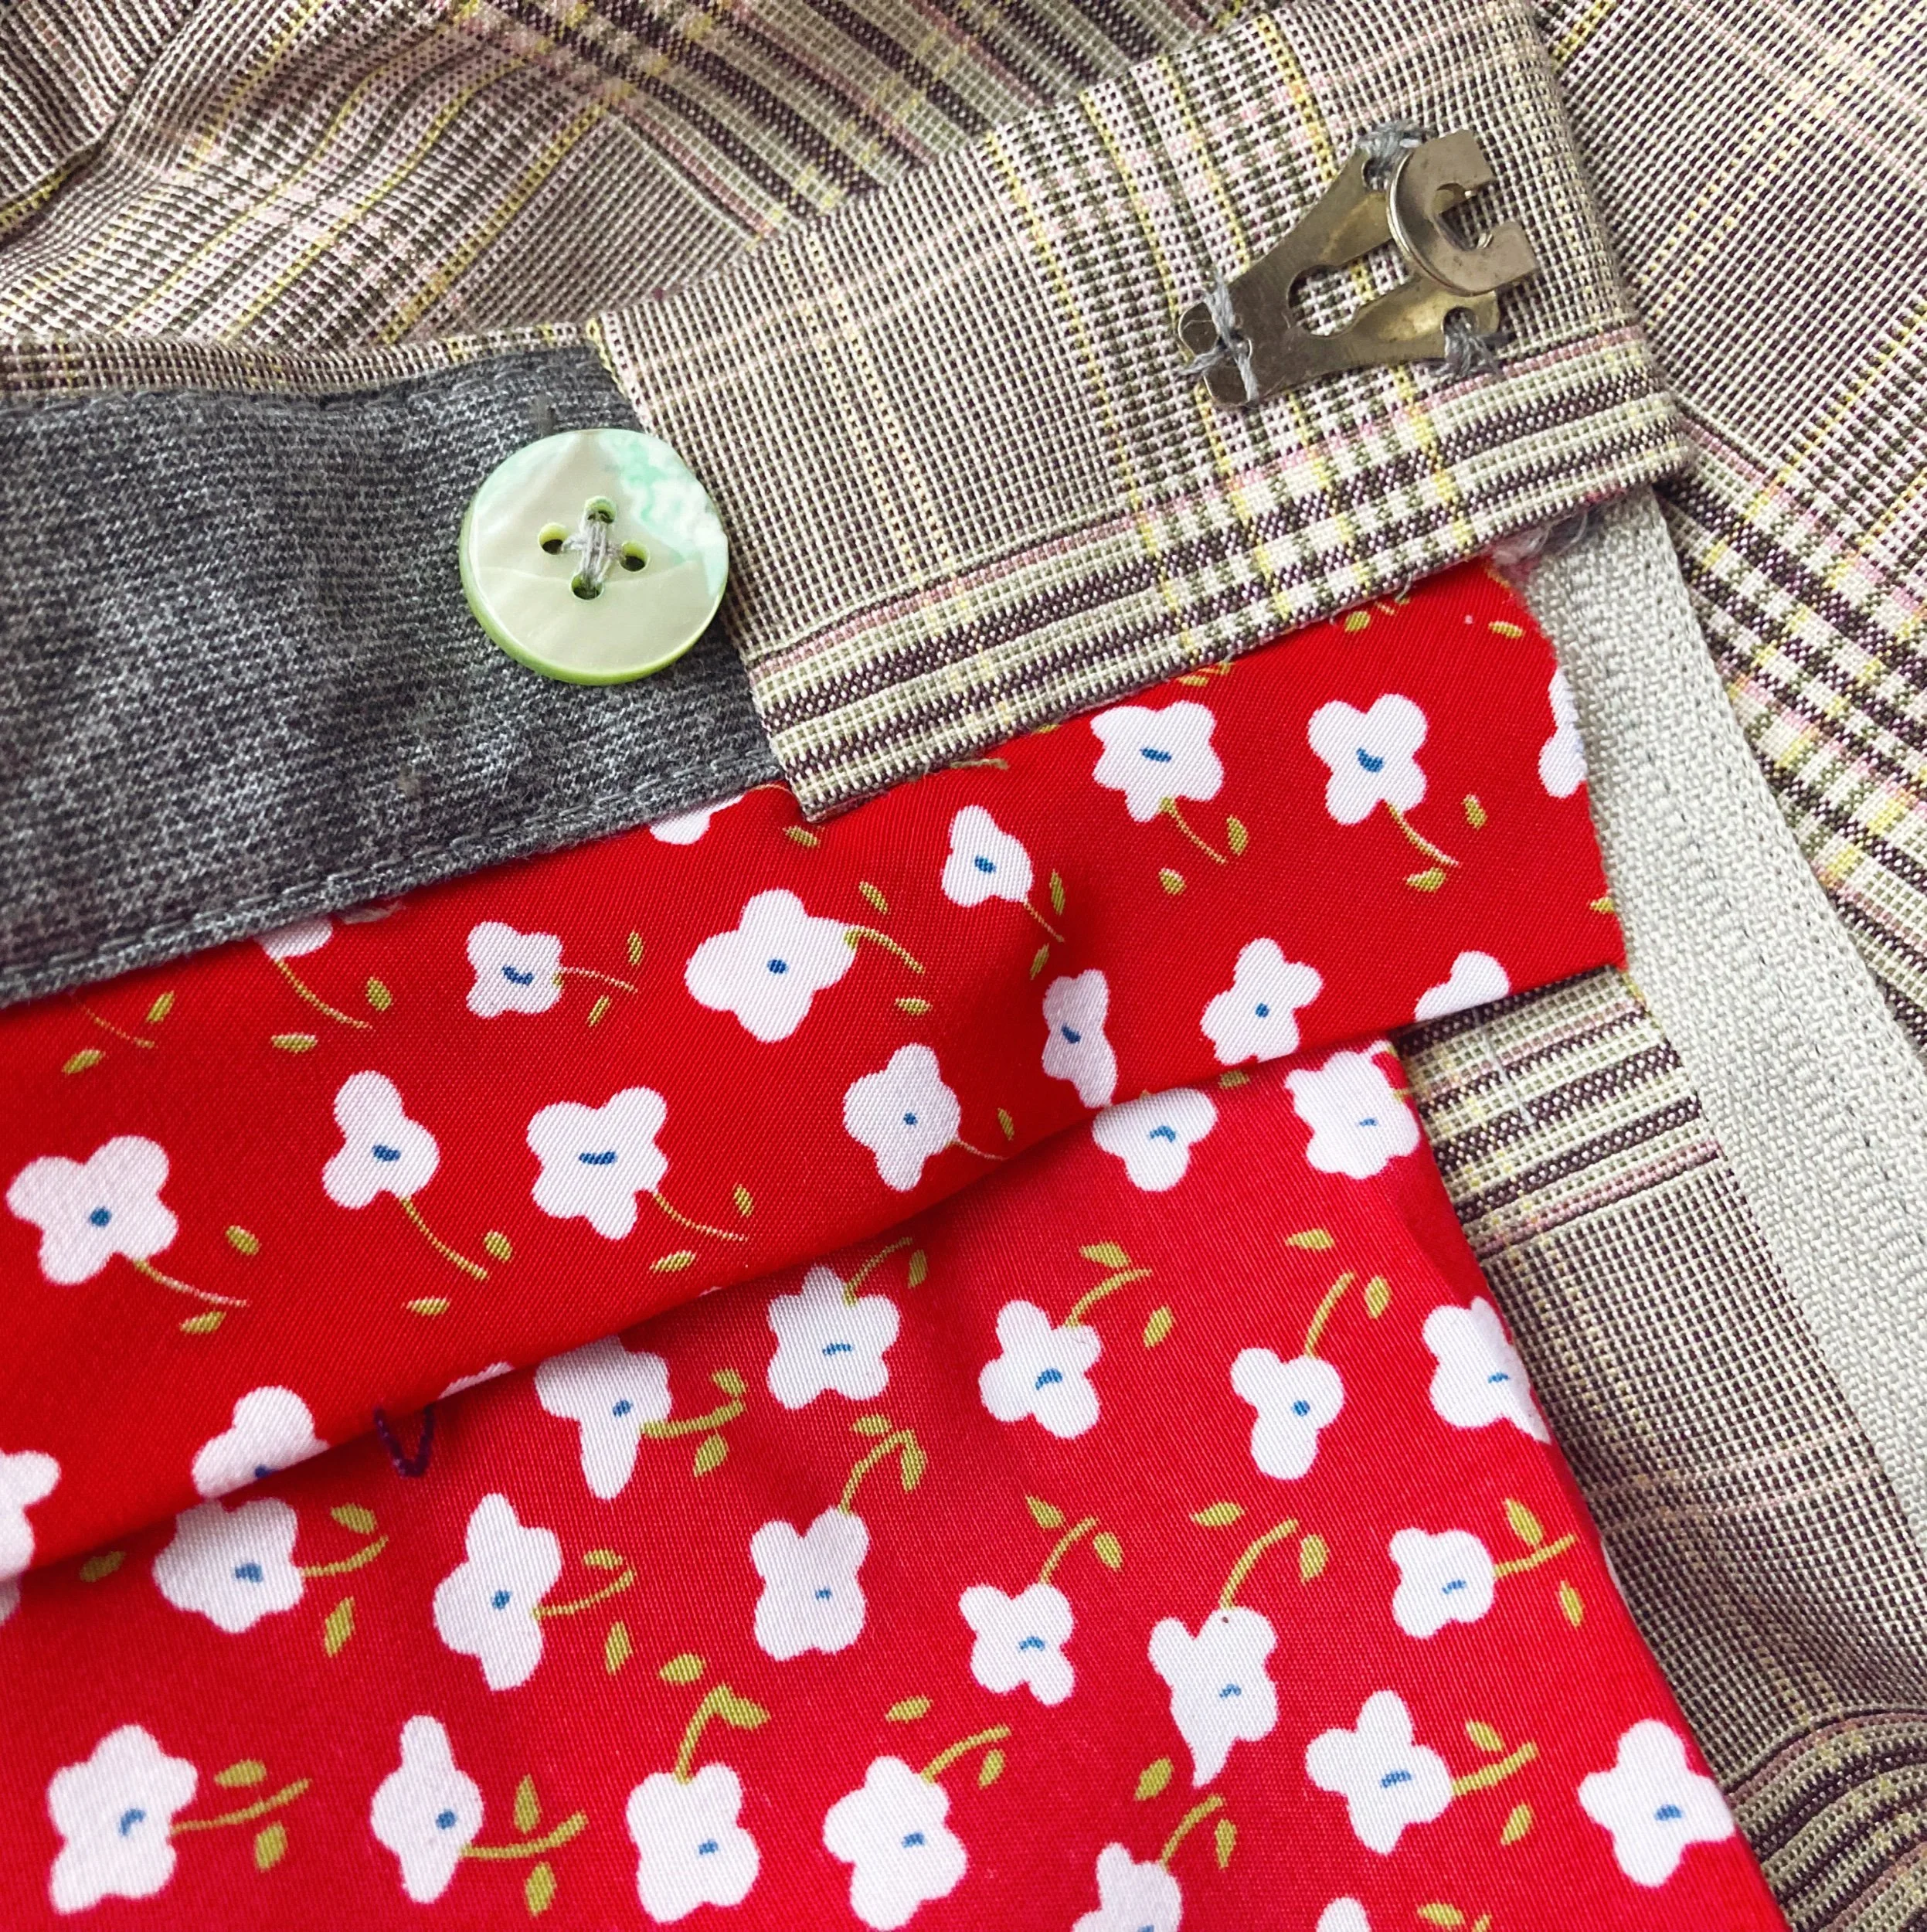
The waistband is ban-rolled, as is now my default. Love that crisp structure.
Pocket bags are probably too weak, but I wanted to use up this pretty print so I did. (It’s probably polyester).

The 12 oz denim did give my baby Kenmore a bit of trouble, though only when bar tacking the belt loops. Could deffo be worse and I ultimately got through sans hammering but with much manual handwheel turning.
Ooh and I broke out the buttonholer for the front and it does a keywhole which is a treat! I wasn’t able to adjust the stitch length as one of the adjustment screws is quite stuck, but I’ll continue to pick away at it with alcohol and heat and hope that someday I’ll get that bit fixed up.
I gifted these un-hemmed, as I typically do for pants just to be sure, and they remain so as Matthew has just been wearing them cuffed. Presumably they’ll be hemmed sometime in the next year? In either case, a great success! And after a few days of wear, he has even successfully worn wool long johns underneath. The necessary dream.

Pattern: Fulford Jeans by Thread Theory
Fabric: 12 oz organic cotton denim in teak from blackbird
Notions: zip cannibalized from old Levi’s, jeans button from Closet Core kit, topstitching thread and polyester thread local/stash, ban-rol
Measurements: Waist 34
Size made: 34 but sized down - 1/2 removed from inseam on each piece, more from the back side seam.
Next time: Go Closet Core for the fly technique (grow on the fly extensions!). Hoping to make khakis with this pattern for a dress pants that fit like jeans. If I don’t find my notes and transfer pattern edits to the pattern pieces, check against current jeans for needs.